How to manage employee and service availability schedules?
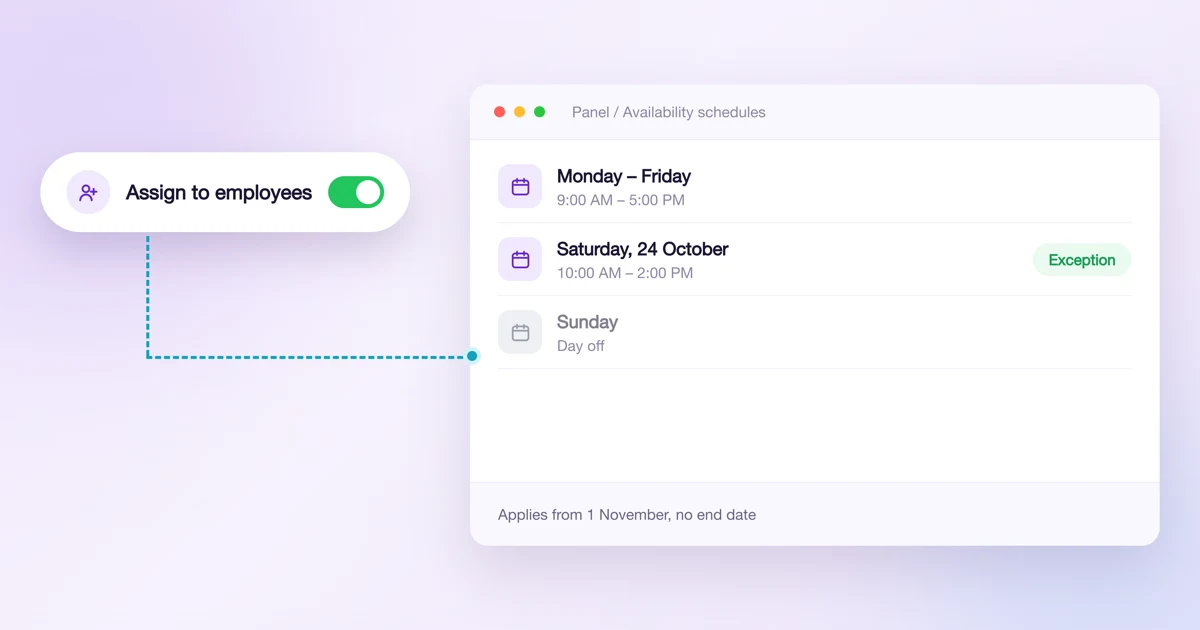
Availability schedules decide which times your customers can book. You assign a schedule either to employees or to services. If a service has no schedule of its own, its available times come from the schedules of the employees who provide it.
Where do I find availability schedules?
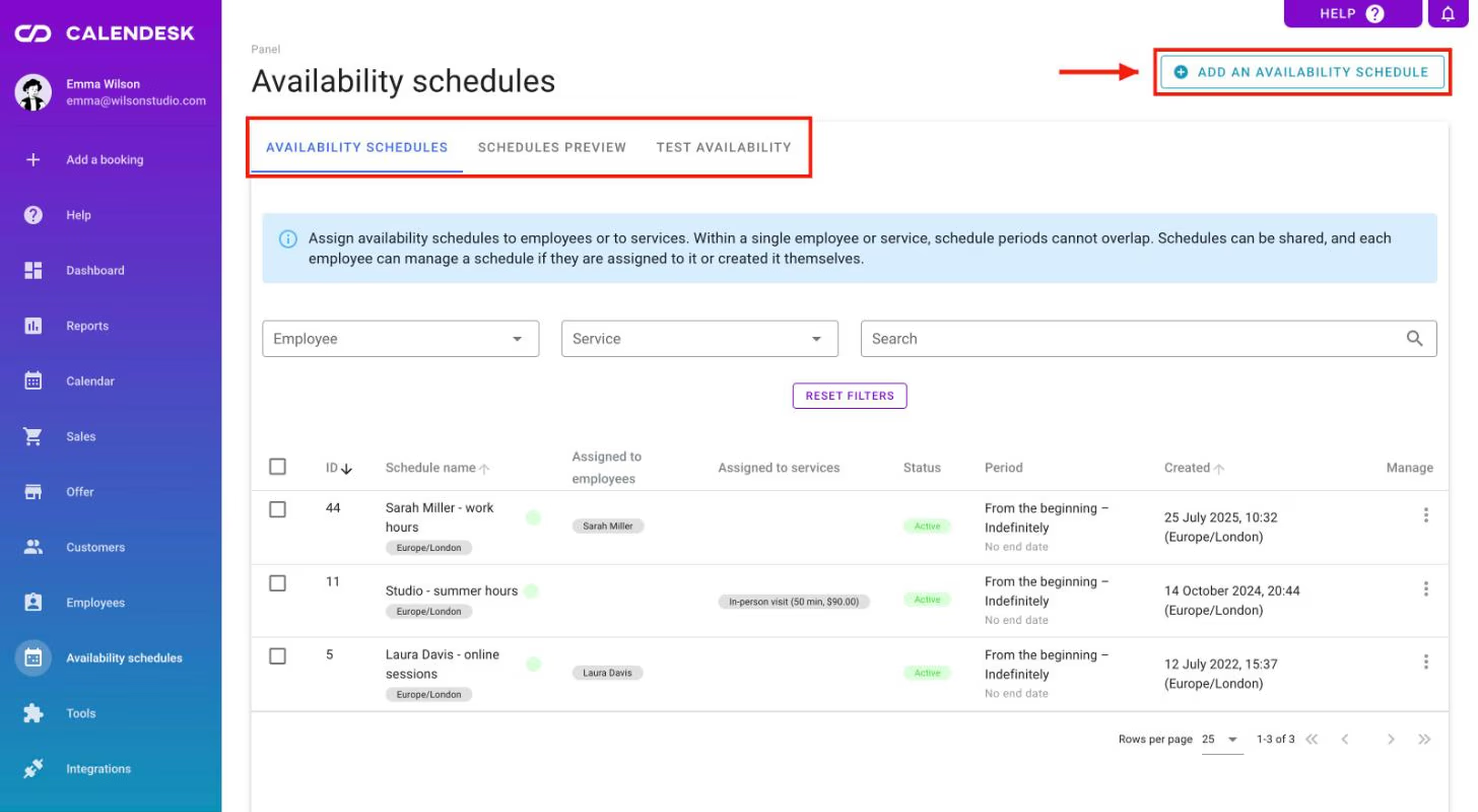
All schedules live in the Availability schedules tab, which has three cards:
- Availability schedules: the list of schedules with their employees or services, status and validity period,
- Schedules preview: which schedule applies on a given day and what hours it produces,
- Test availability: free slots the way your customers see them.
You can also pick a schedule in the employee form, in the Services and availability schedule section, and in the service settings, under The service availability for customers: Employee schedule or Service schedule.
Creating a new availability schedule
Click Add an availability schedule. A window opens where you set up the schedule step by step.
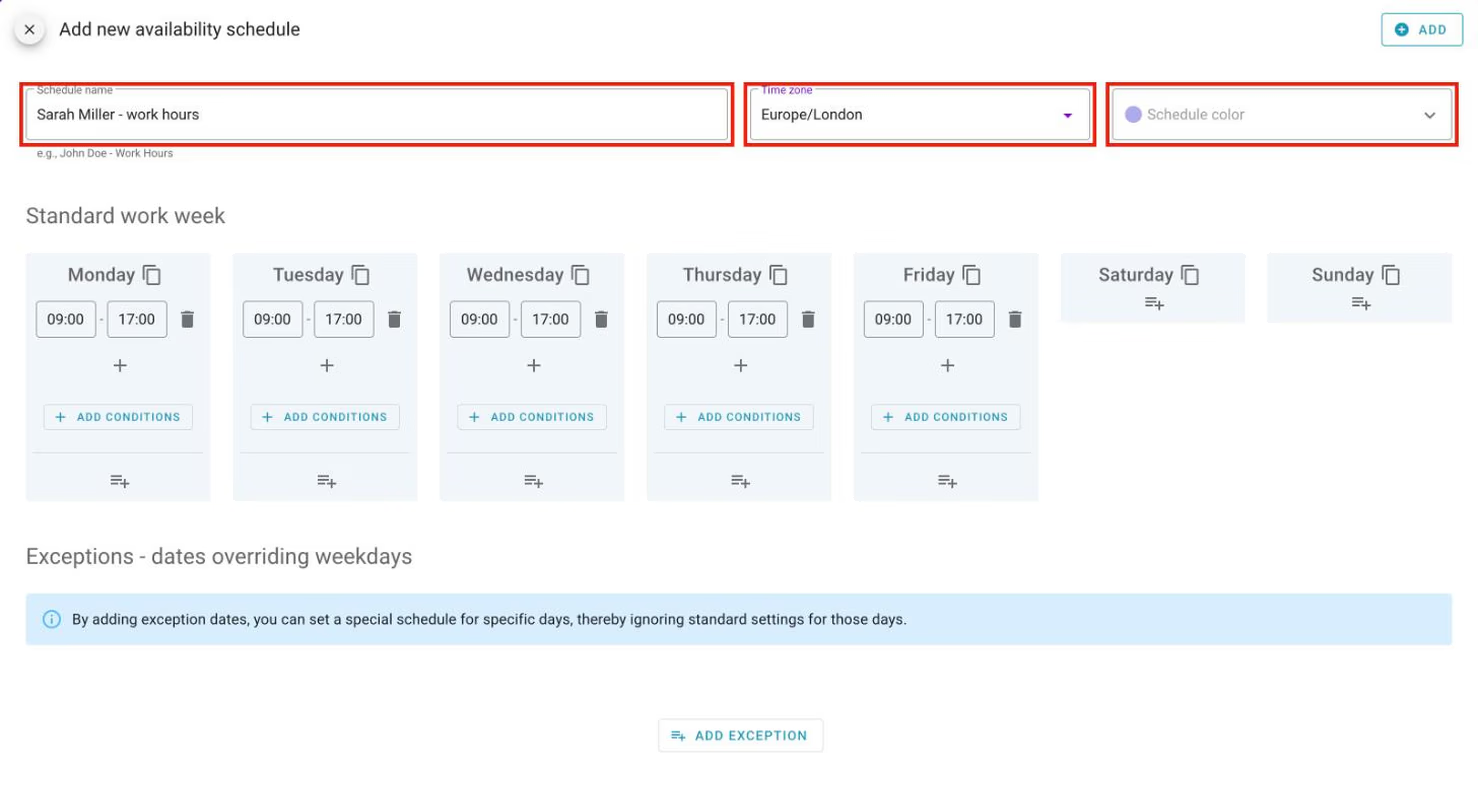
Schedule name
The name helps you recognise the schedule on the list. Say who and which period it covers, for example "Sarah Miller - Work Hours" or "Studio - summer hours".
Time zone
The hours in a schedule are counted in the time zone you choose. If an employee works remotely from Dubai, set Asia/Dubai: 8:00 in the schedule is then 8:00 in Dubai. On the booking page, customers see times converted to the time zone selected in the calendar, so in London in winter the same slot shows as 4:00. When the schedule's time zone differs from yours, the window shows you an example of the conversion.
Schedule color
The color marks the schedule on the list and in the preview, so the schedules of different people are easy to tell apart.
Standard work week
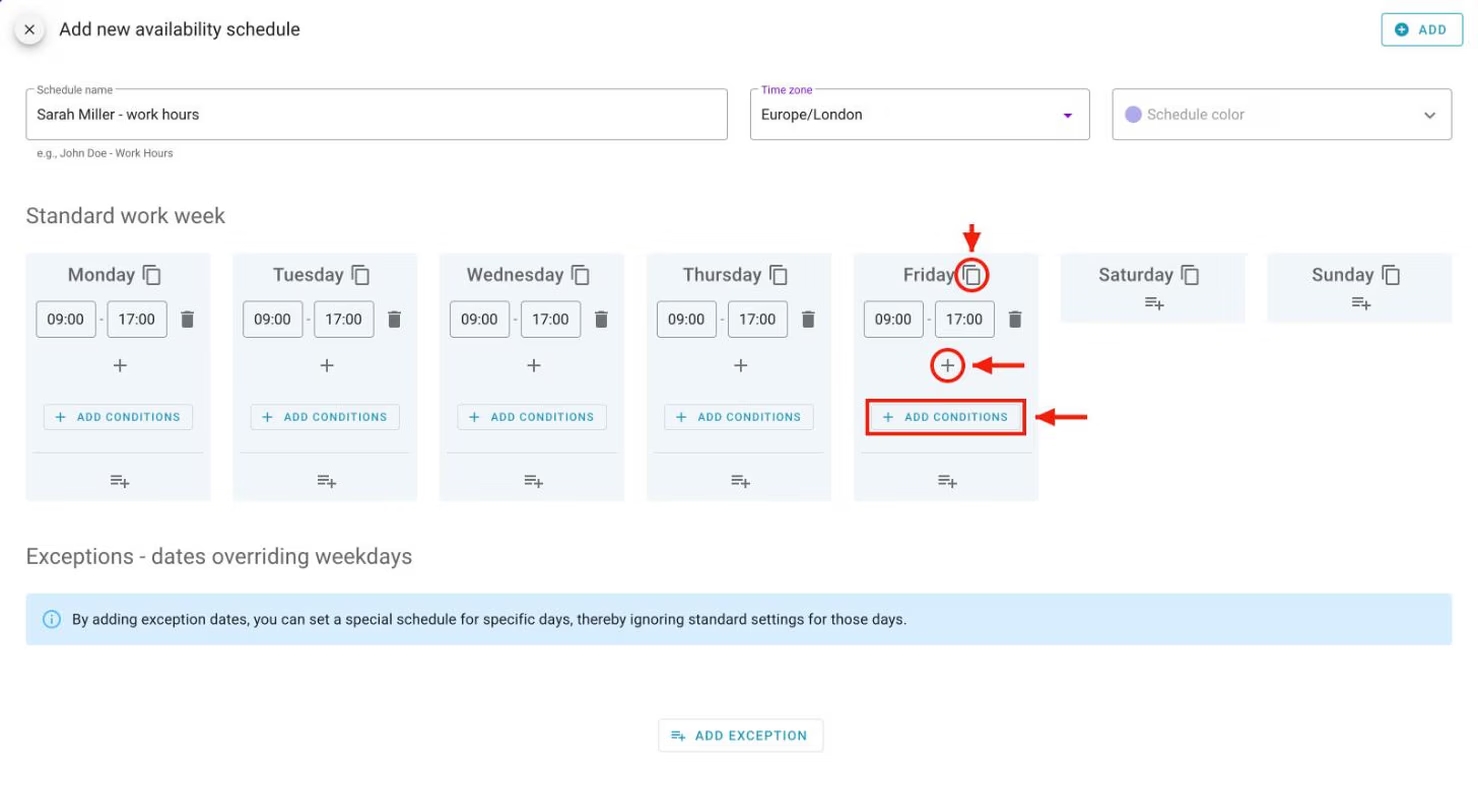
This is where you set the hours that repeat every week. For each day you can:
- add another hours range, for example 8:00-12:00 and 14:00-18:00,
- add a time interval inside an existing range,
- delete an interval,
- copy the hours from another day with Copy hours,
- add conditions to a range with Add conditions.
How do conditions work?
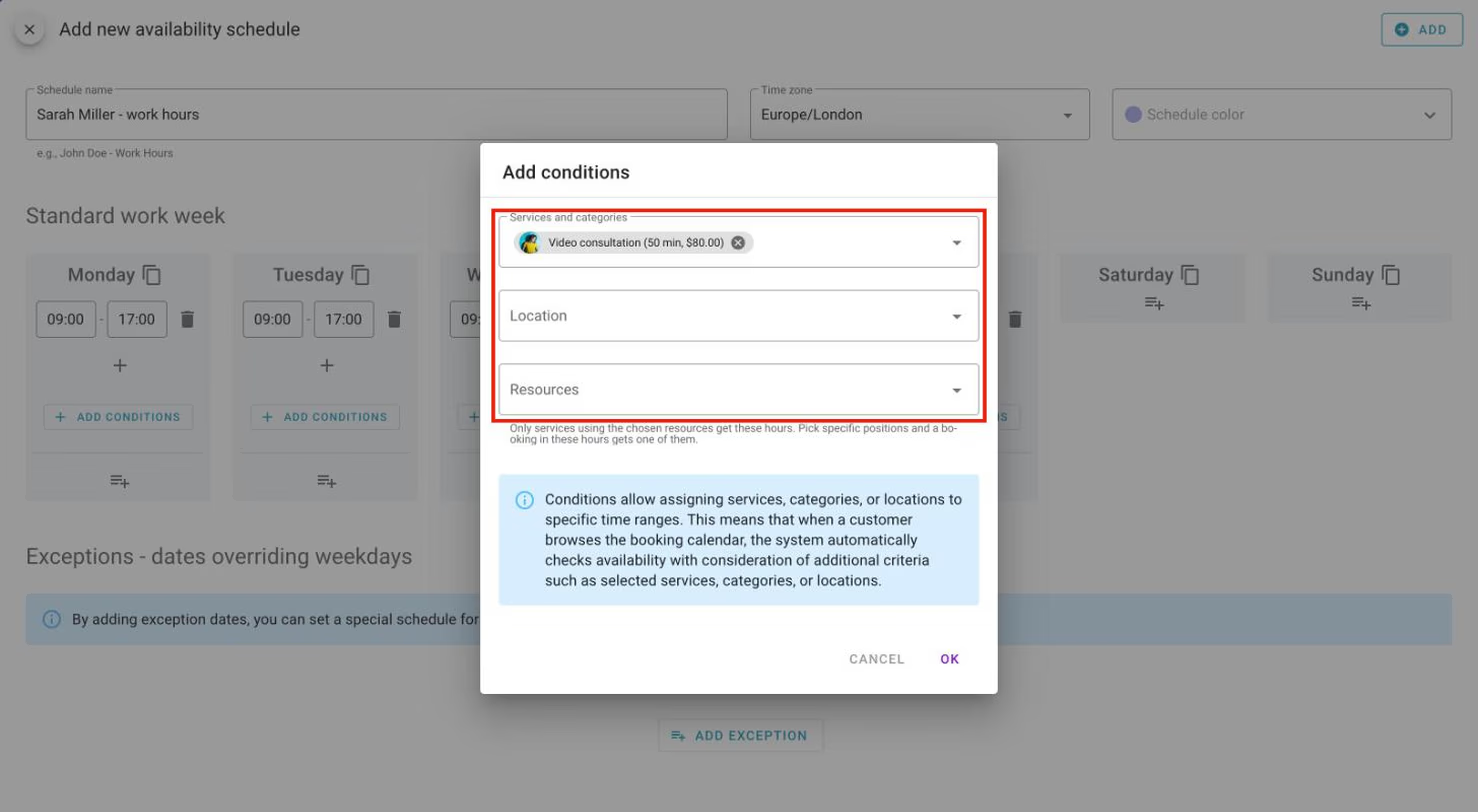
Conditions tell Calendesk what a range of hours applies to. There are three fields: Services and categories, Location and Resources.
- A range without conditions applies to every service and location covered by the schedule.
- A range with a service or category shows slots only for those services.
- A range with a location shows slots only at that location.
- A range with resources goes only to services that use those resources. If you pick specific positions, a booking in these hours gets one of them.
You can combine conditions, for example the "Video consultation" service, online only, on Tuesdays from 16:00 to 20:00.
Exceptions - dates overriding weekdays
Exceptions cover irregular hours: workshops, extra shifts, single working days or time off. Click Add exception and:
- in 1. Select availability days, pick one or more days in the calendar,
- in 2. Select availability hours, set the hours. Calendesk fills in the standard hours for that weekday to start with, and you change them for this exception only. If that weekday is a day off in the standard week, click Add and enter the hours.
An exception with no hours is a day off. You can add conditions to exception hours the same way as in the standard week.
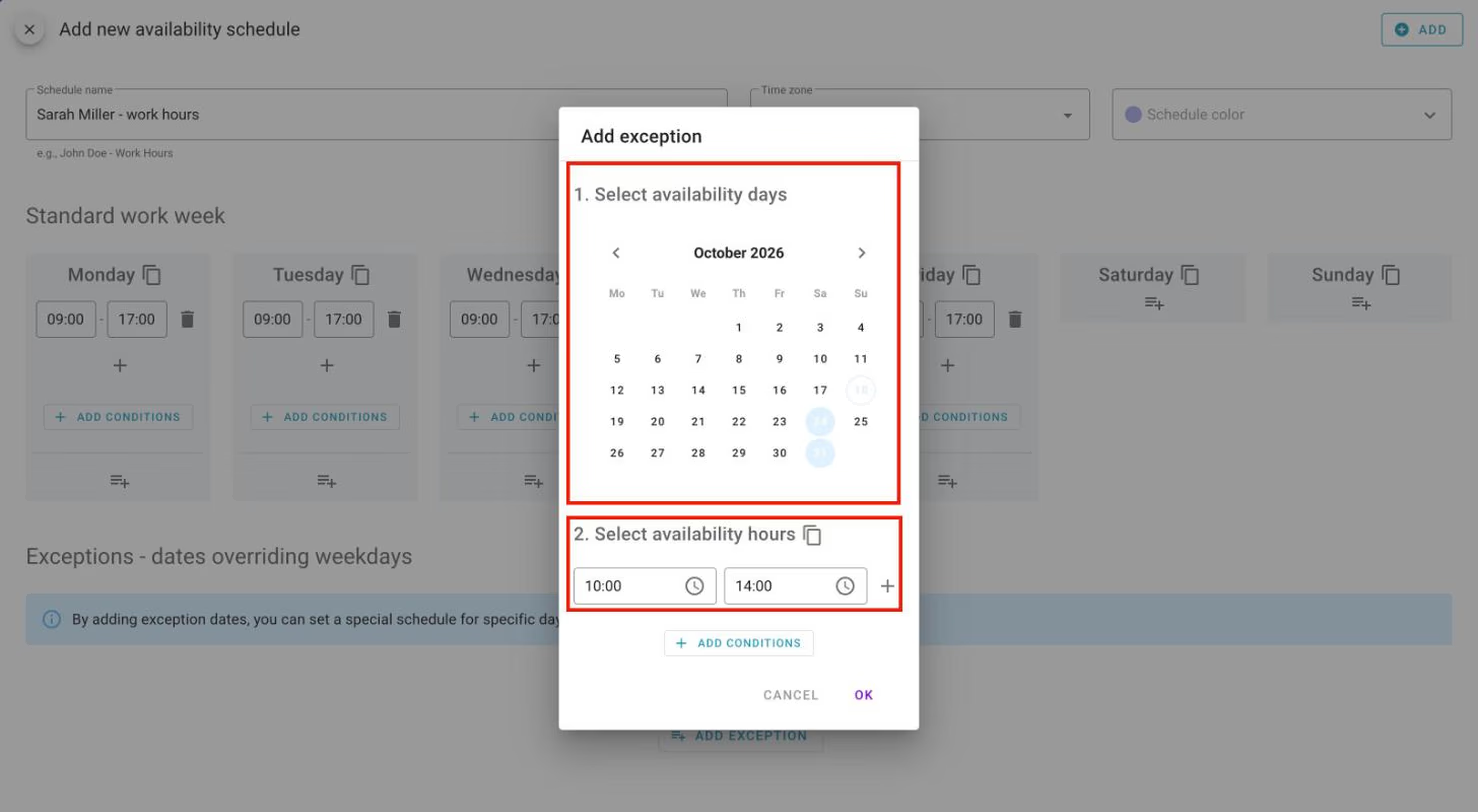
A schedule can have only a standard week, only exceptions, or both. On days added as exceptions, the exception hours apply instead of the standard week.
Save the schedule when you're done.
Assigning availability schedules
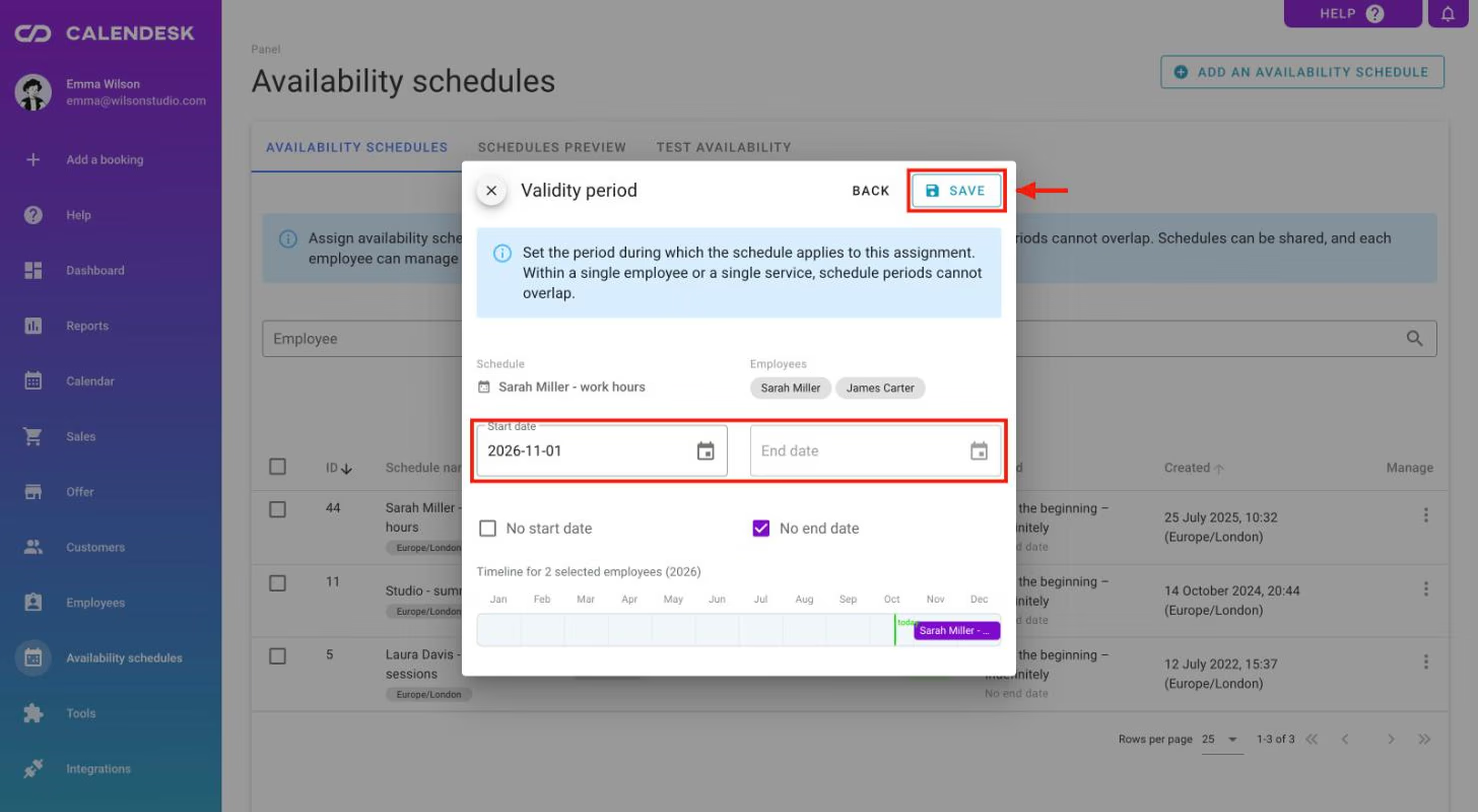
Assign a saved schedule from the Manage column on the schedule list. The menu holds Edit schedule, Set validity period, Duplicate, Assign to employees, Assign to services and Delete. If you can't edit employees, you'll see Assign to myself instead of Assign to employees. Set validity period only works once the schedule is assigned to someone.
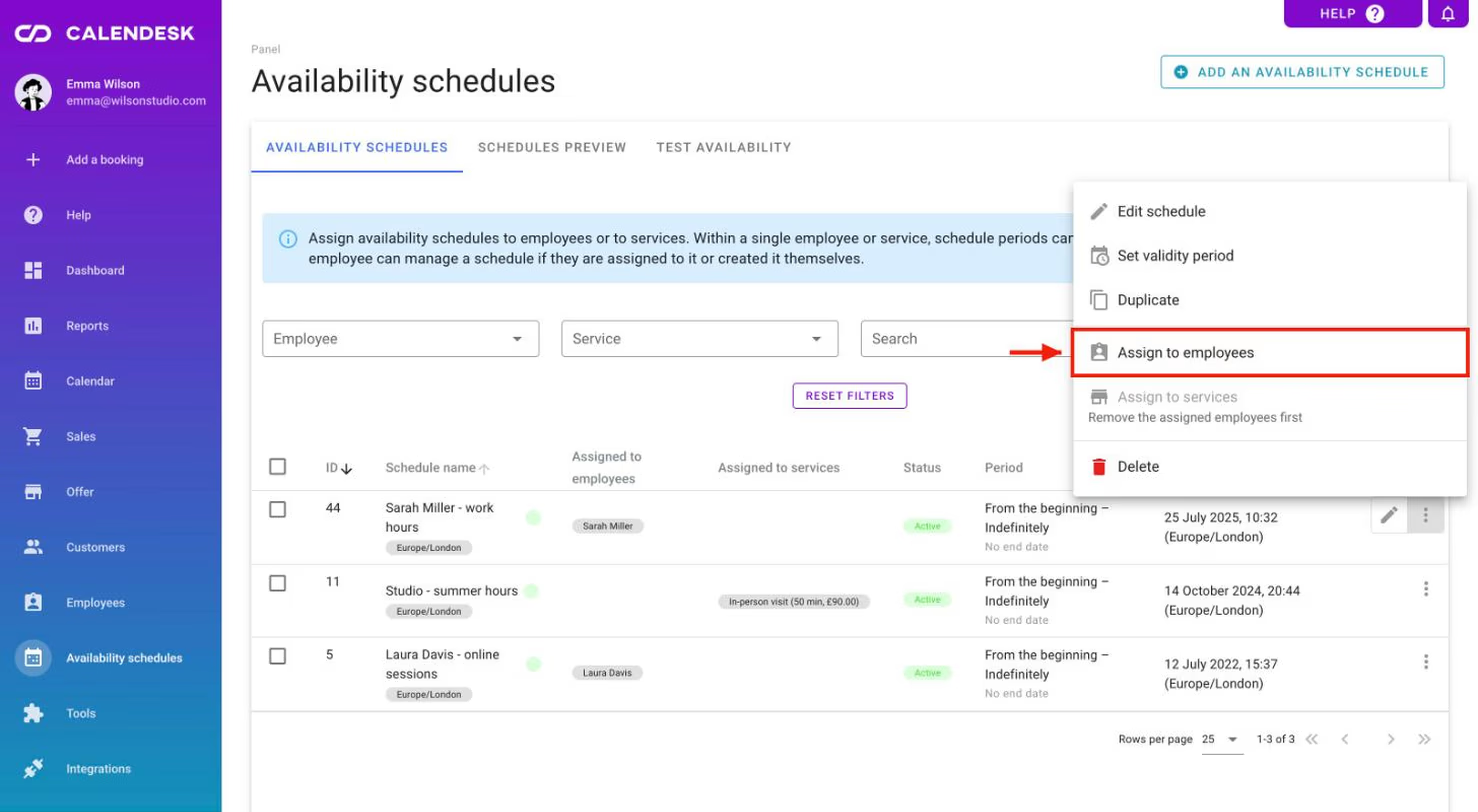
Assigning takes two steps:
- Pick the employees (or services) and click Next.
- In the Validity period window, set the Start date and End date. If the schedule should apply right away or with no end, check No start date or No end date. Below the fields you'll see a timeline with these people's schedules. Click Save.
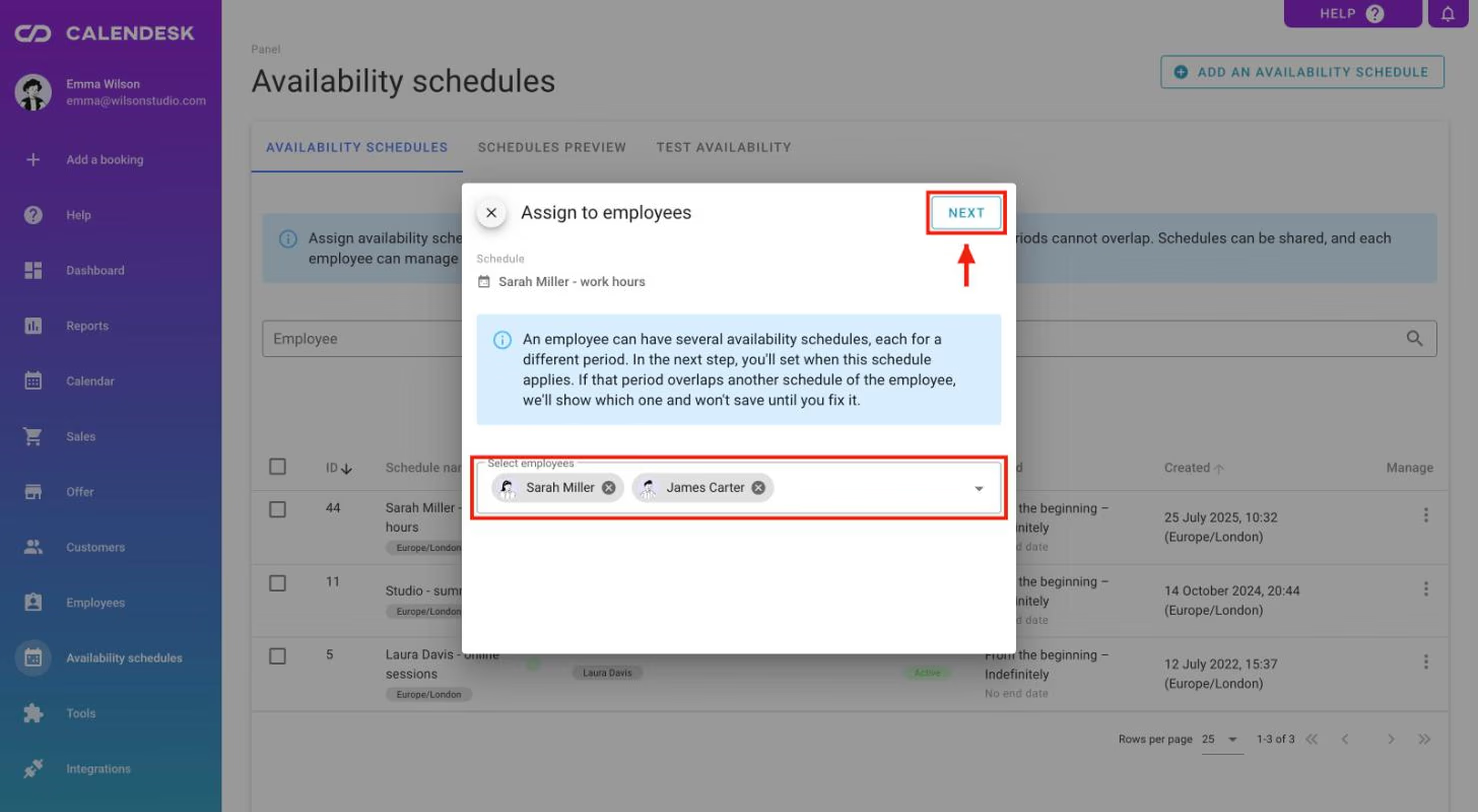
A few rules worth knowing:
- A schedule goes either to employees or to services. To switch, remove the current assignments first.
- For one employee or one service, schedule periods can't overlap. That lets you plan ahead, for example a summer schedule that starts when the regular one ends. If periods overlap, you'll see Overlapping periods with the name of the schedule that already applies at that time. Change the period, or shorten the other schedule's period.
- You can change the period of an existing assignment later with Set validity period.
- An employee can manage a schedule if they are assigned to it or created it themselves.
How do I check that a schedule works?
The Schedules preview card shows which schedule applies on which day, and Test availability shows free slots the way customers see them. Both are covered in How to preview service availability in the admin panel?