Advanced Notification Editing
Edit notifications
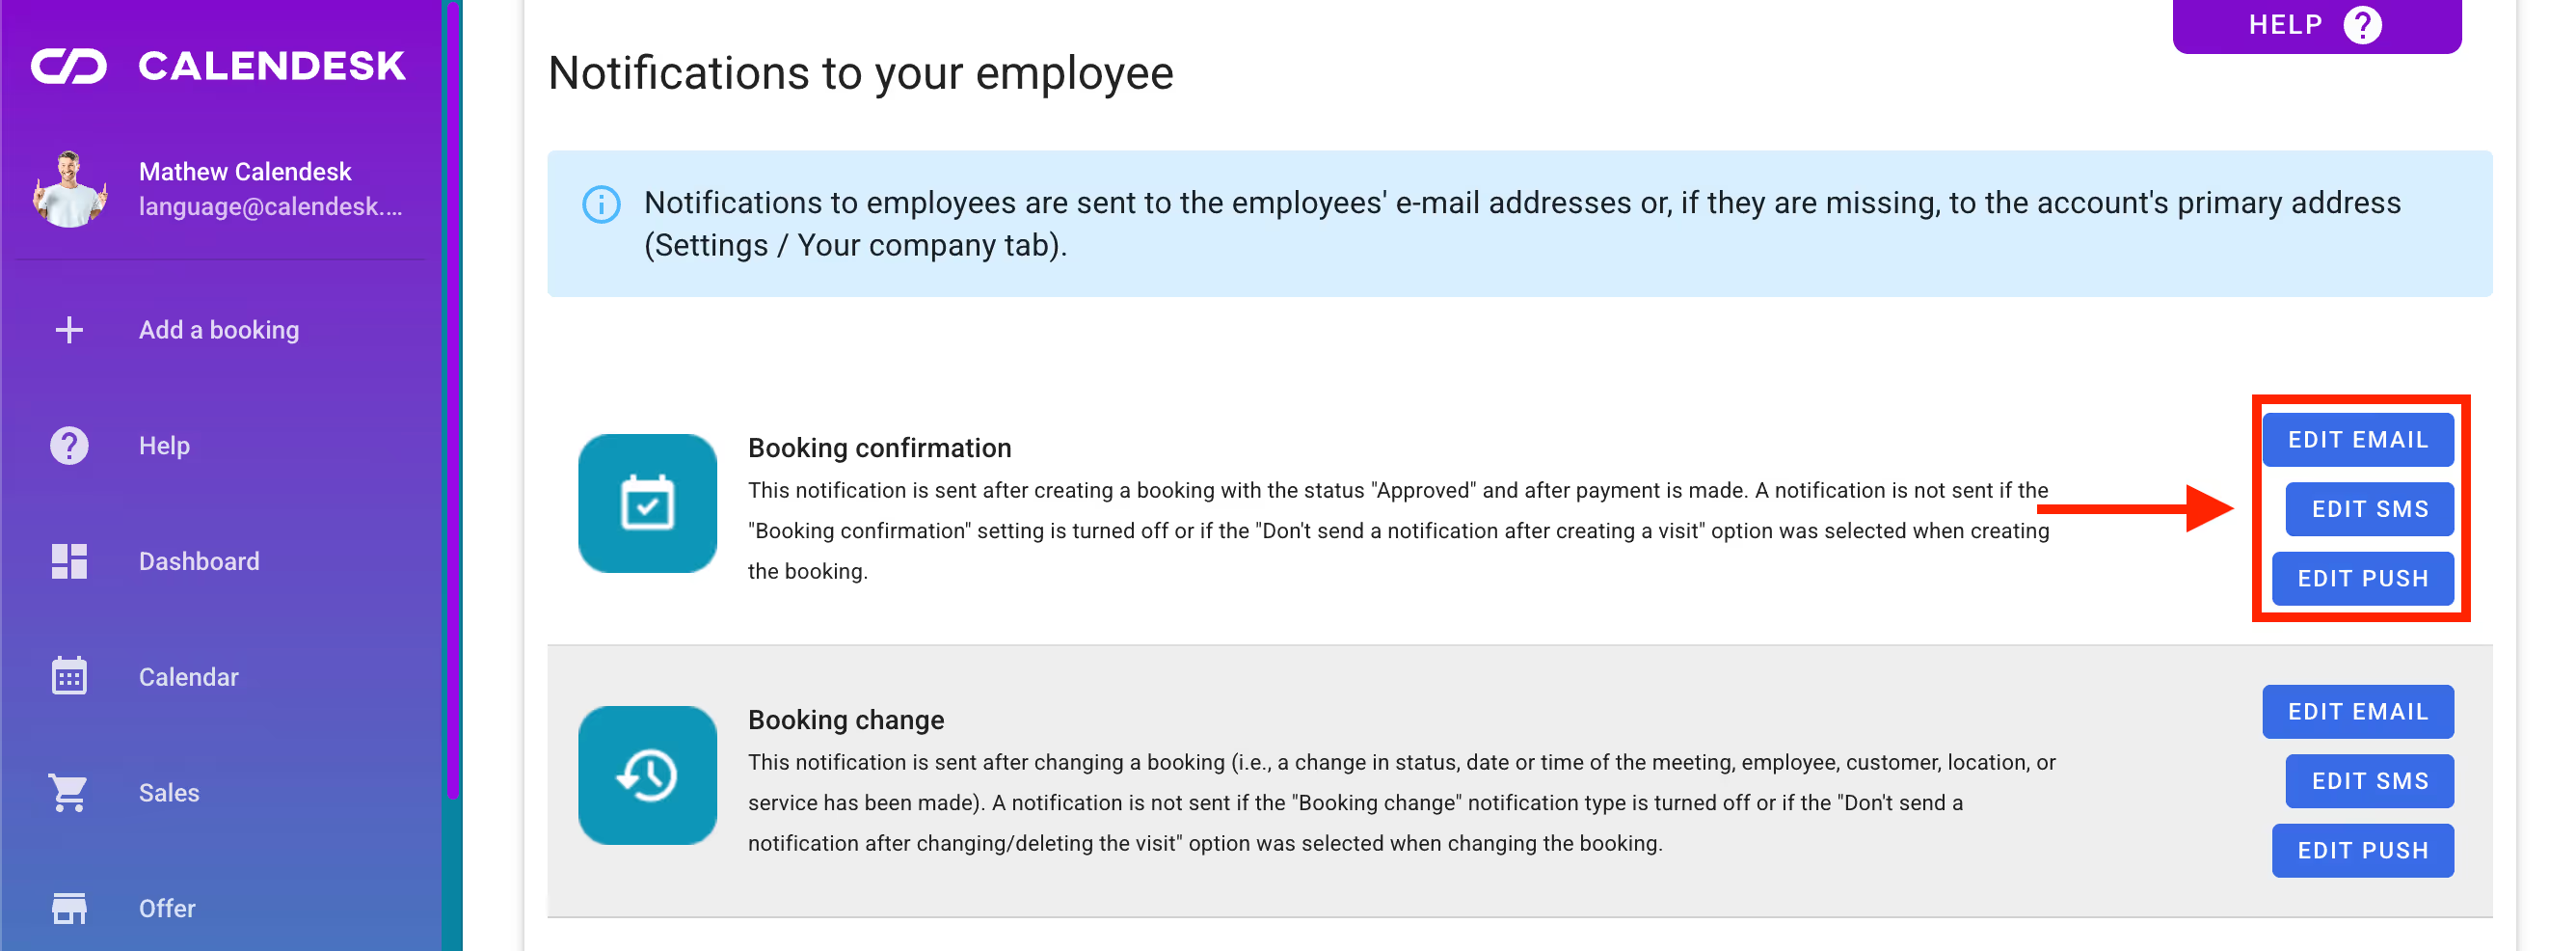
You can customize all notifications that Calendesk sends to your customers and employees. First, please go to the Notifications – Templates tab, where you can find the list of the notifications. Here, you can select the notification type you would like to customize.
Click on the blue button to edit email, SMS or push notification.
Notification editor
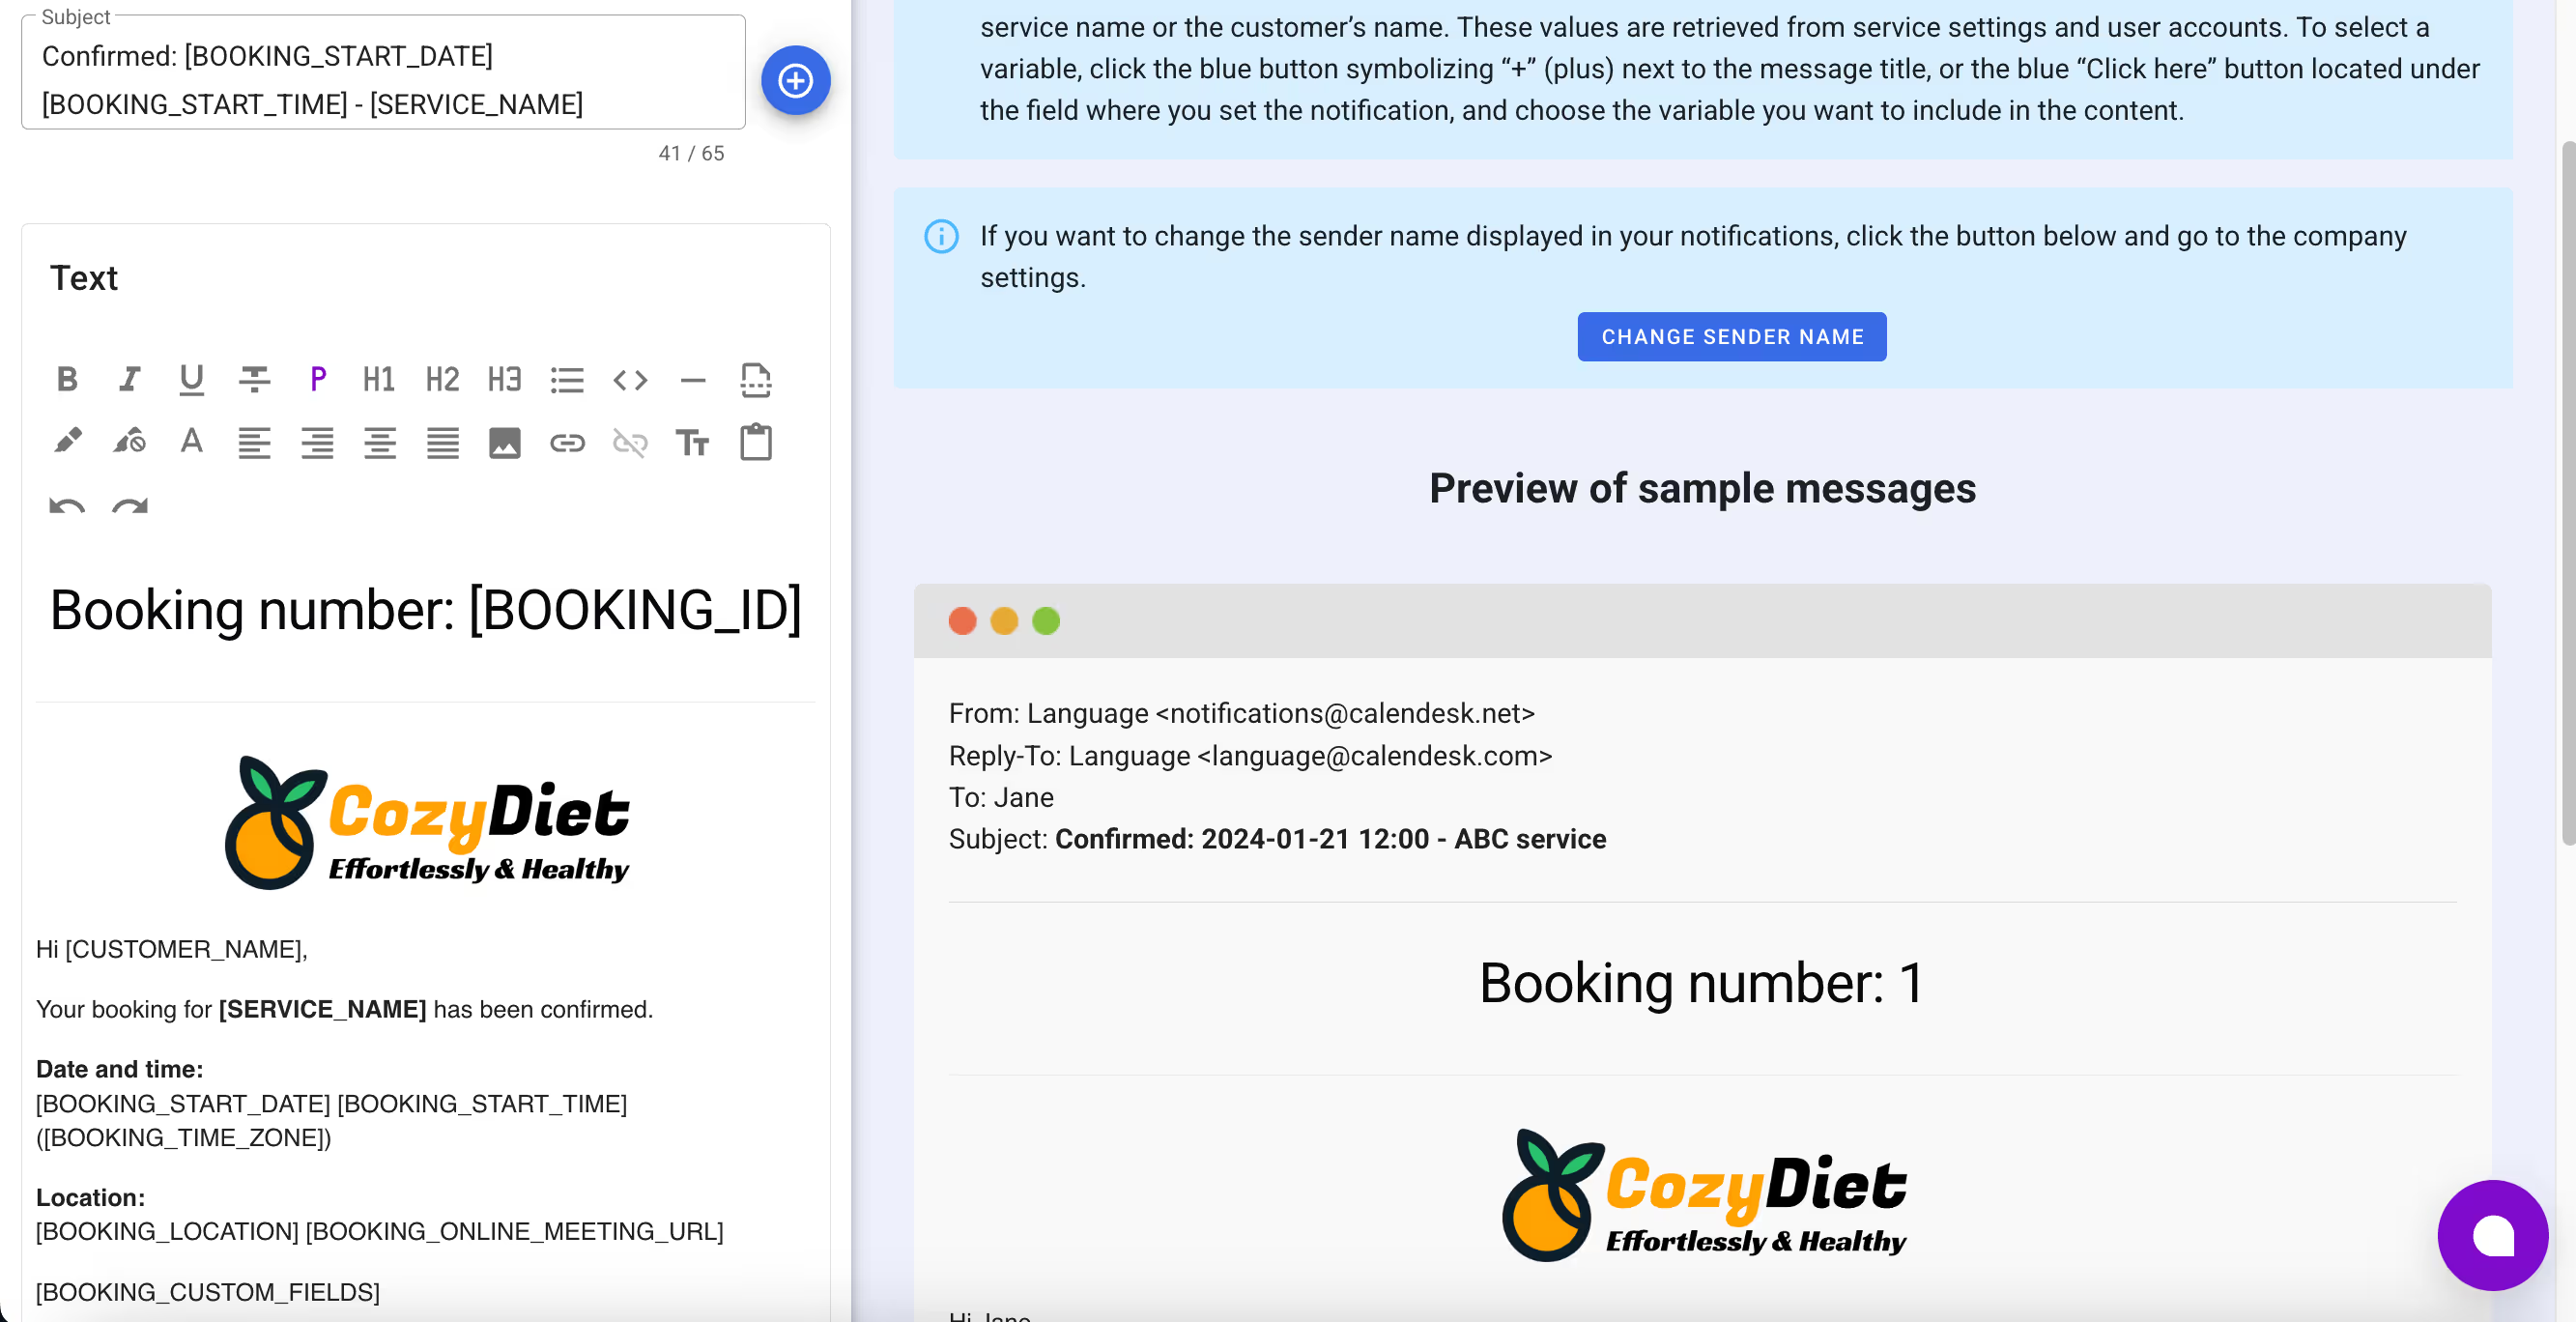
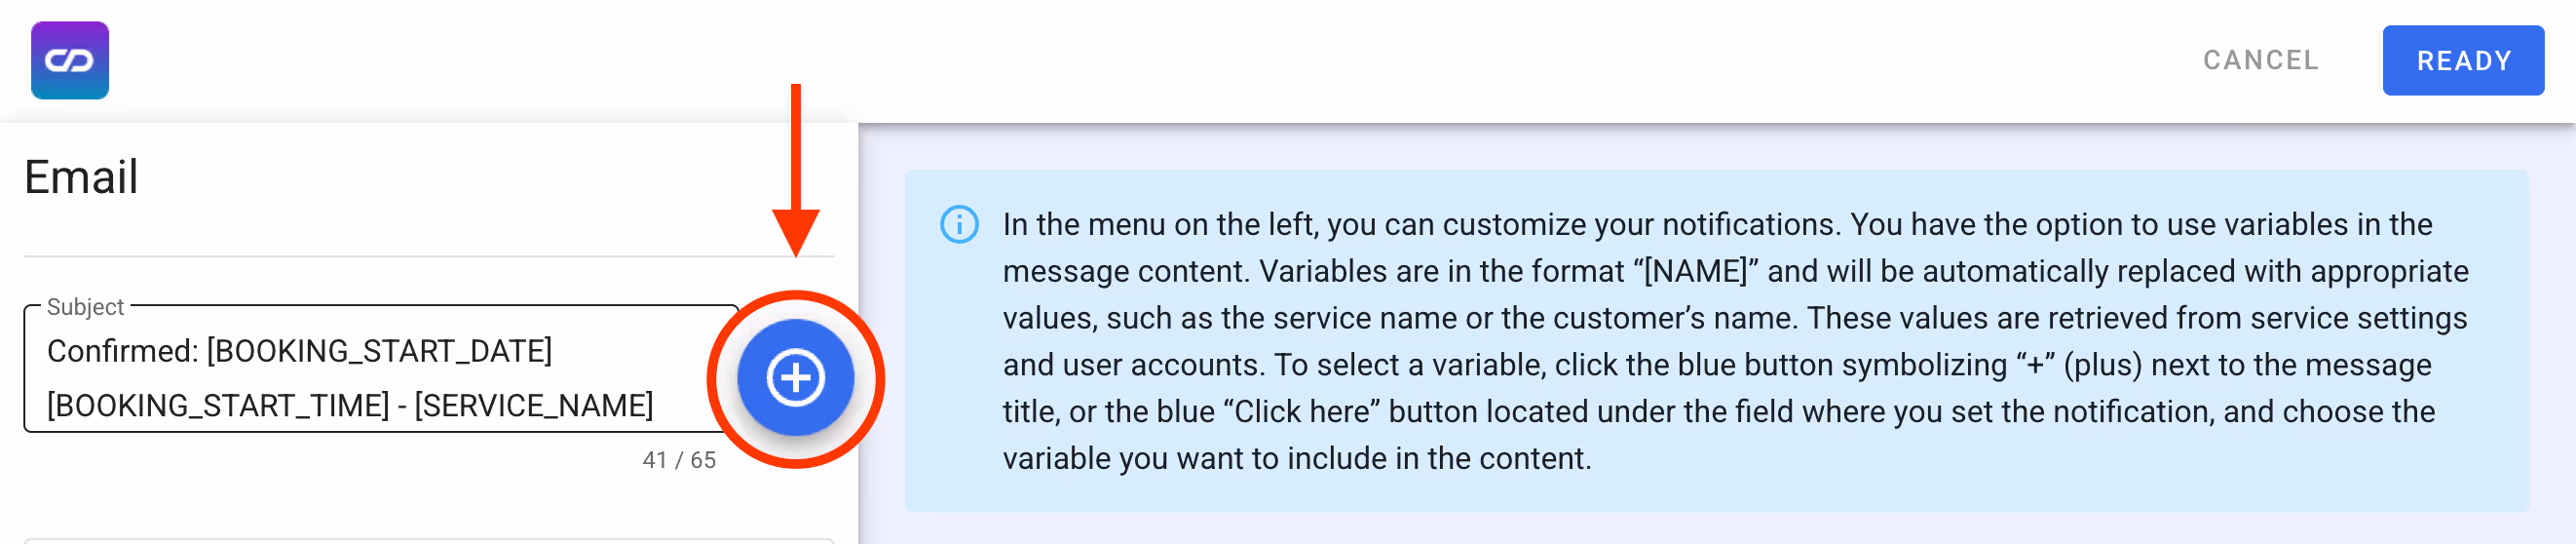
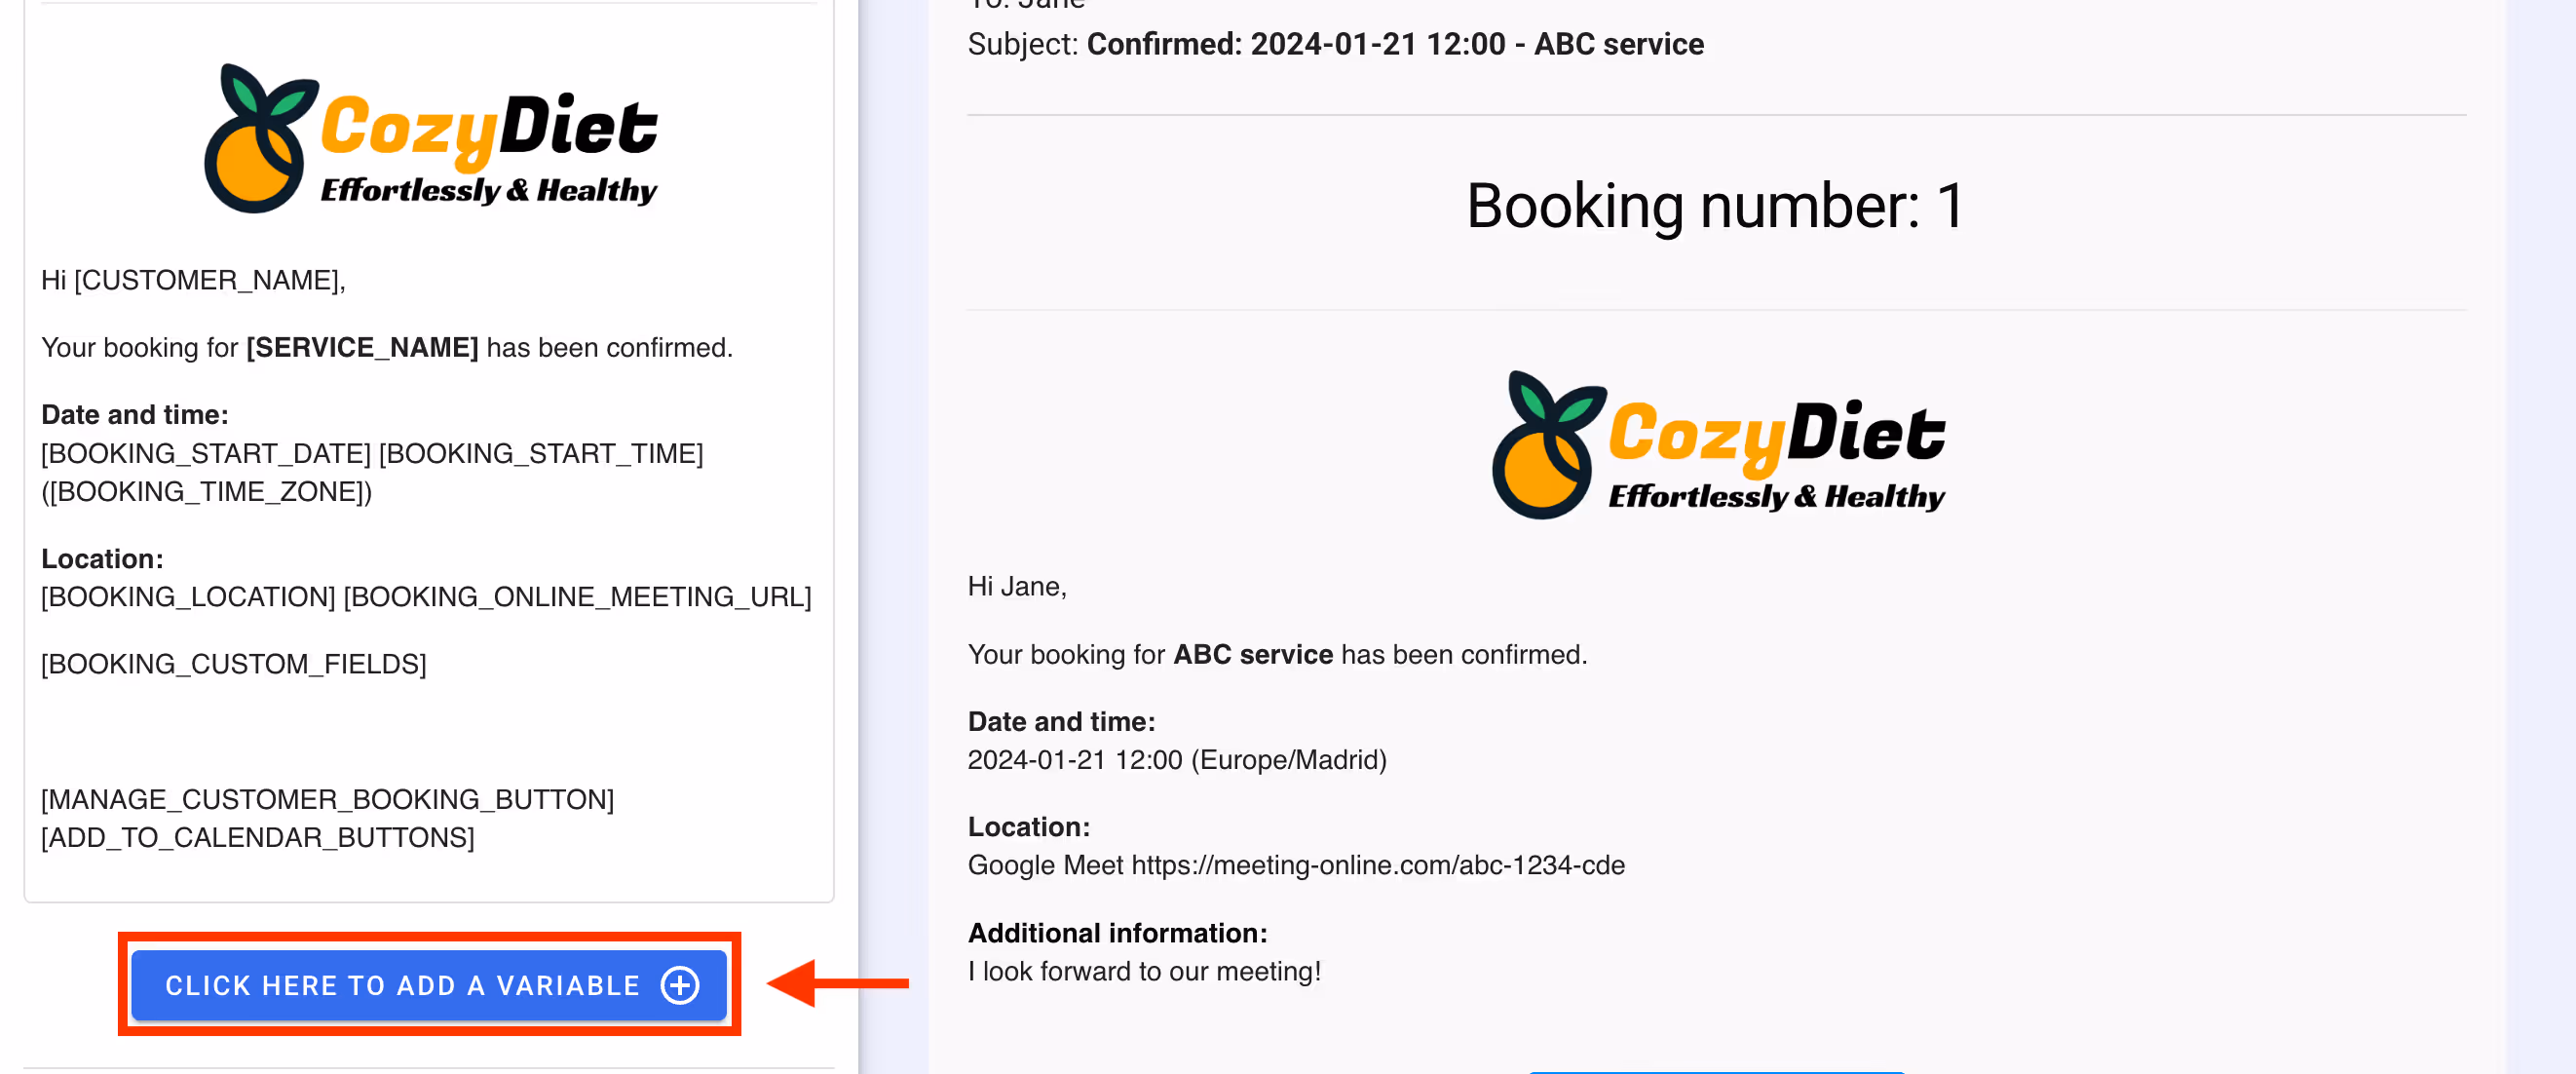
After selecting the notification type, the notification editor will appear. You can edit the notification content on the left-hand side. On the right-hand side, you can view a preview of the notification with some test data.
Variables – personalize your emails with variables.
In notifications, you can use variables. Variables are placeholders in your message that the Calendesk online booking system replaces with specific data before sending the notification.
For example, imagine you want to include customers' names in your message. Of course, you cannot use the same name for all clients. That’s why we use variables. Instead of manually adding client names to the message, you can use a variable and let Calendesk replace it with the actual booking details.
Example:
You would like to write Hi Anna at the beginning of your message. But, of course, not all your customers have the name Anna :). To do so, use a variable called
[CUSTOMER_NAME]which will be replaced right before sending the message with the customer name.
The text: Hi [CUSTOMER_NAME] will be replaced with: Hi Anna, Hi Mark, Hi Joe and so on.
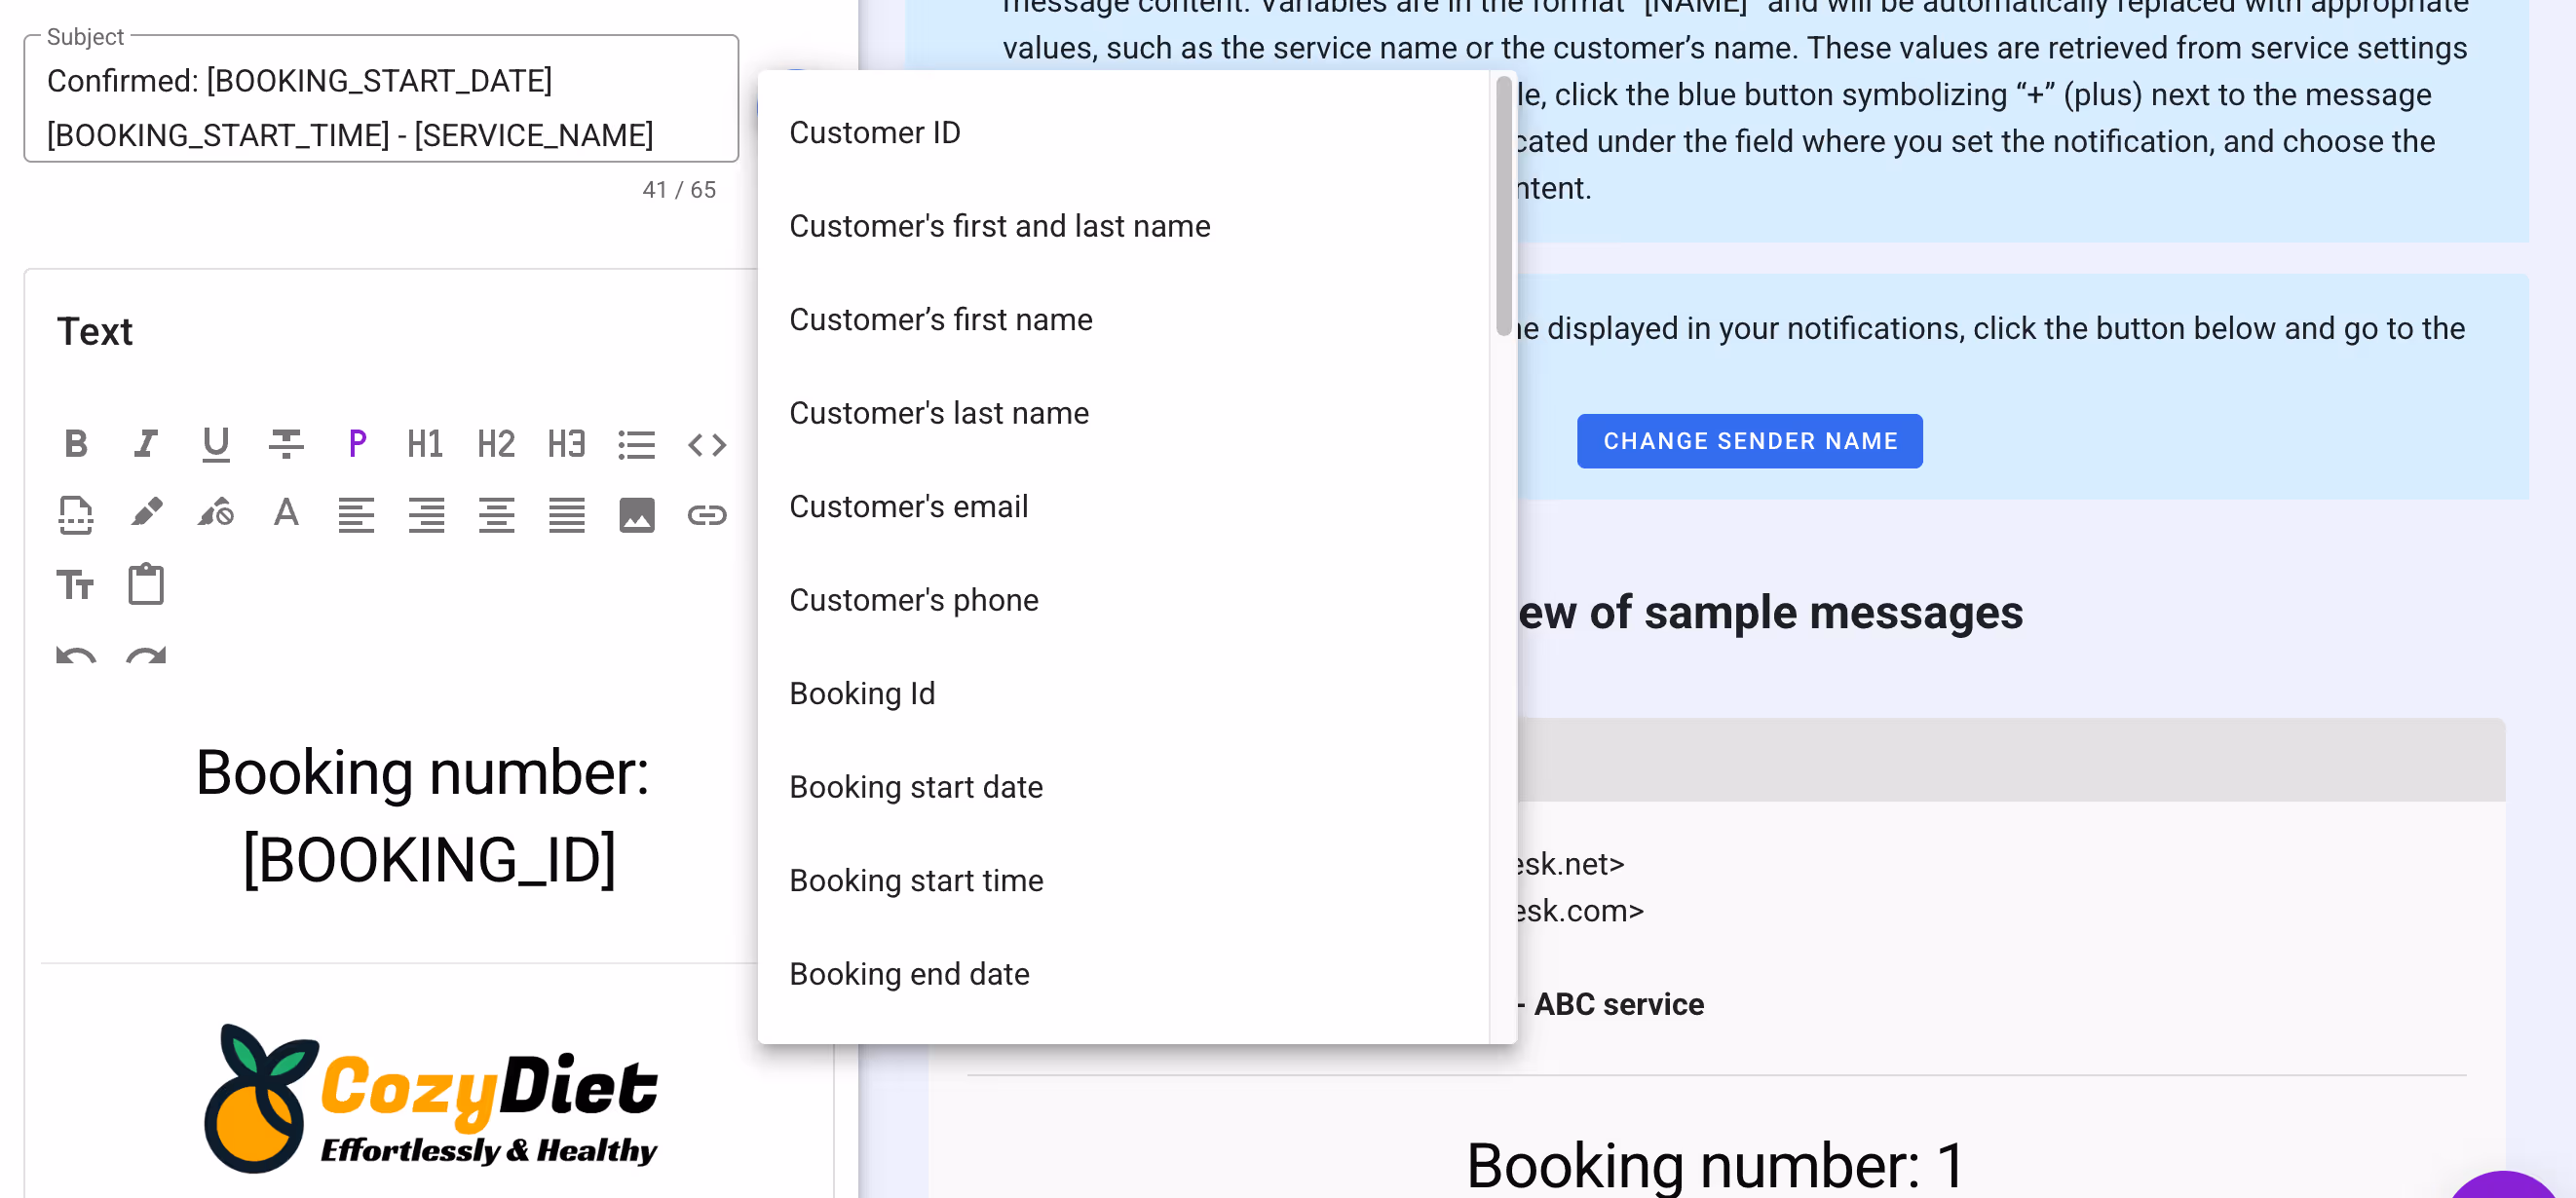
Supported variables
[CUSTOMER_ID] - A customer ID.
[CUSTOMER_FULL_NAME] - A customer full name (name + surname).
[CUSTOMER_NAME] - A customer name.
[CUSTOMER_SURNAME] - A customer surname.
[CUSTOMER_EMAIL] - A customer email.
[CUSTOMER_PHONE] - A customer phone.
[BOOKING_ID] - A booking ID.
[BOOKING_START_DATE] - A booking start date YYYY-MM-DD in the accounts time zone.
[BOOKING_START_TIME] - A booking start time HH:MM (24h) in the accounts time zone.
[BOOKING_END_DATE] - A booking end date YYYY-MM-DD in the accounts time zone.
[BOOKING_END_TIME] - A booking end time HH:MM (24h) in the accounts time zone.
[BOOKING_TIME_ZONE] - Selected time zone by a customer.
[BOOKING_LOCATION] - A location name, for example: Zoom, Google Meet, Phone, Address, Other.
[BOOKING_LOCATION_TYPE] - Type of location, for example: 1 (Address), 2 (Phone), 3 (Google Meet), 4 (Other), 5 (Zoom), 6 (Teams), 7 (Skype), 8 (WhatsApp).
[BOOKING_GOOGLE_MEET_URL] - A booking location Google Meet URL for a meeting. If doesn't exist nothing will appear.
[BOOKING_ZOOM_JOIN_URL] - A booking location Zoom URL for a meeting. If doesn't exist nothing will appear.
[BOOKING_CONTROL_URL] - A URL that allows editing a booking from the calendar, for example, https://yourcalendar.com/bookings/secret_code_to_booking, enables managing the selected booking.
[BOOKING_CUSTOM_FIELDS] - custom fields from a booking form. They will be parsed in to the text.
[SERVICE_ID] - A booking service ID.
[SERVICE_NAME] - A booking service name.
[BOOKING_PRICE] - A booking service price.
[BOOKING_STATUS] - A booking status.
[EMPLOYEE_ID] - A booking employee's ID.
[EMPLOYEE_NAME] - A booking employee's name.
[EMPLOYEE_SURNAME] - A booking employee's surname.
[EMPLOYEE_FULL_NAME] - A booking employee's full name (name + surname).
[EMPLOYEE_EMAIL] - A booking employee's email.
[EMPLOYEE_PHONE] - A booking employee's phone.
[COMPANY_NAME] - Your company name.
[COMPANY_PHONE] - Your company phone.
[COMPANY_ADDRESS] - Your company full address.
[BOOKING_ONLINE_MEETING_URL] - Google Meet or Zoom URL.
[BOOKING_CREATED_BY_USER_ID] - The id number of the user who created the reservation.
[BOOKING_UPDATED_BY_USER_ID] - The id number of the user who last edited the reservation.
[BOOKING_CREATED_BY] - The name of the user who created the reservation.
[BOOKING_UPDATED_BY] - The name of the user who last edited the reservation.
[BOOKING_AWAITING_PAYMENT_FULL_TIME] - Maximum time to pay for a booking (e.g., 1h 30 min).
[BOOKING_PAYMENT_STATUS] - Booking payment status (e.g., Paid, Not paid)
[MANAGE_CUSTOMER_BOOKING_BUTTON] - A button that allows customers to manage their booking.
[MANAGE_EMPLOYEE_BOOKING_BUTTON] - A button that allows employees to display bookings in admin panel.
[ADD_TO_CALENDAR_BUTTONS] - Buttons that allow your customers add booking to their calendars.
[ADDITIONAL_INFORMATION_AFTER_BOOKING] - Additional information in the email after booking.
Please use the blue buttons, which you can find next to the text fields, to display the list of available variables. Then, click on the variable you want to use in the message.
There are many useful variables you can use in your notifications. Remember to test to final notifications before going live.
Conditions – customize your emails with conditions
Conditions allow you to customize your email notifications. For example, you can decide if you want to show something specific just for some services or employees. Calendesk supports the handlebars templating language to render conditions and formatting. While processing your emails, our system will search for them.
If – check if the value exists or is true.
{{#if [CUSTOMER_NAME]}}
Dear [CUSTOMER_NAME],
{{/if}}
If with else – check if the value exists or is true, otherwise do something else.
{{#if [CUSTOMER_NAME]}}
Dear [CUSTOMER_NAME],
{{else}}
Dear Customer
{{/if}}
Equals – check if the values are equal.
Hello Mark!
{{#equals [SERVICE_ID] 5}}
You have selected a service for VIP customers!
{{/equals}}
Thanks for booking with us.
---
Hello Mark!
{{#equals [BOOKING_PAYMENT_STATUS] Not paid}}
Please pay for the booking within [BOOKING_AWAITING_PAYMENT_FULL_TIME]. Otherwise, it will be canceled automatically.
{{/equals}}
Thanks for booking with us.
---
Hello Mark!
{{#equals [SERVICE_ID] [1,4,55]}}
You have selected a service that has an ID 1, 4 or 55!
{{/equals}}
Thanks for booking with us.
Not equals – check if the values are not equal.
Hello Mark!
{{#not_equals [SERVICE_ID] 5}}
You have selected a service that has an Id different from 5!
{{/not_equals}}
Thanks for booking with us.
---
Hello Mark!
{{#not_equals [SERVICE_ID] [1,4,55]}}
You have selected a service that doesn't have an ID 1, 4 or 55!
{{/not_equals}}
Thanks for booking with us.
Equals, else – check if the values are equal, otherwise do something else.
Hello Ben!
{{#equals [SERVICE_ID] 5}}
You have selected a service for VIP customers!
{{else}}
You have selected a service for regular customers!
{{/equals}}
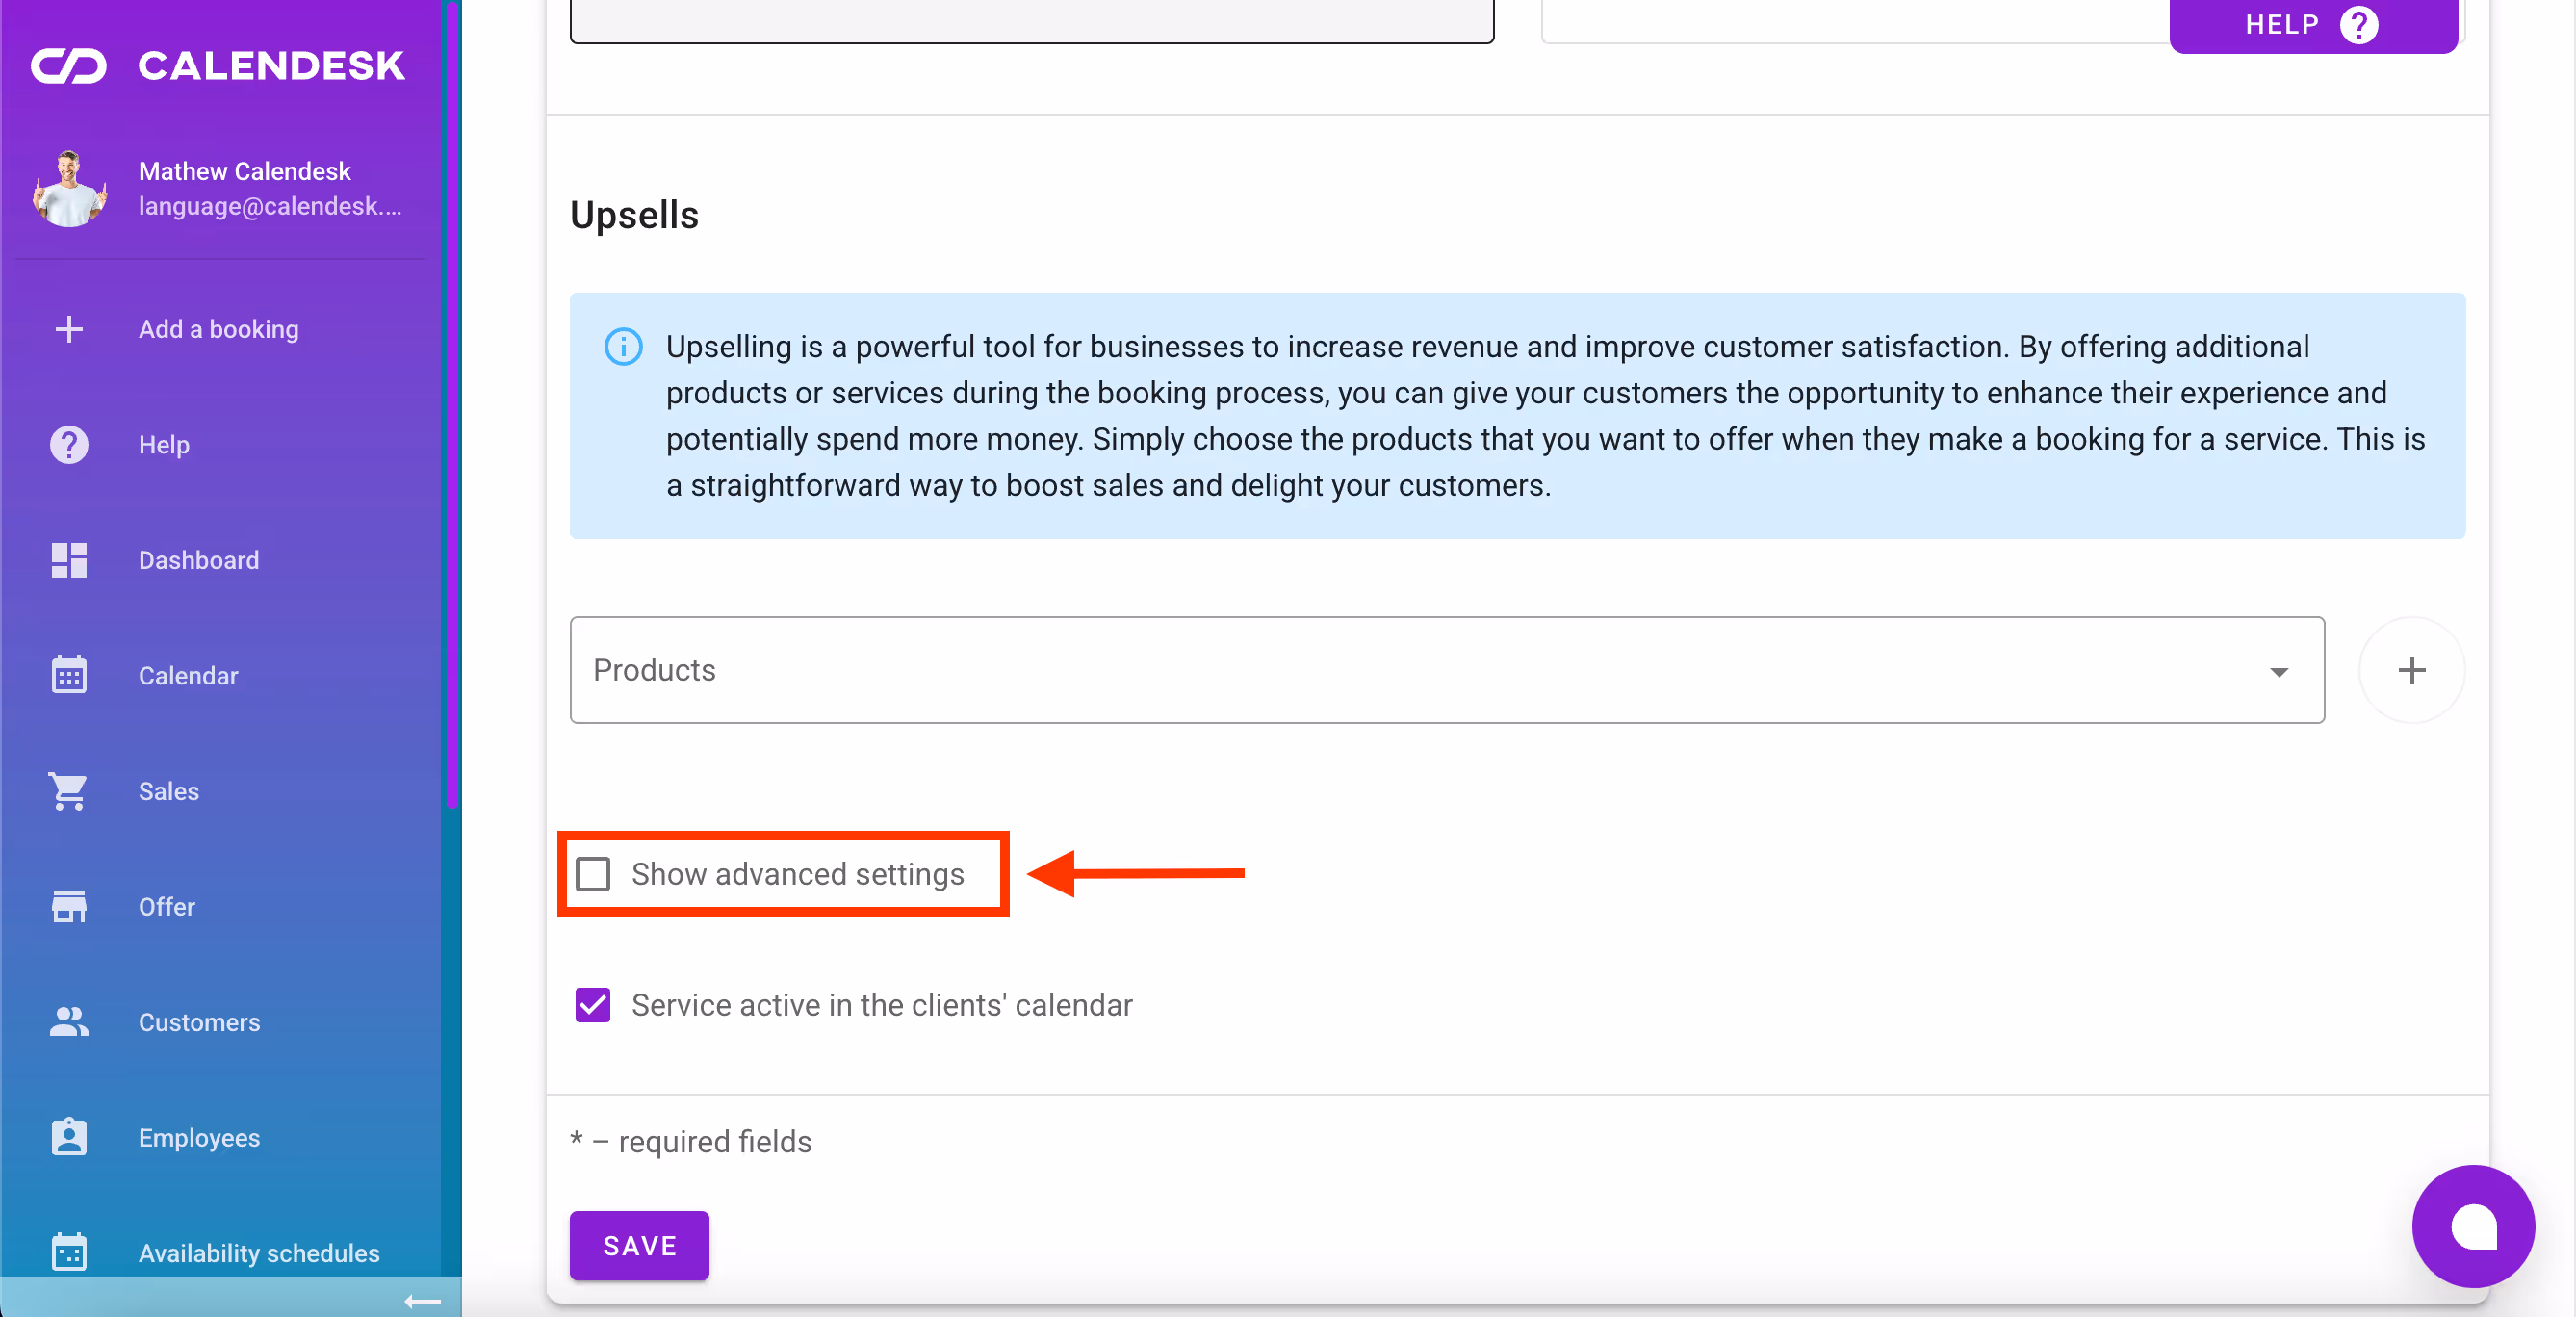
Thanks for playing.Custom notification section for each service
Using conditions might seem a bit complex, so our technical support team has simplified the process of adding extra notification content based on the service a customer books.
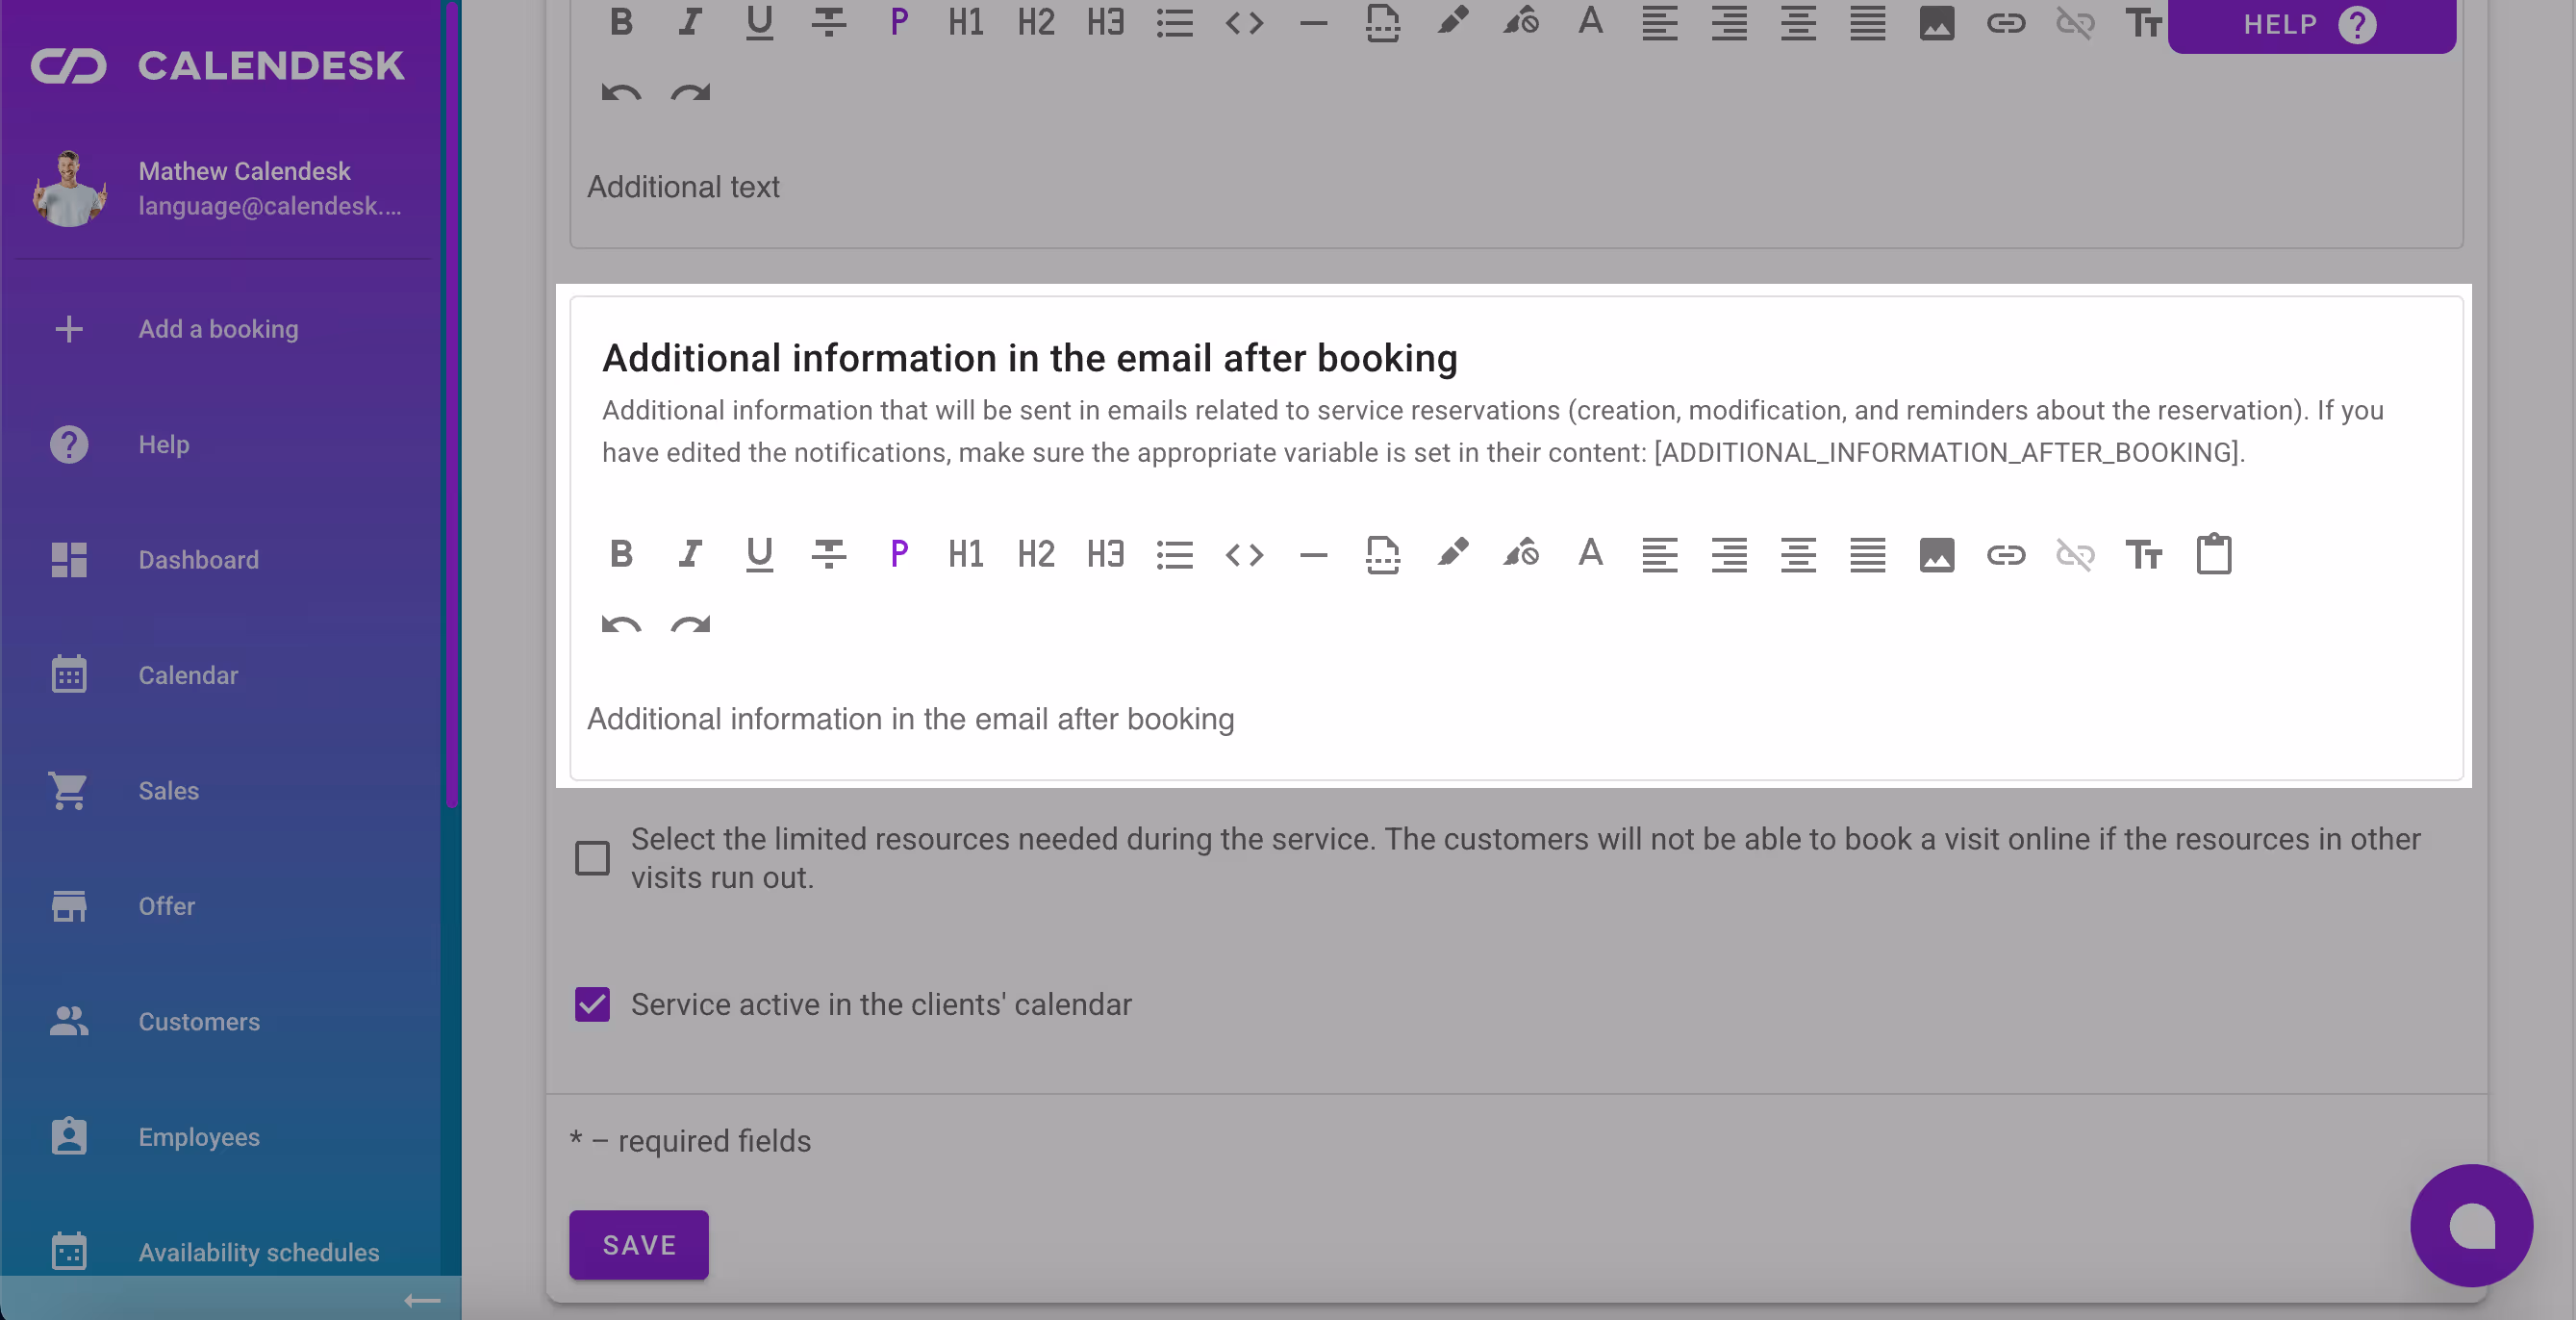
The default email notifications sent from the Calendesk system already include the Additional Information variable in the email after a booking. This variable allows extra text to be imported into the notification content from the service settings. You can add additional service details by going to the Offer – Services tab and selecting the checkbox shown below.
Then, enter the additional service description, which will appear in the email notification content.
Formatting
Uppercase – format a string to uppercase.
{{#upper make me upper}}
-> MAKE ME UPPER
Capitalize – capitalize the first letter in a string.
{{#capitalize john}}
-> John
Capitalize Words – capitalize each word in a string.
{{#capitalize_words john doe}}
-> John Doe
Buttons
System buttons
Replace a button title in notifications like Activate account, Change password, Confirm newsletter subscription.
Occasionally, we include a button at the bottom of various notifications, such as “Activate Account,” “Change Password,” and “Confirm Newsletter Subscription.” This button confirms actions like account activation or password modification. To customize the button’s title, simply insert your preferred text into a variable. This text will then replace the variable in your message, becoming the button’s title.
Important: This feature is designed to function exclusively within specific email templates, such as “Activate Account,” “Change Password,” and “Confirm Newsletter Subscription.”
[CUSTOM_BUTTON_TITLE=Please click here]Custom button titles for managing bookings or adding to Google/iCal calendars
[MANAGE_CUSTOMER_BOOKING_BUTTON=Manage my bookings]
[ADD_TO_CALENDAR_BUTTONS=Add to Google,Add to iCal]
Create Your Own Button
You can craft a custom button that directs users to any specified URL. Tailor it to fit your requirements by adding the following parameters:
Title of the Button
URL of the Button
Background Color (optional)
Text Color (optional)
Here’s how to set it up:
[CUSTOM_BUTTON=Click here,https://calendesk.com,#e6e9fb,#00000]
[CUSTOM_BUTTON=Click here,https://calendesk.com]
Remember, when adding a URL as a button parameter, you should remove the hyperlink so that only the plain text remains.
Changing the color of the booking management button
To change the color of the booking management button, you need to remove the system-generated button from the left side of the notification template editor.
[MANAGE_CUSTOMER_BOOKING_BUTTON]and replace it with the following formula:
[CUSTOM_BUTTON=Manage booking,[BOOKING_CONTROL_URL],#e6e9fb,#00000]You can replace Manage booking with any text (just keep it concise), change #e6e9fb to set the button color, and use #000000 to define the text color on the button.
Here, you'll find an attachment detailing the balance usage for SMS notifications sent to international numbers.