How can I configure different types of notifications?
Notifications
Notifications is the tab where you will configure the types of notifications that will be sent automatically by the Calendesk booking system to your customers and employees. Here, you can customise the content of all the notifications sent from the Calendesk platform
Editing notification content
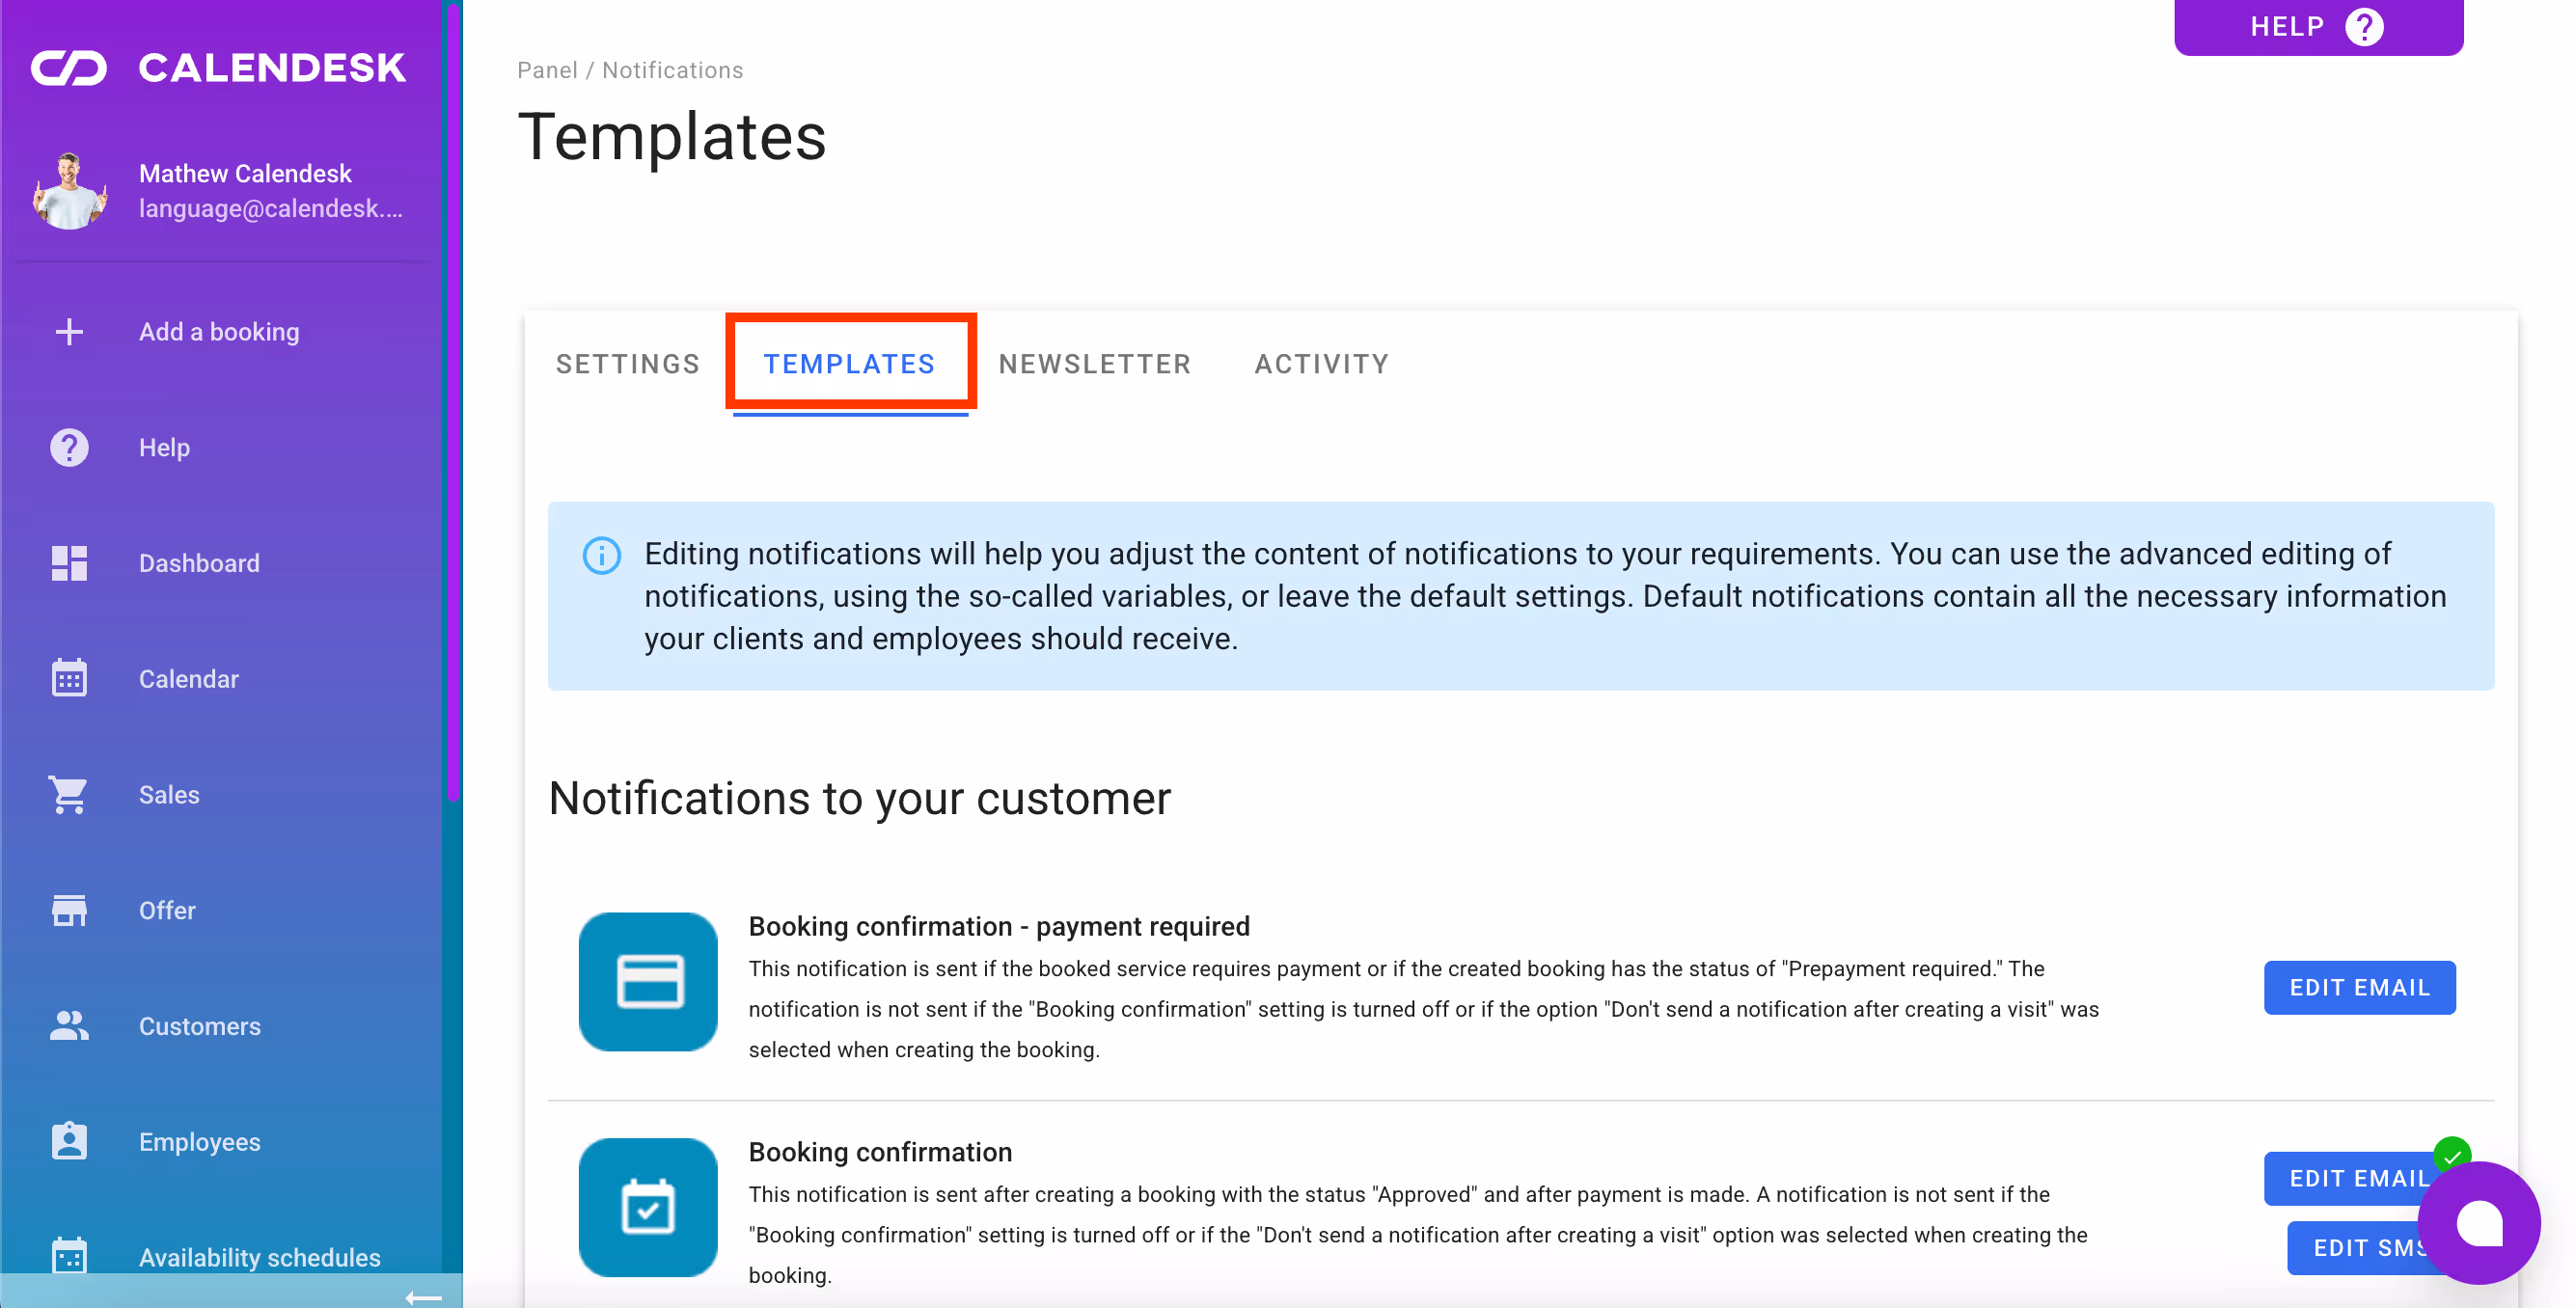
By selecting one of the blue buttons visible in the image above, you can proceed to edit the notification of your choice, which is sent by the Calendesk system to your clients or employees.
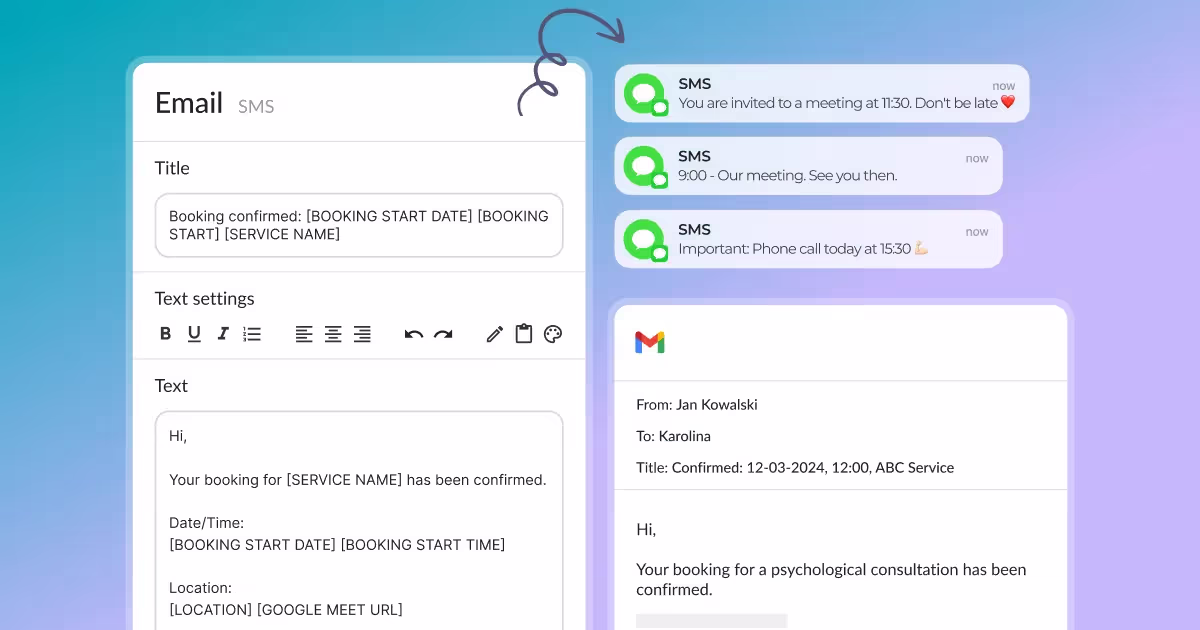
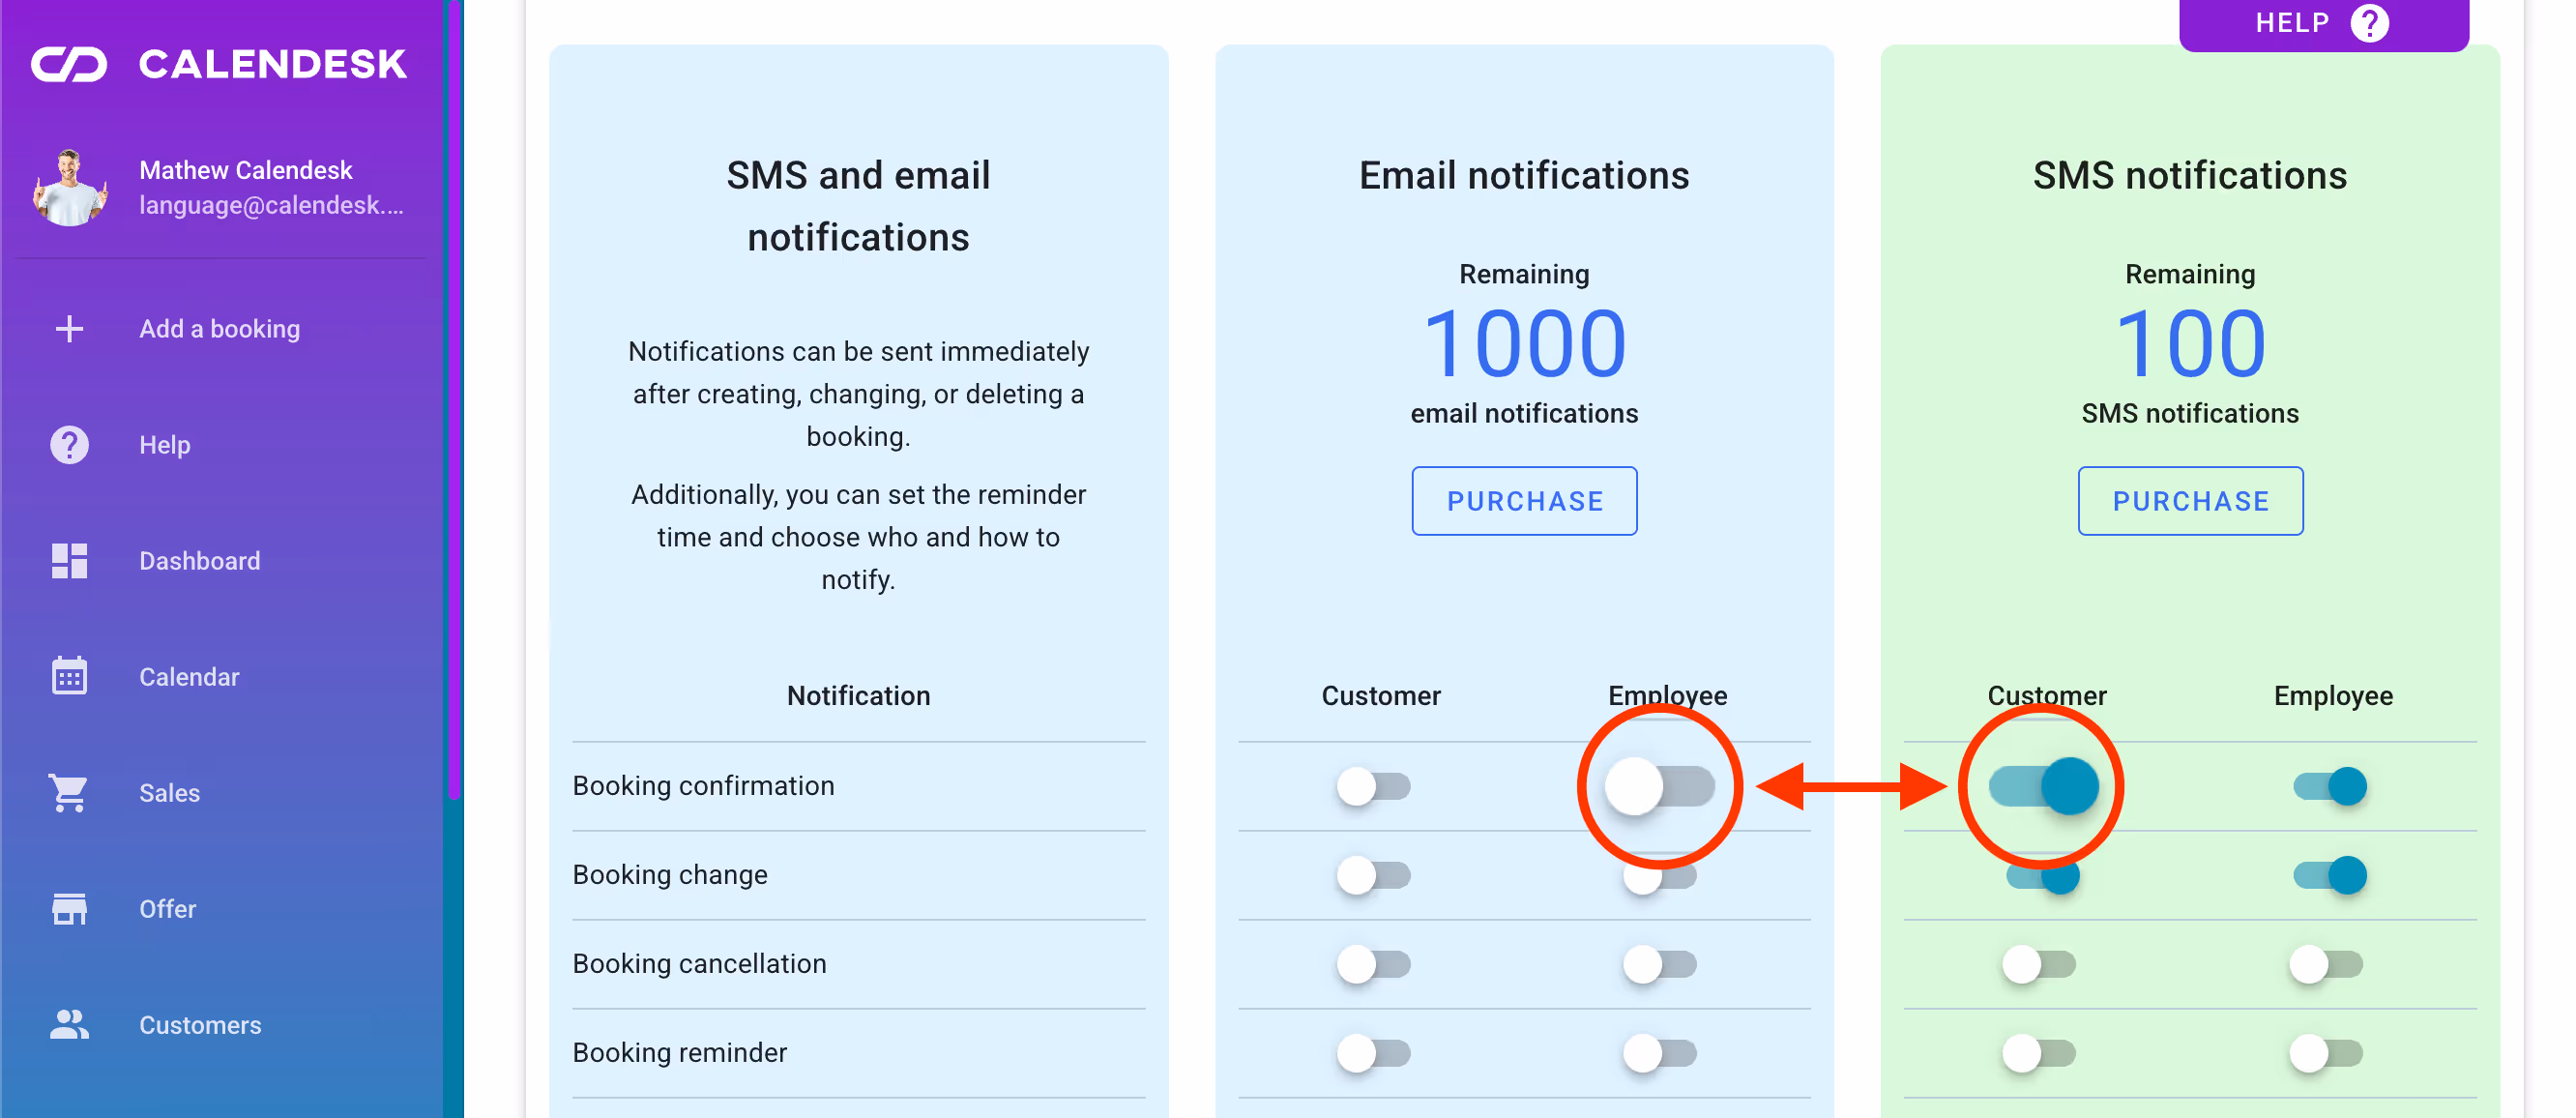
SMS and Email Notifications
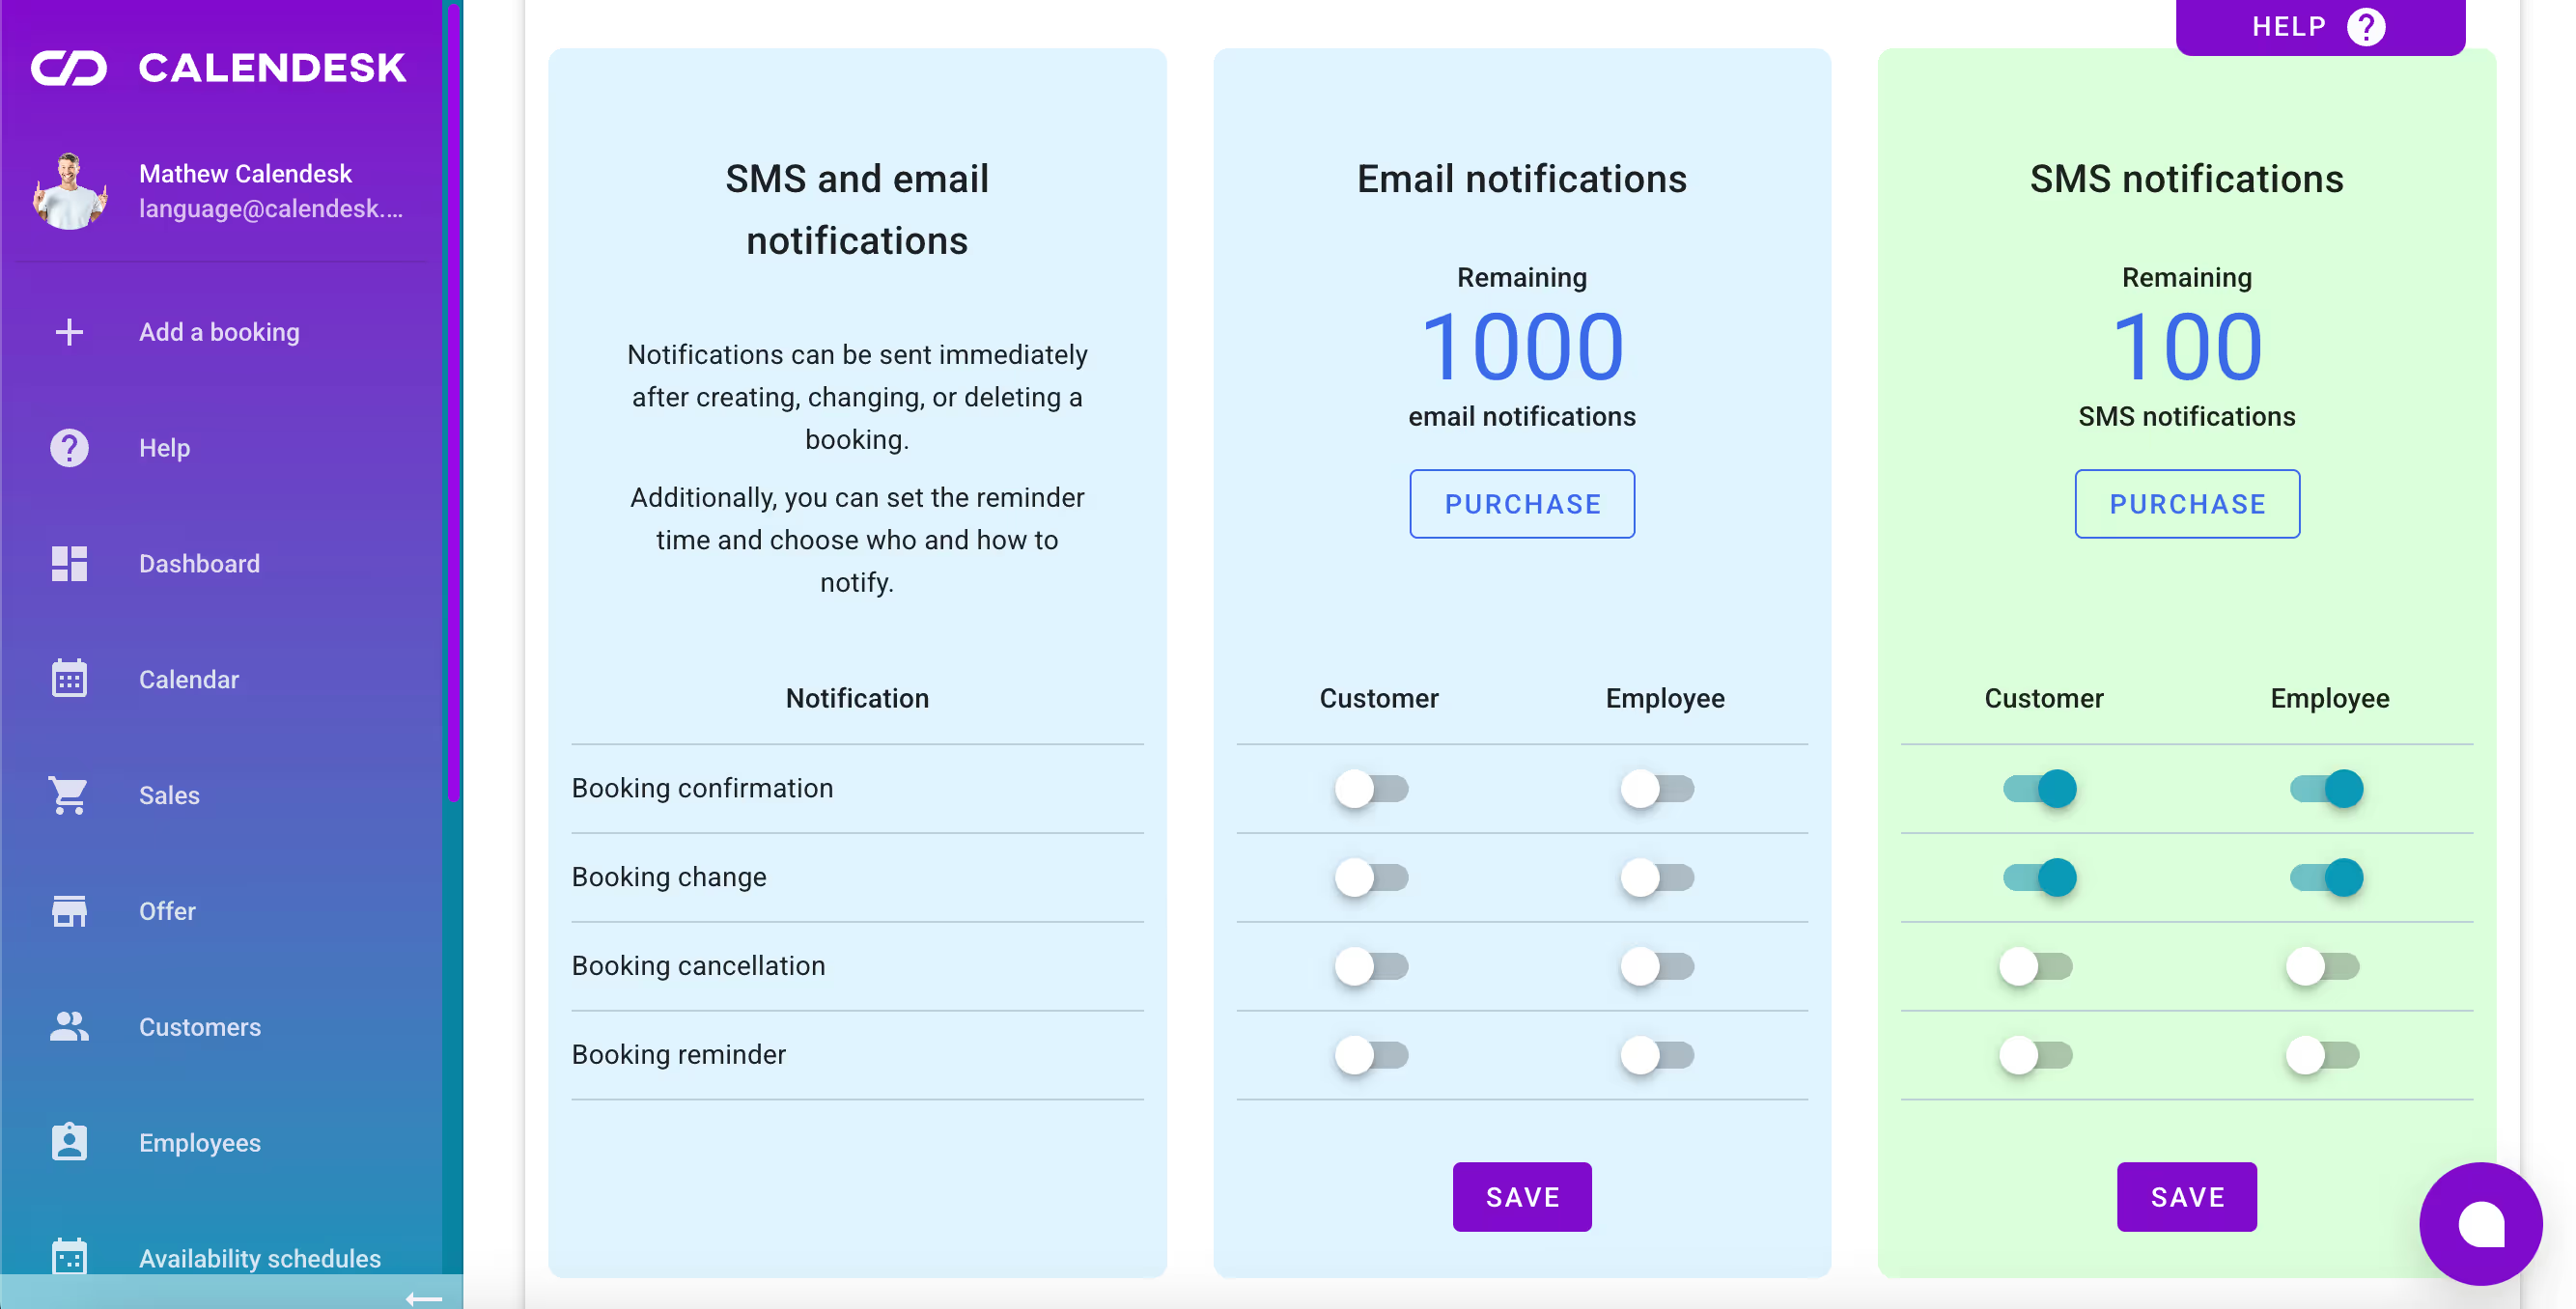
In the settings section, you can choose which notifications will be sent to your clients and employees. Notifications are divided into three types of messages:
- SMS,
- e-mail,
- push (only for employees)
You can learn how to edit the content of these notifications from the article How can I edit email, SMS, and push notifications?
Push notifications
Push notifications are messages that appear as a banner on your smartphone screen. They are free of charge and do not depend on the number of available SMS or email messages you have in your notification pool purchased from the Calendesk store. You can modify the content of these notifications, but you cannot change the settings related to the delivery of push notifications. These are currently sent independently, and they can only be disabled in the phone/app settings.
Email messages
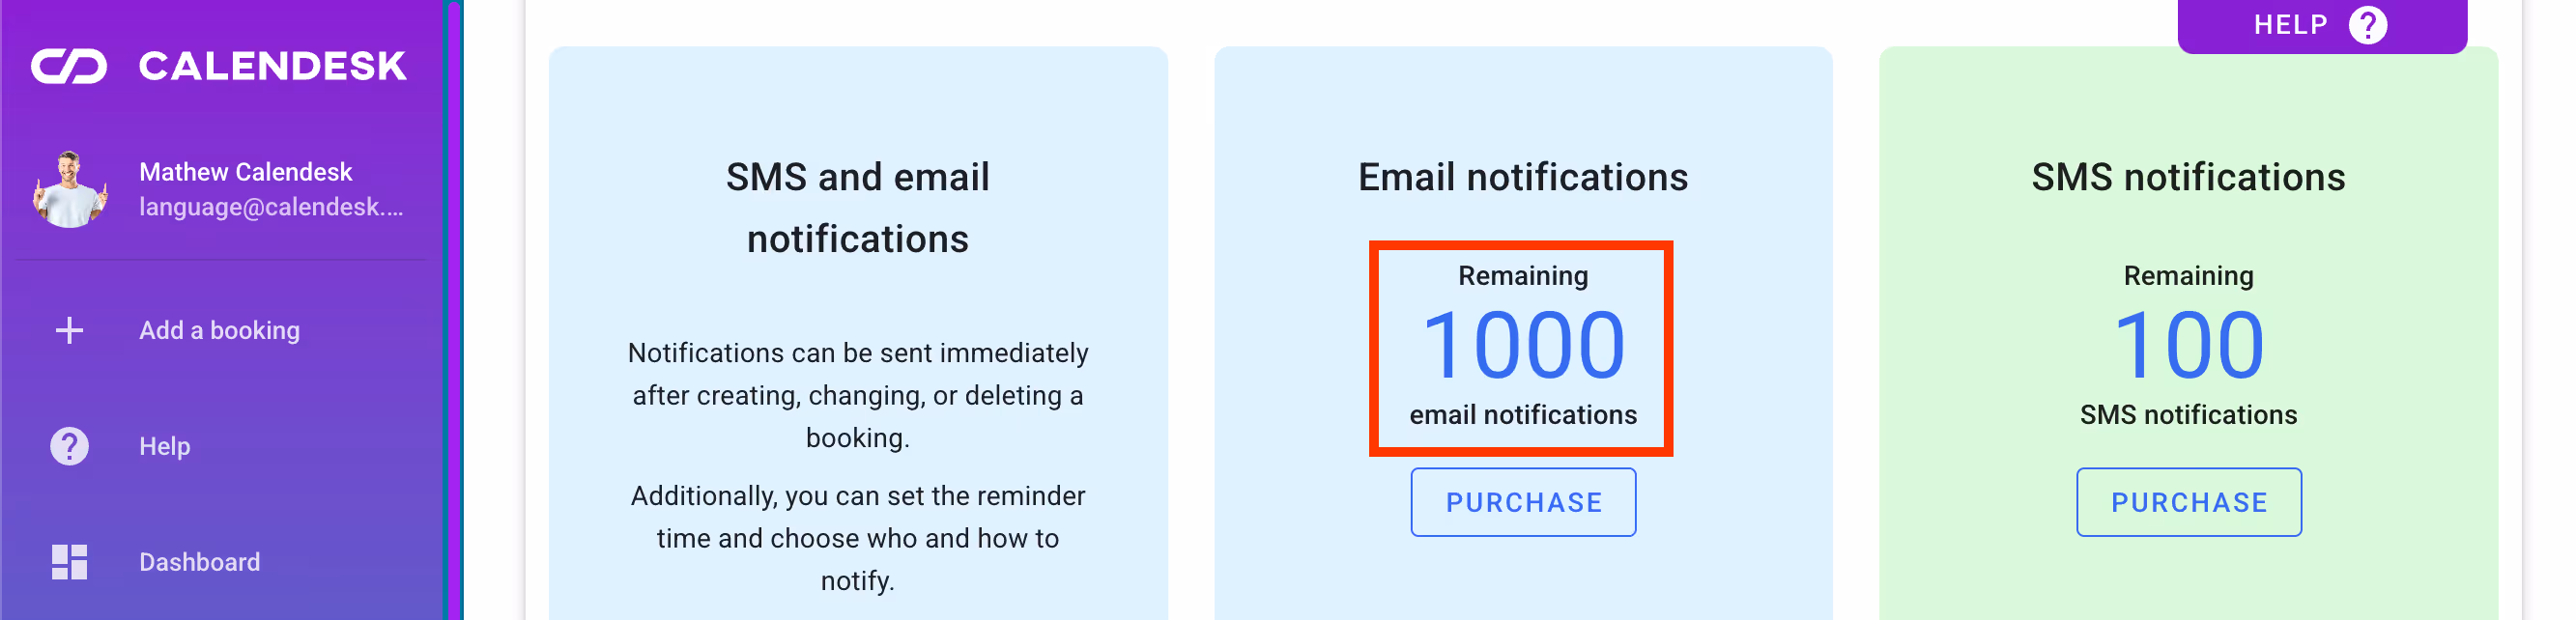
You can see the number of available email messages in the location indicated in the picture below.
These messages are sent to your customers' and employees' email inboxes and phone numbers that were provided during the registration in the Calendesk system. To learn how to change email addresses or phone numbers, refer to the articles How can I access and manage customers? and How can I access and manage employees?
Here you will find an attachment regarding the usage of the available SMS notification balance when sending to international numbers.
Top-up of the number of notifications
If you are nearing the limit of available SMS and email notifications, you should top up the number of notifications by purchasing an additional notification package. To buy more notifications, press the Purchase button located at the bottom of the remaining SMS or email message counter (as shown in the image above). If you haven't connected any payment method to the Calendesk portal, you will see the following message:
You don't have completed VAT invoice data. Go to the "Billing" tab and fill in the data.
You can learn how to connect a payment method in the article Where can I find invoices for Calendesk services?
If you have previously connected a payment method, your bank account will be charged the amount due for the selected notification package. All payments are processed through the Stripe system.
Activation and deactivation of notifications
Activating and deactivating notifications involves selecting the button located next to the name of each notification type. This way, the grey slider will turn blue when the notification is activated, and the blue slider will turn grey when the notification is deactivated.
Any change made in the notification management panel must be confirmed by pressing the Save button for it to take effect.