How can I add an employee?

Adding an employee
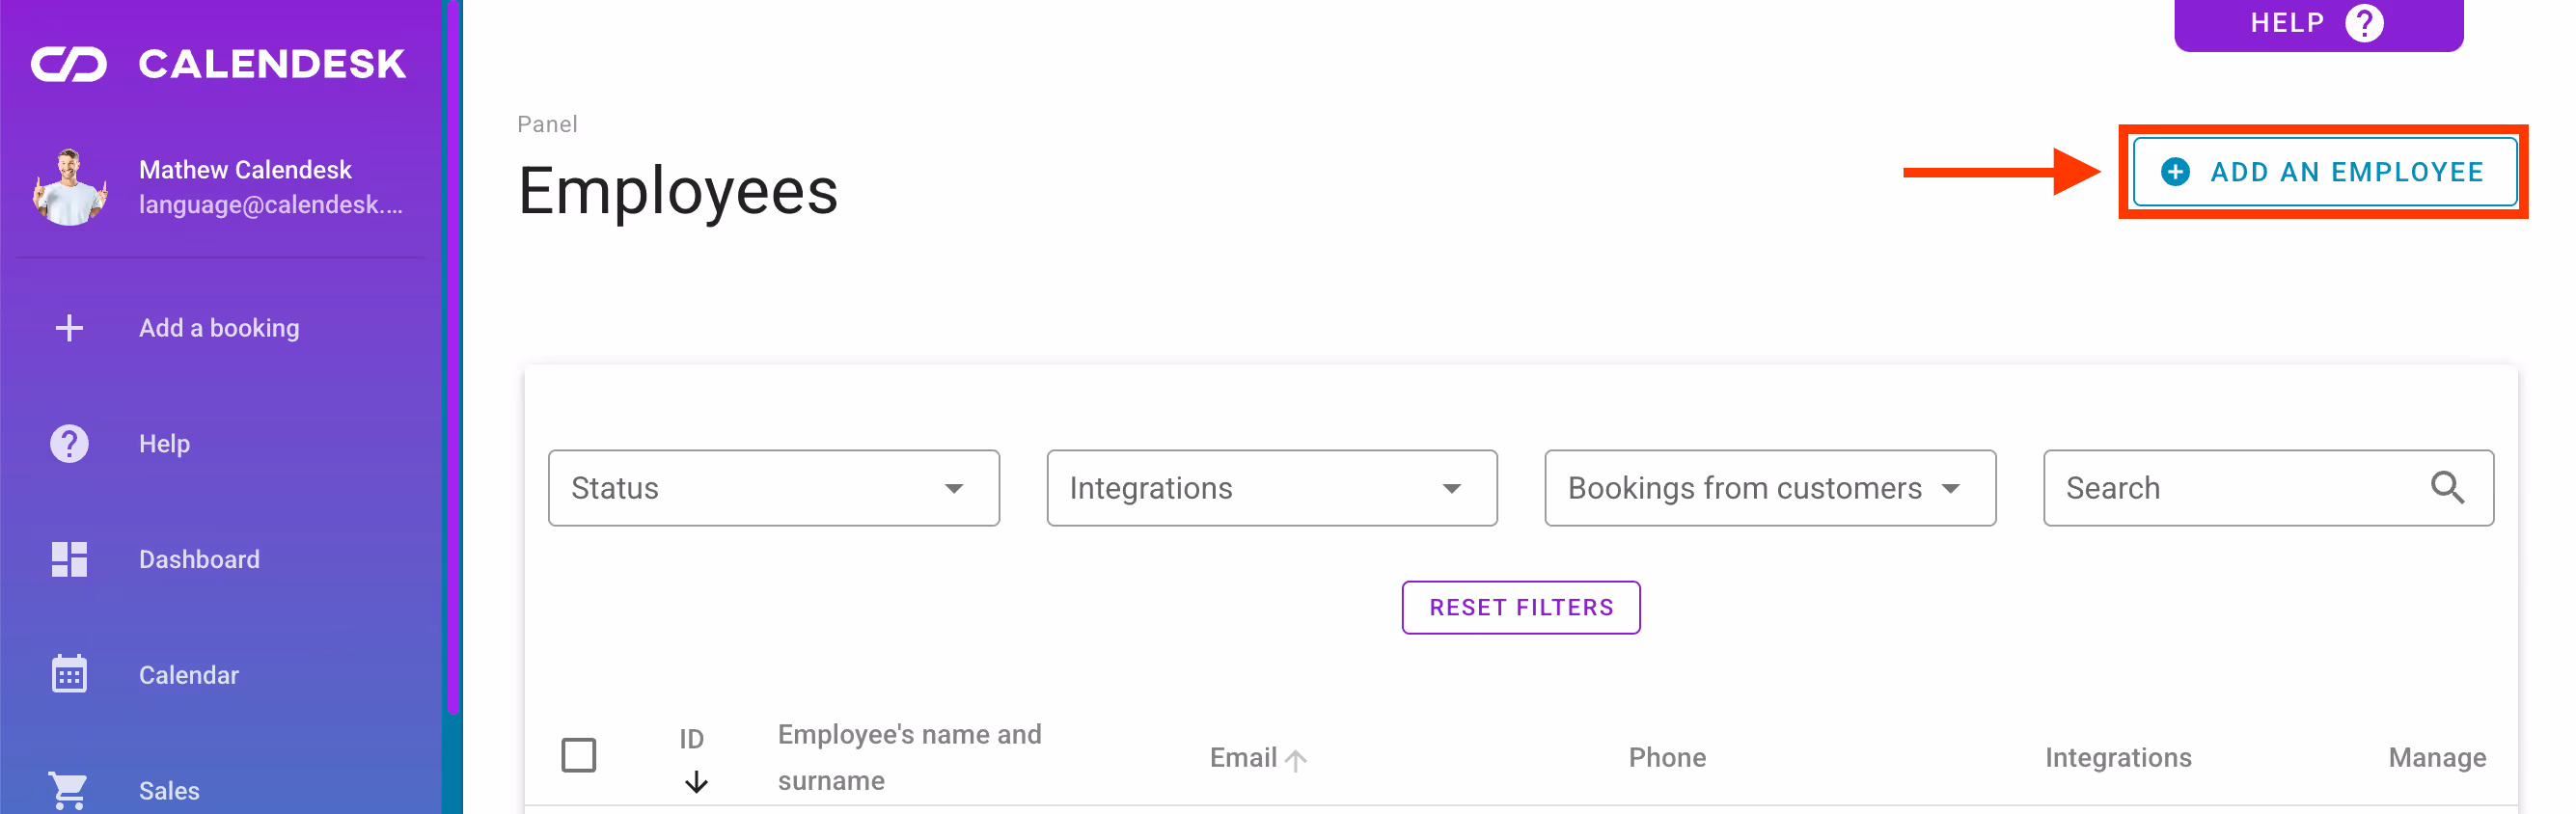
In the Employees tab, you can add an employee to your employee database. Using the Add an Employee button, you can enter details such as:
- the employee's first name,
- the employee's last name,
- the employee's email address,
- the employee's phone number.
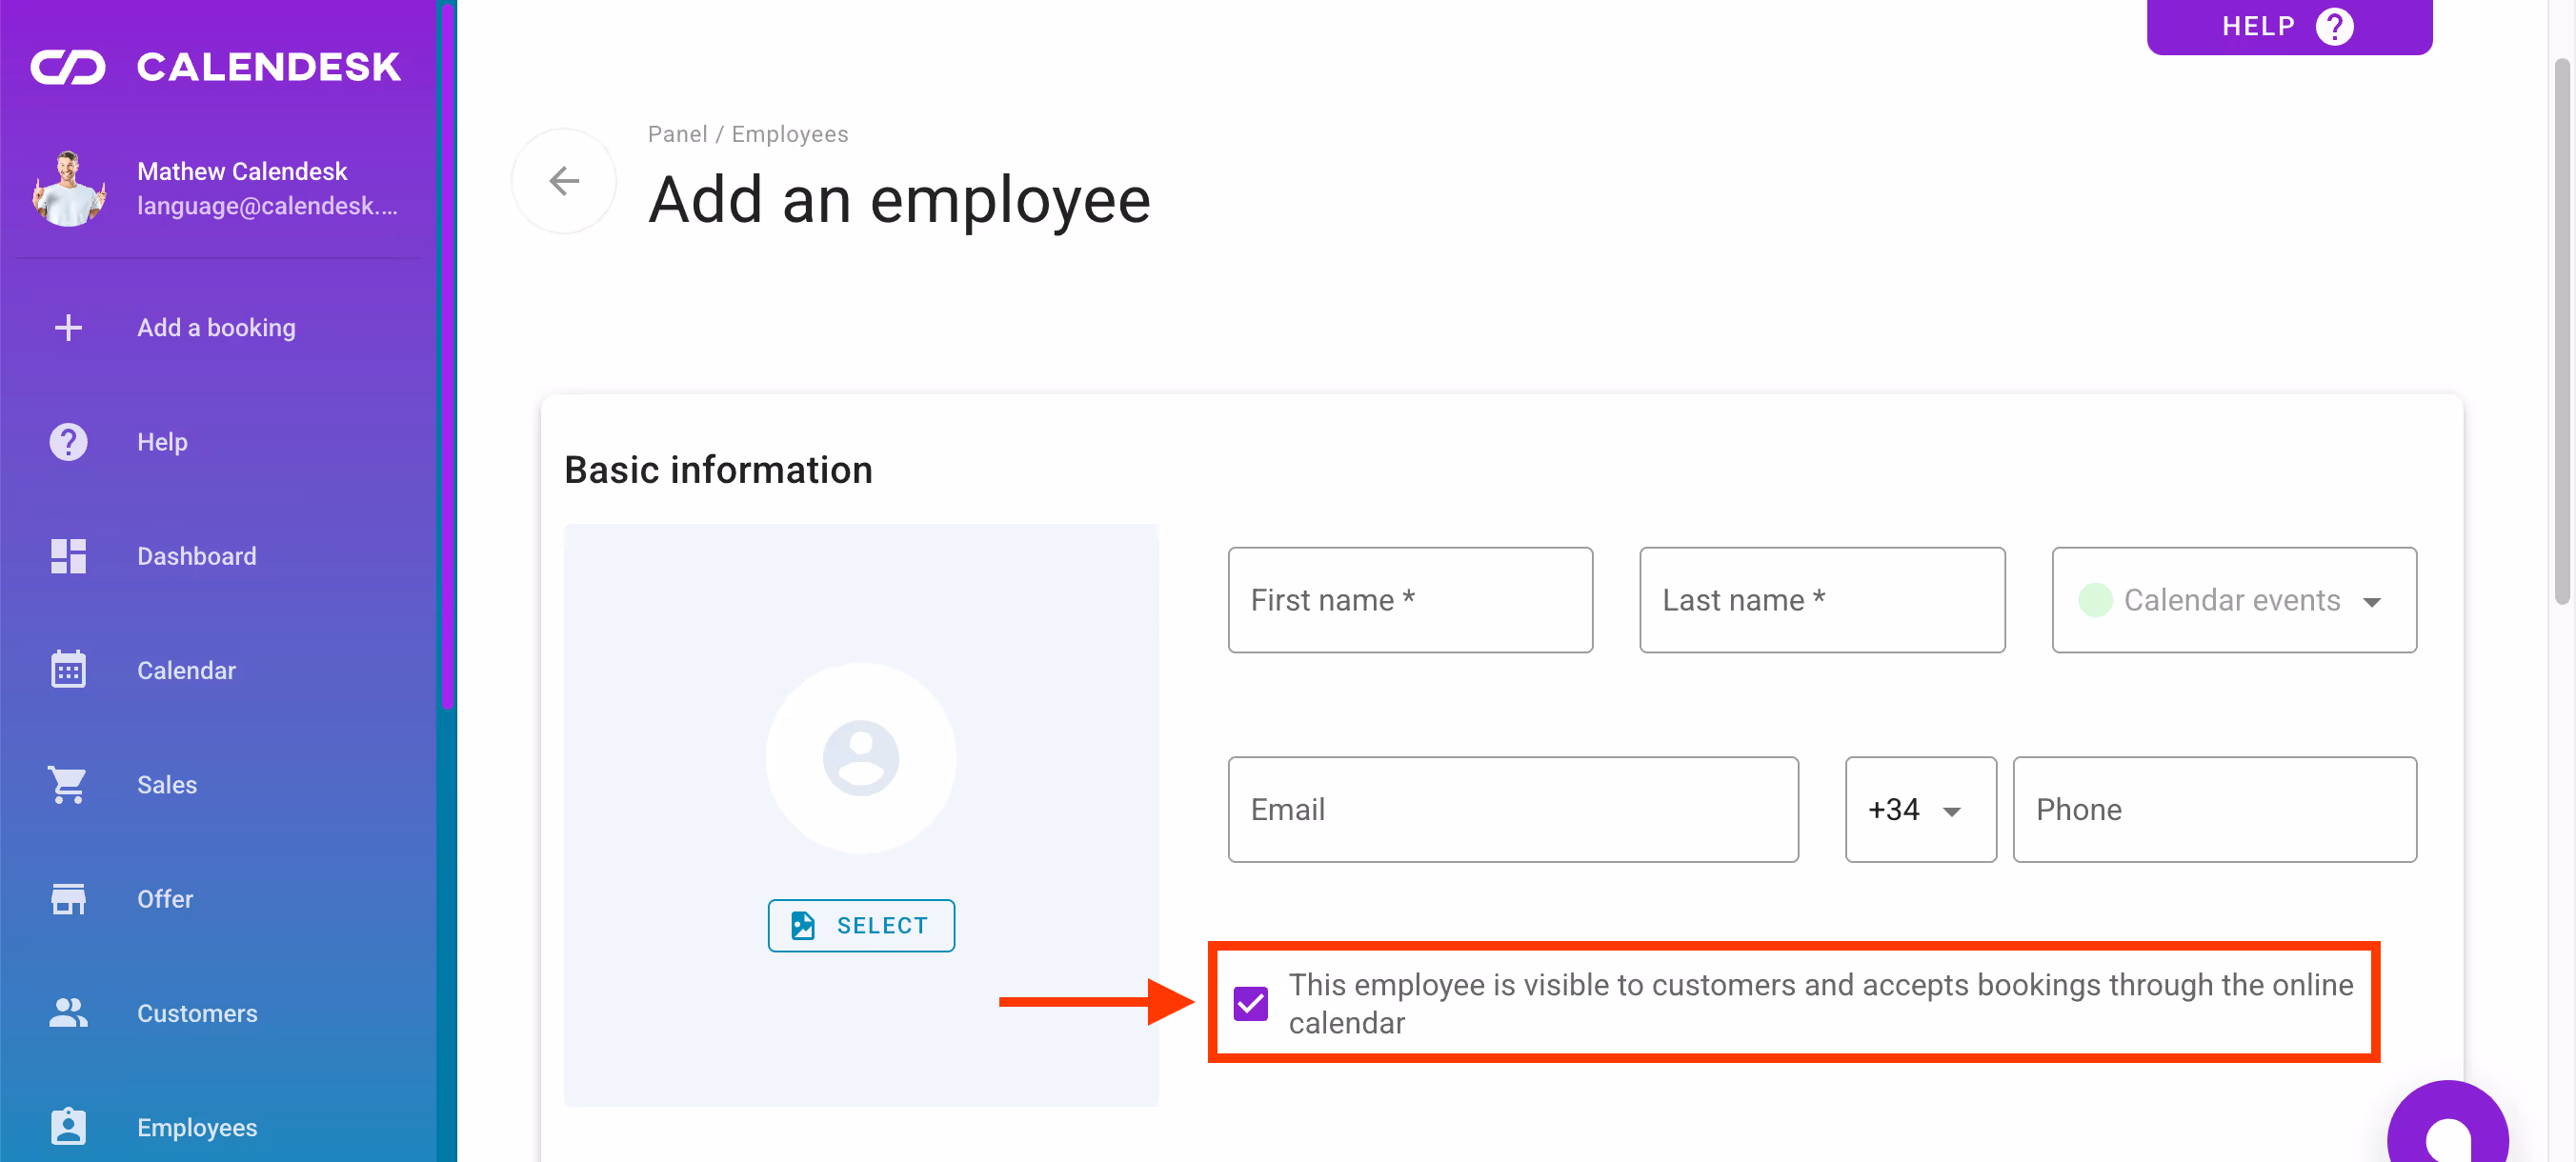
Here, you will decide whether the employee can accept bookings using the calendar published on your company’s website.
Permissions
Here, you can grant the employee access to log in to the Calendesk panel and assign the appropriate permissions.
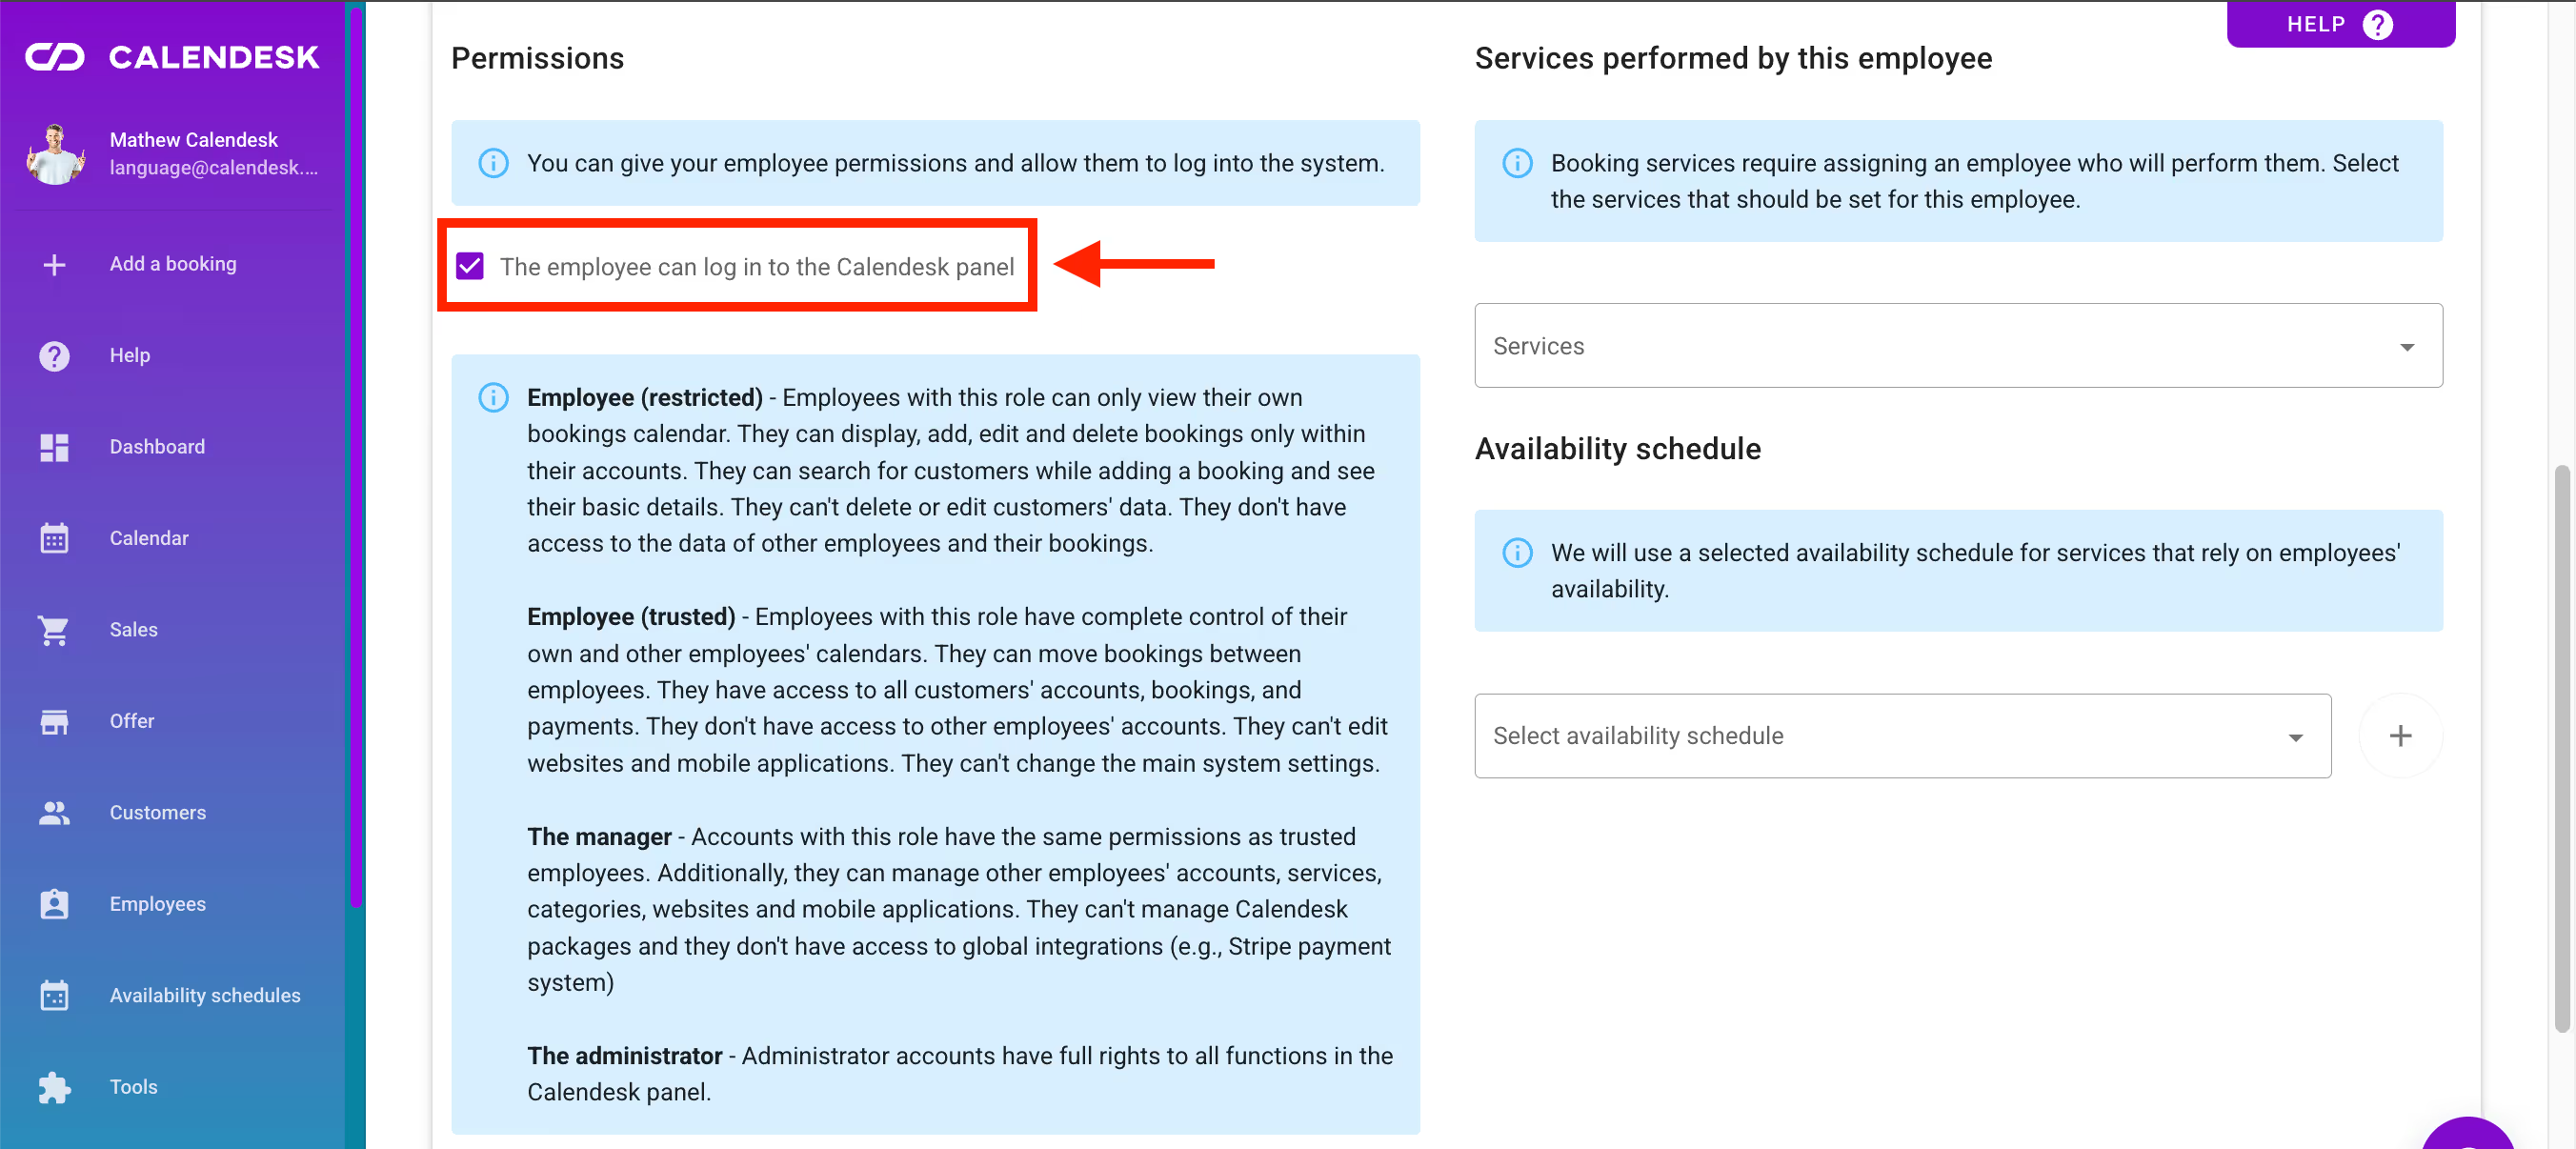
The available levels of employee permissions are:
- Restricted Employee:
- Manages own data and bookings.
- Cannot access other users’ data.
- Cannot delete bookings.
- Can add and edit bookings only for themselves and their own clients.
- Can create/edit own schedule, but cannot assign to others.
- Can delete their own availability schedule.
- Trusted Employee:
- Manages own data and all bookings.
- Can view but not edit other users’ data.
- Can add/edit bookings for all users.
- Has access to the Customers tab.
- Can create/edit own schedule, but cannot assign to others.
- Can delete availability schedules.
- Manager:
- Manages own data and all user data (except admin emails).
- Can manage (including delete) all bookings.
- Can view/edit data in other user accounts.
- Can add/edit bookings for all users.
- Can add new users (without login permissions).
- Access to Customers, Offer, Employees, Availability Schedules, Tools, and Notifications tabs.
- Cannot access Notifications – Settings, Notifications – Templates, Billing, and Settings.
- Administrator:
- Full system access.
- First admin (ID: 1) cannot downgrade permissions.
- Cannot change email address of the first admin.
During the creation/editing of a user profile, you can assign a colour that will be used in the Calendar tab when creating a booking for the employee. This colour will be used to highlight all bookings for that employee.
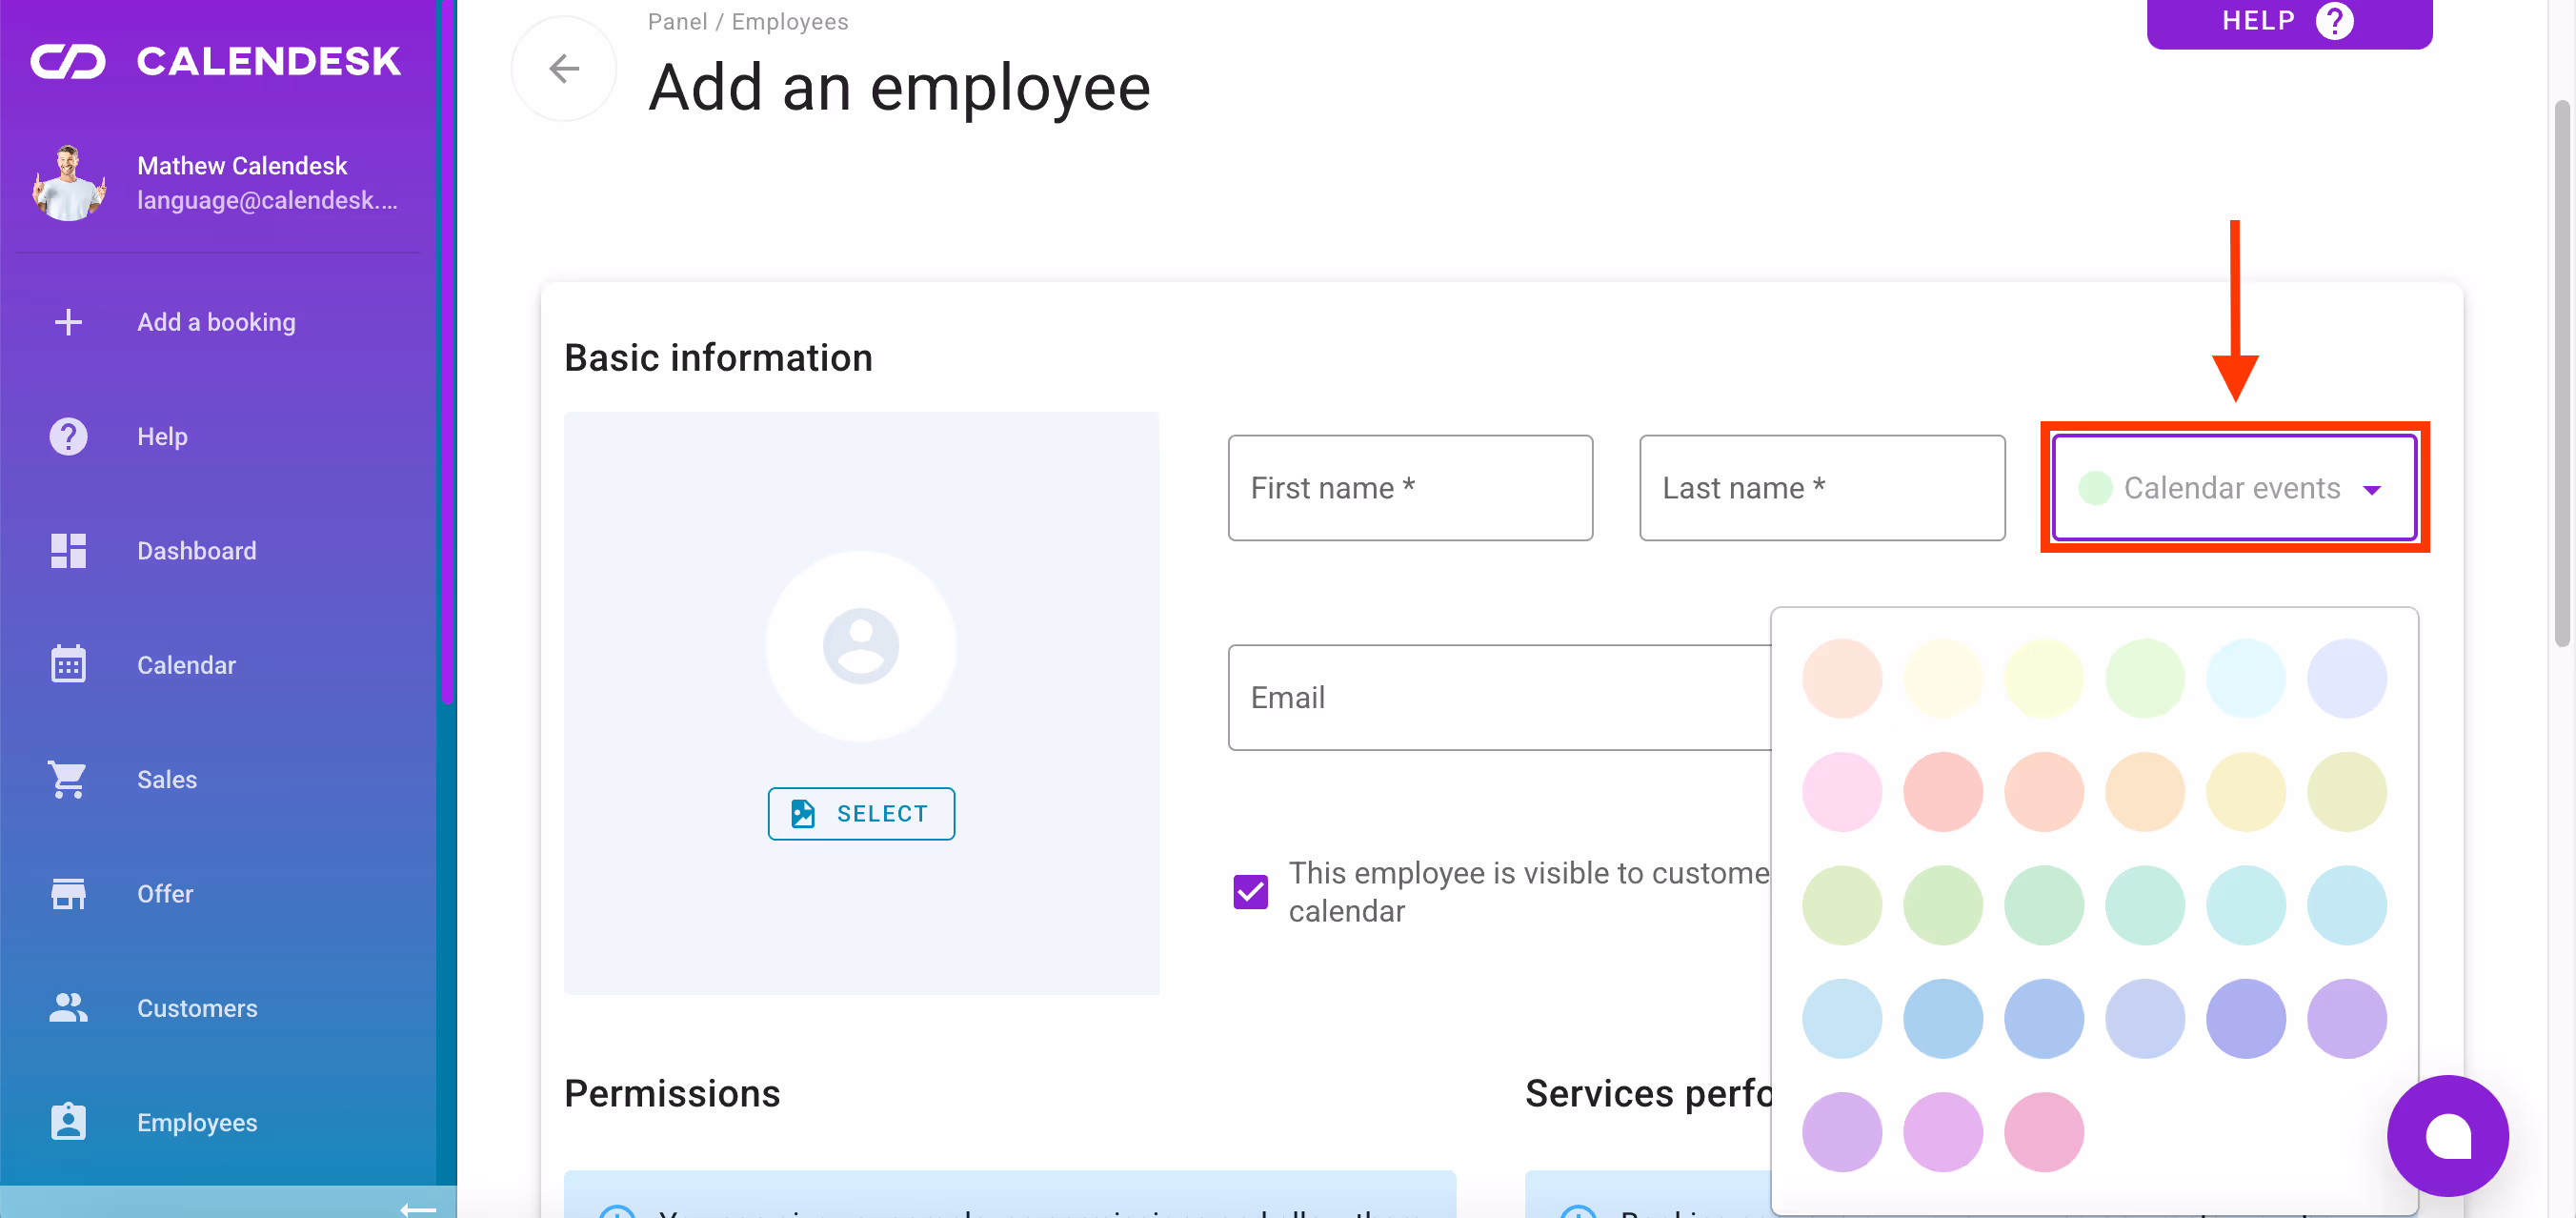
That's a very useful feature! If you remember which colours are assigned to your employees, you can easily see, without having to read the details, which employee is busy and which one is still available for a booking.

Additional information about the employee
After selecting the first checkbox, as shown in the image below, the employee's details entered in the form will be visible in certain sections of your website created in the Calendesk builder.
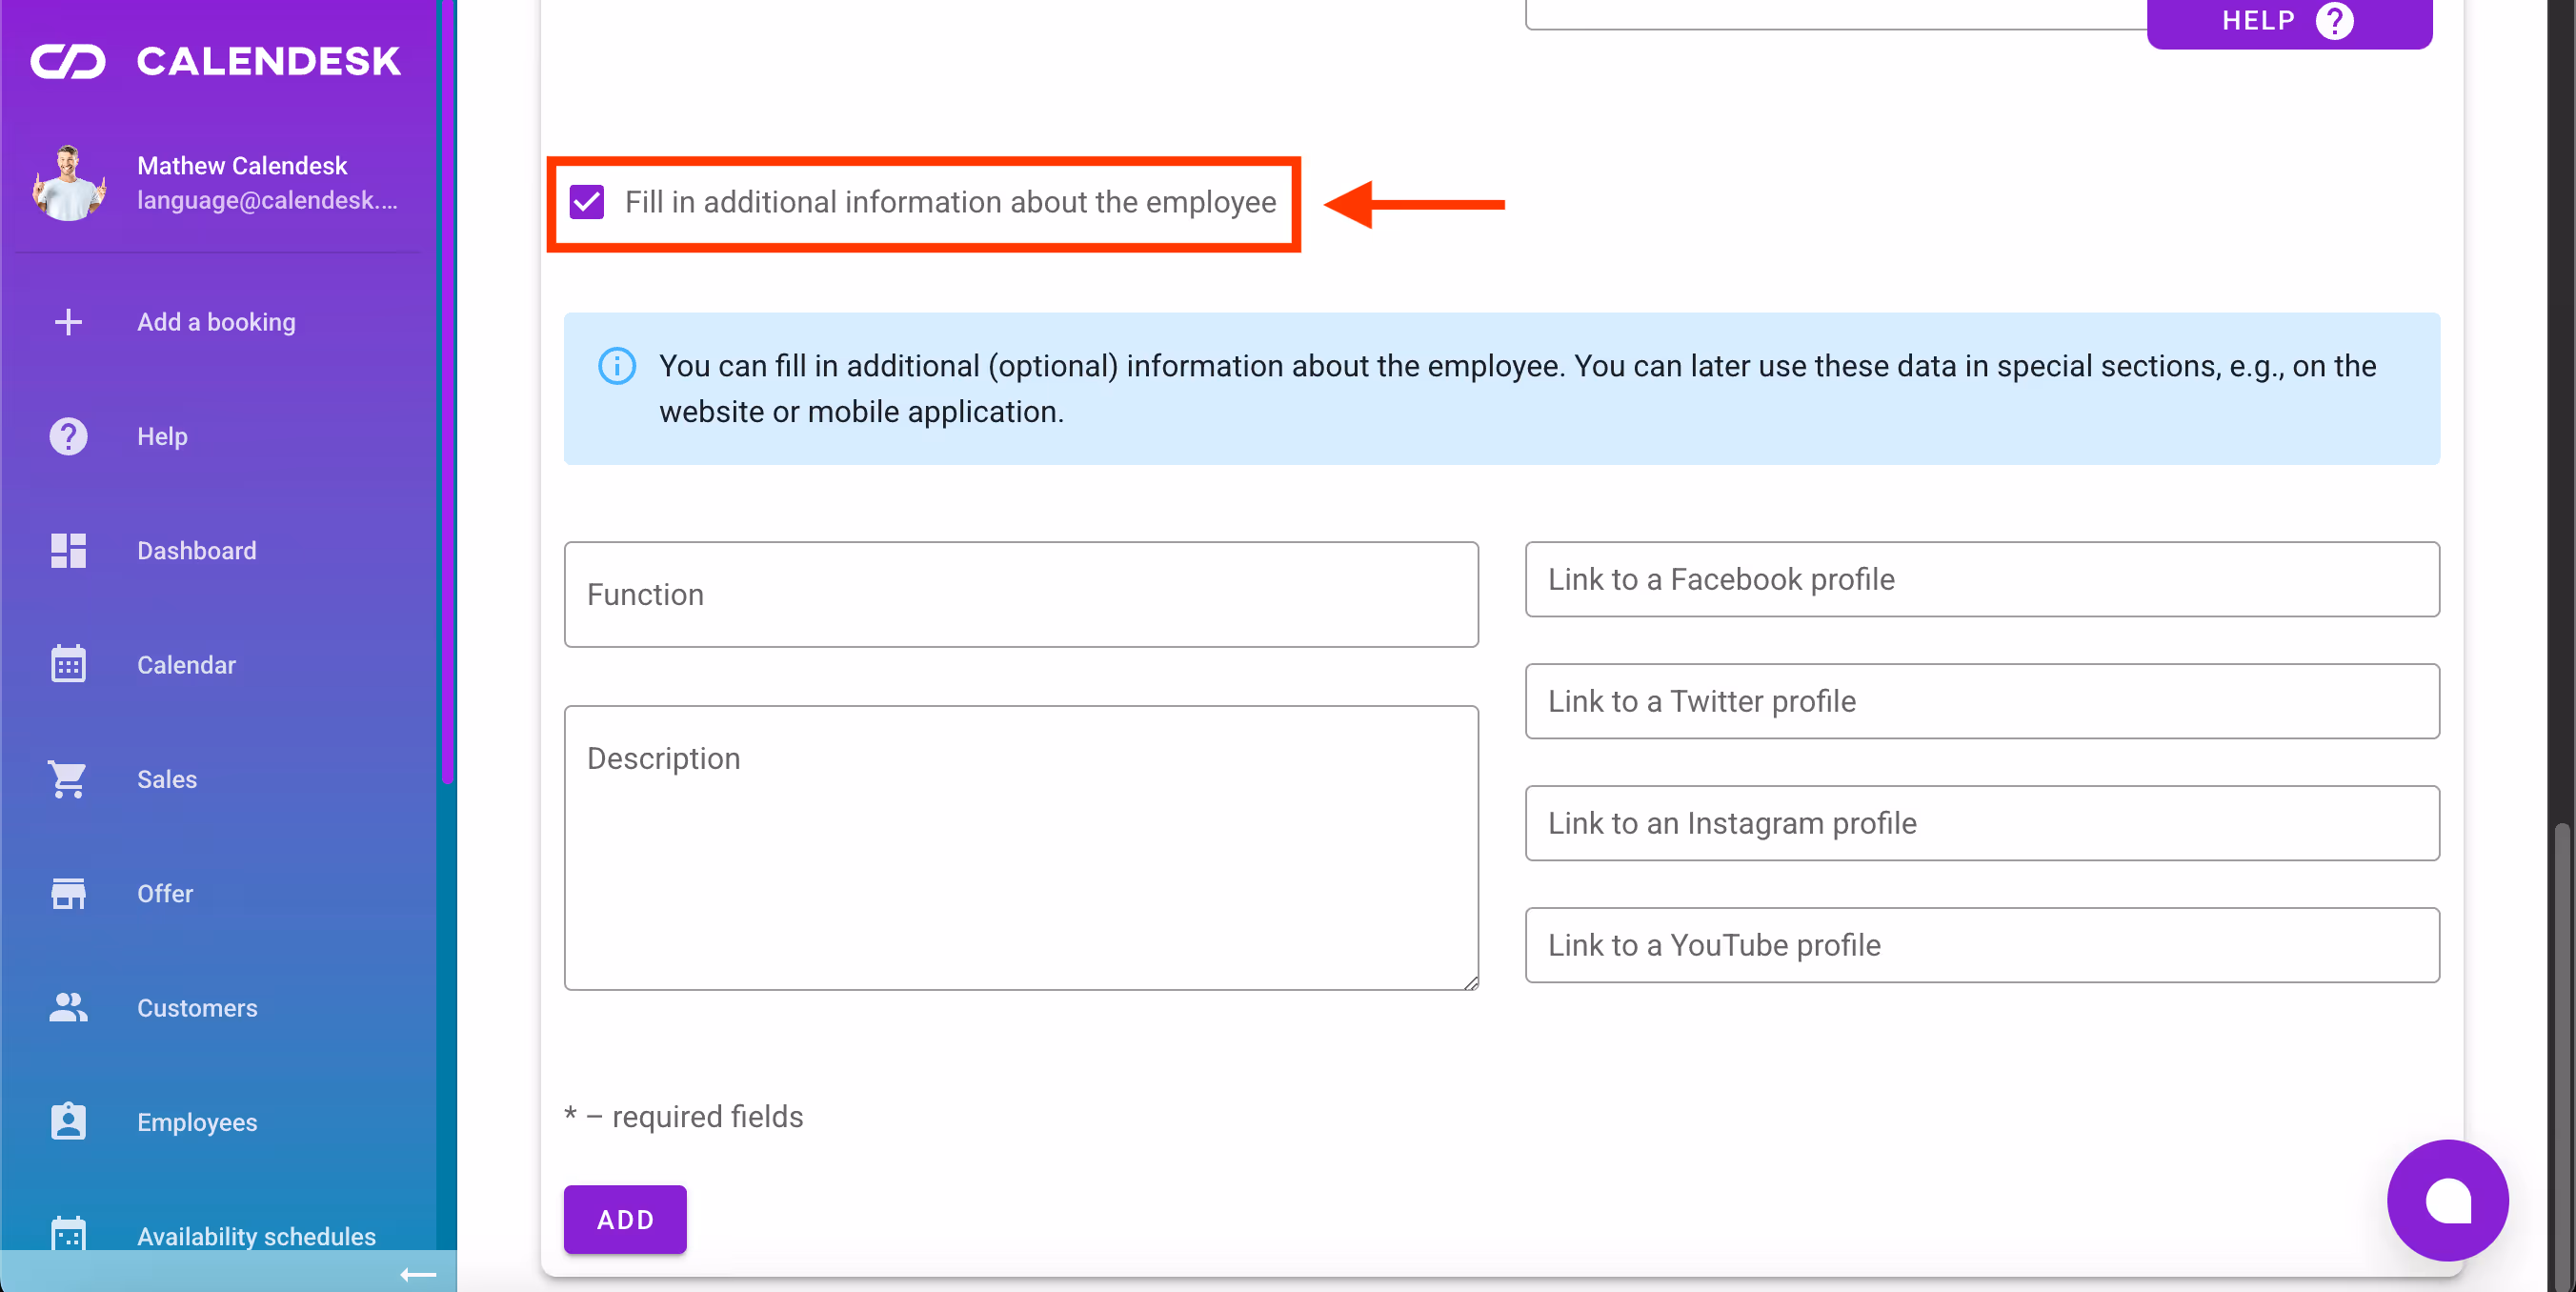
- job title,
- employee description,
- links to social media profiles:
- Facebook,
- Instagram,
- Twitter,
- YouTube.
First employee login
The first login of an employee takes place by navigating to this website:
https://admin.calendesk.com/en/
The employee should use the password reminder/reset option to set a new password. To use this option, the employee needs to visit this website:
https://admin.calendesk.com/en/
and select the button marked below:
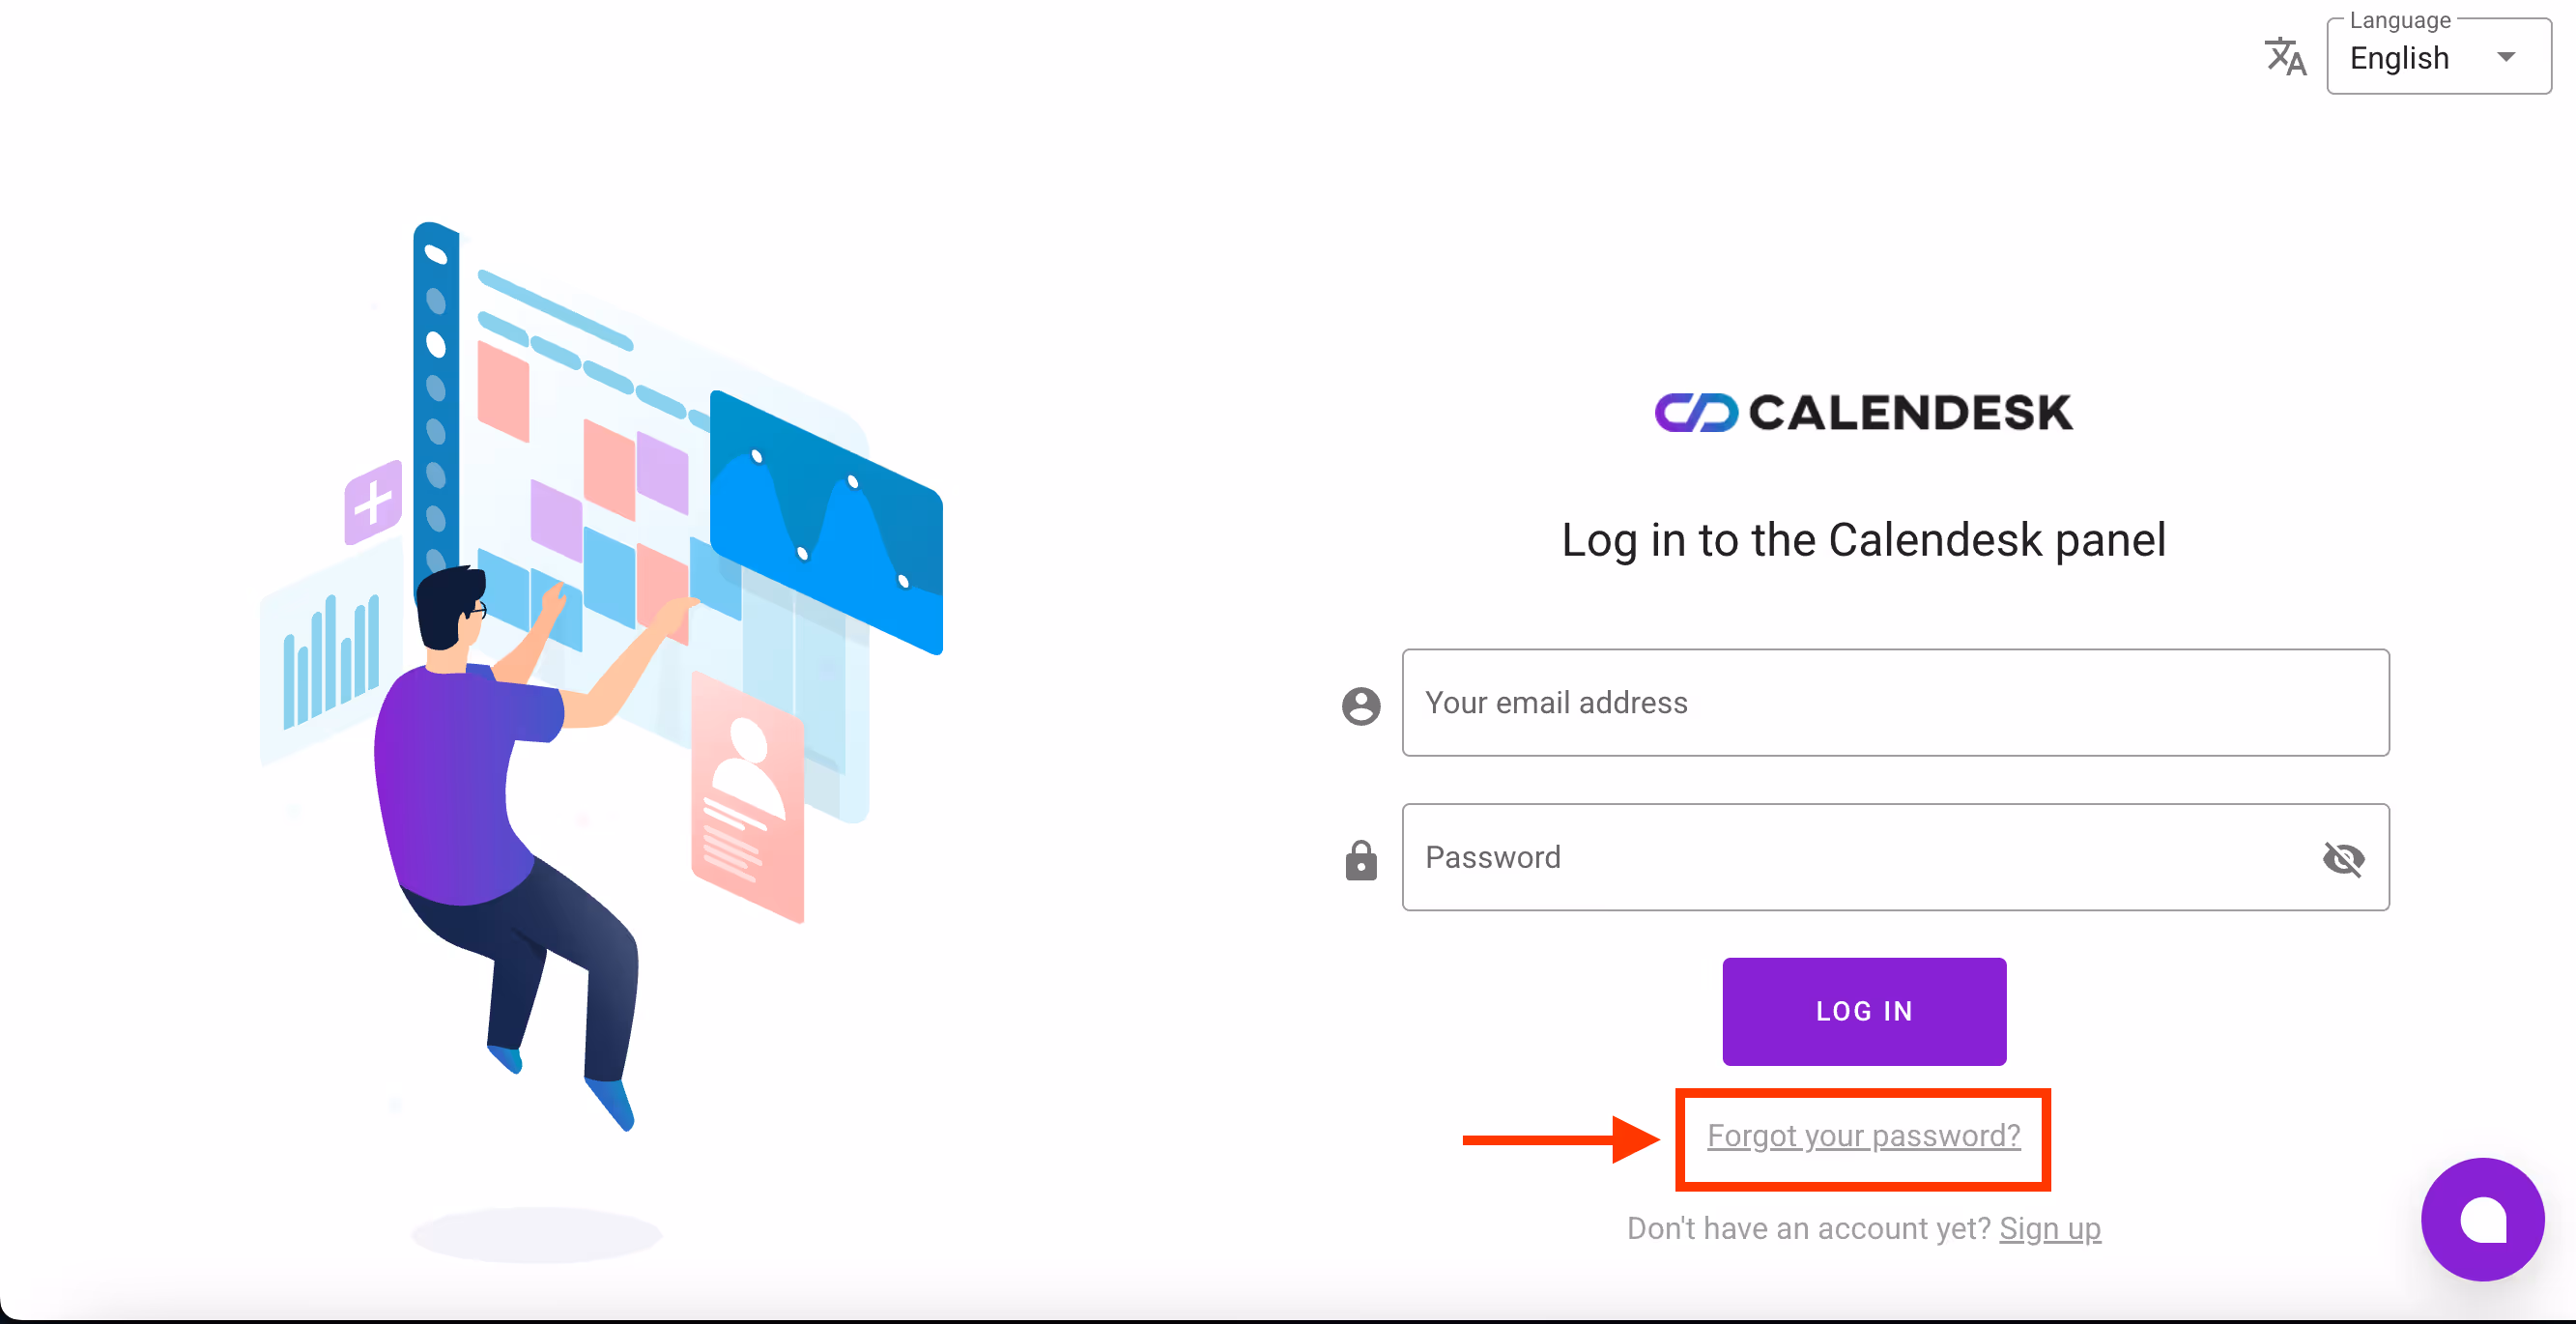
After entering the email address in this field, our system will send a password reset link to the specified address. Once the password is set, the employee will be able to log in using the new credentials.
Note: If the Employee can log in to the Calendesk panel option is not selected in the employee's profile, the link will not be sent, and the employee will not be able to set a password.