How to add custom fields to your website booking system?
Editing the booking form
A well-designed reservation form significantly facilitates the scheduling of business appointments. By using a booking form, you can gather the necessary information and materials for providing your service. You can edit such a form using the Calendesk website builder. This article will guide you through the process.
- First, log in to the Calendesk Panel, then go to the Tools – Websites tab.
- Select the page you want to edit. You will be redirected to the website editor.
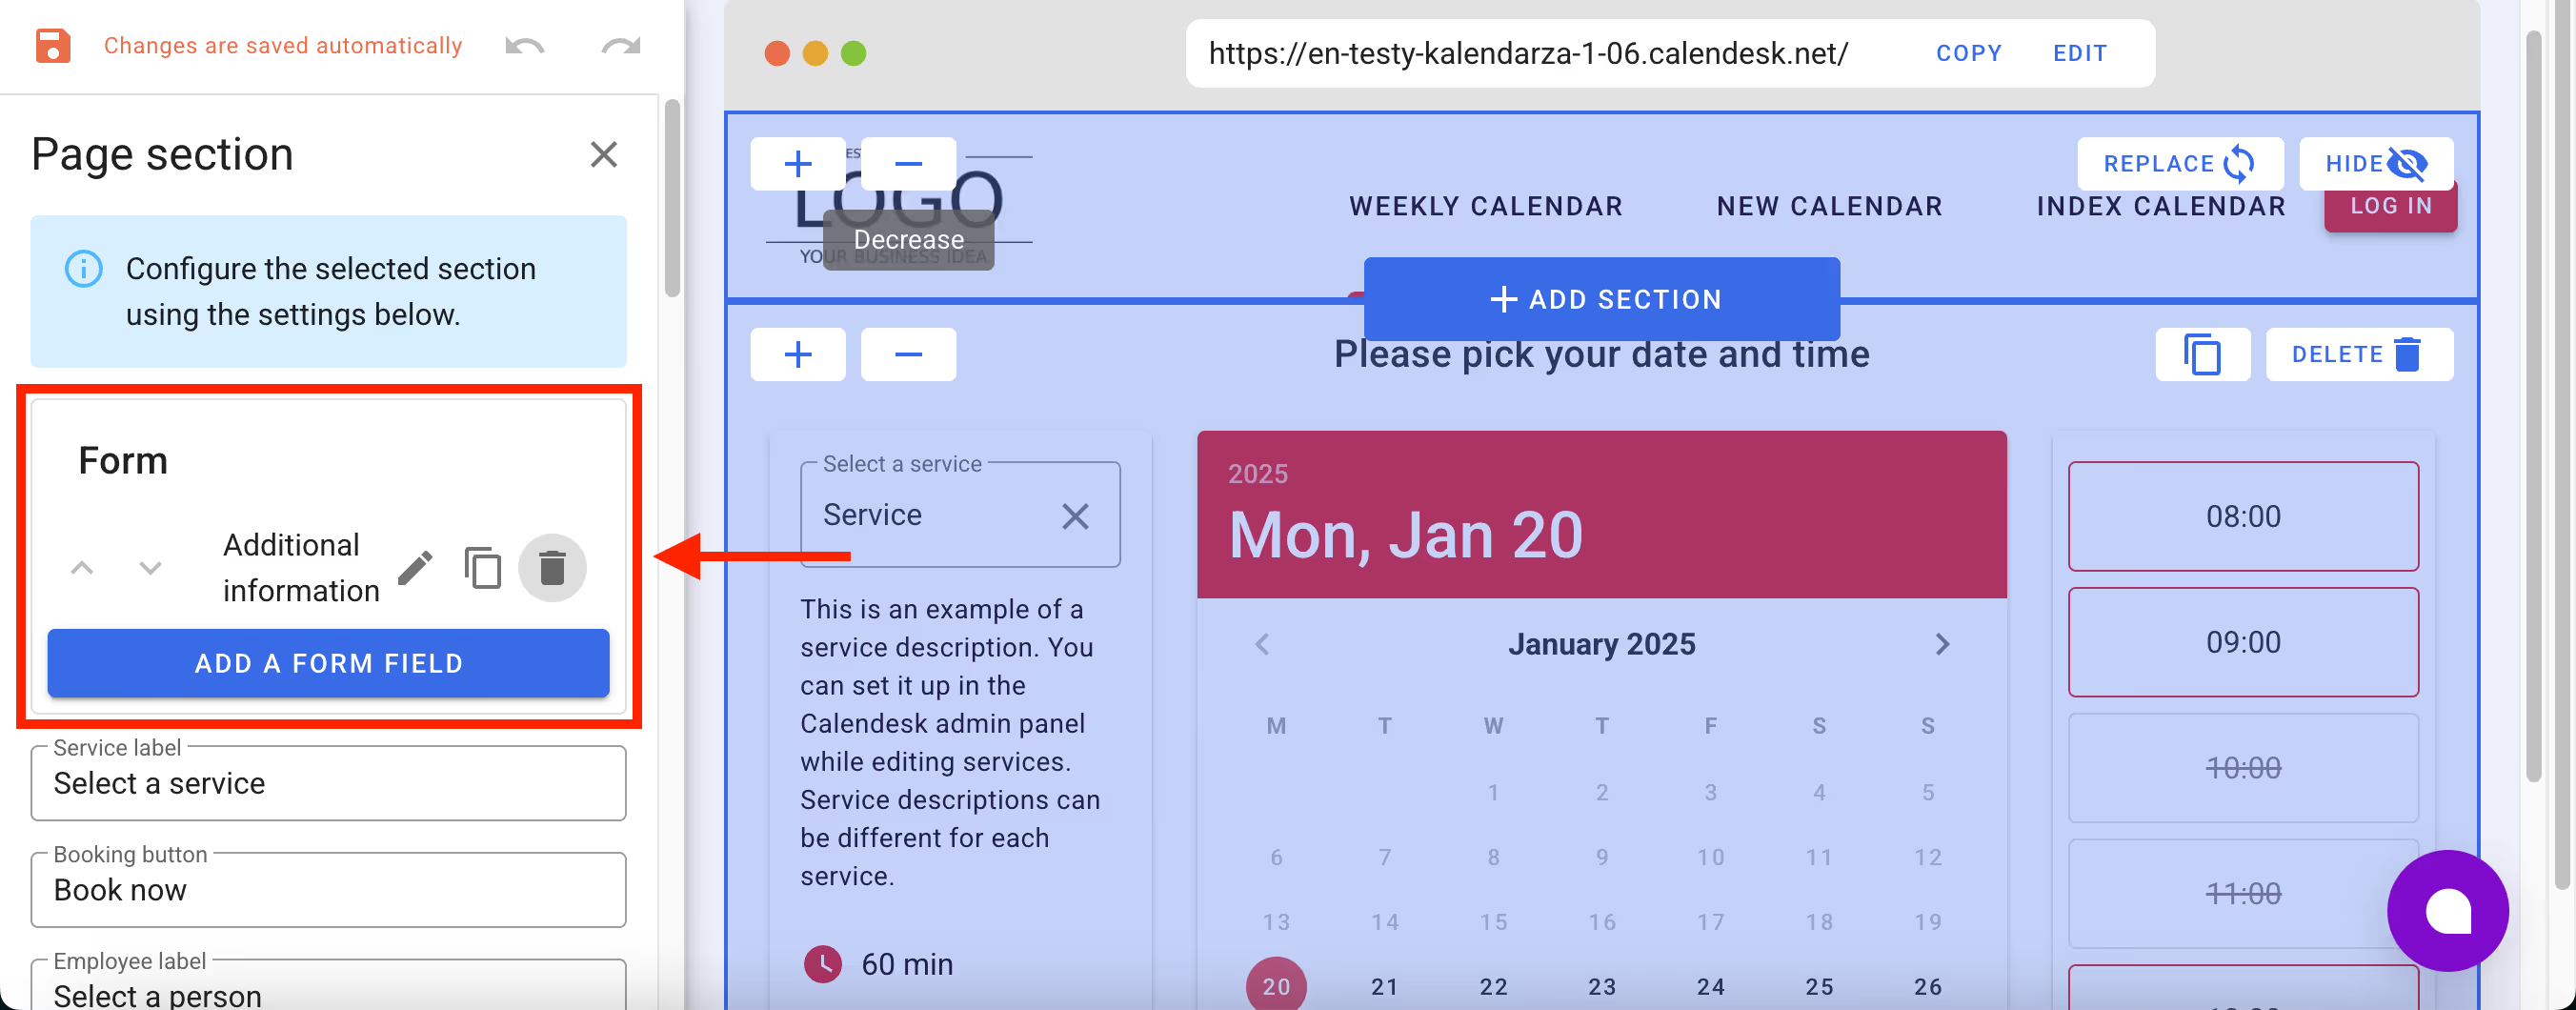
- Now, you need to locate the section with the calendar and proceed to edit it. Focus on the very top of the visible panel on the left side of the screen, specifically on the Form section.
Editing the content of the form
- After locating the Form section (as marked in the image above), click the Add a form field button to create an additional form field.
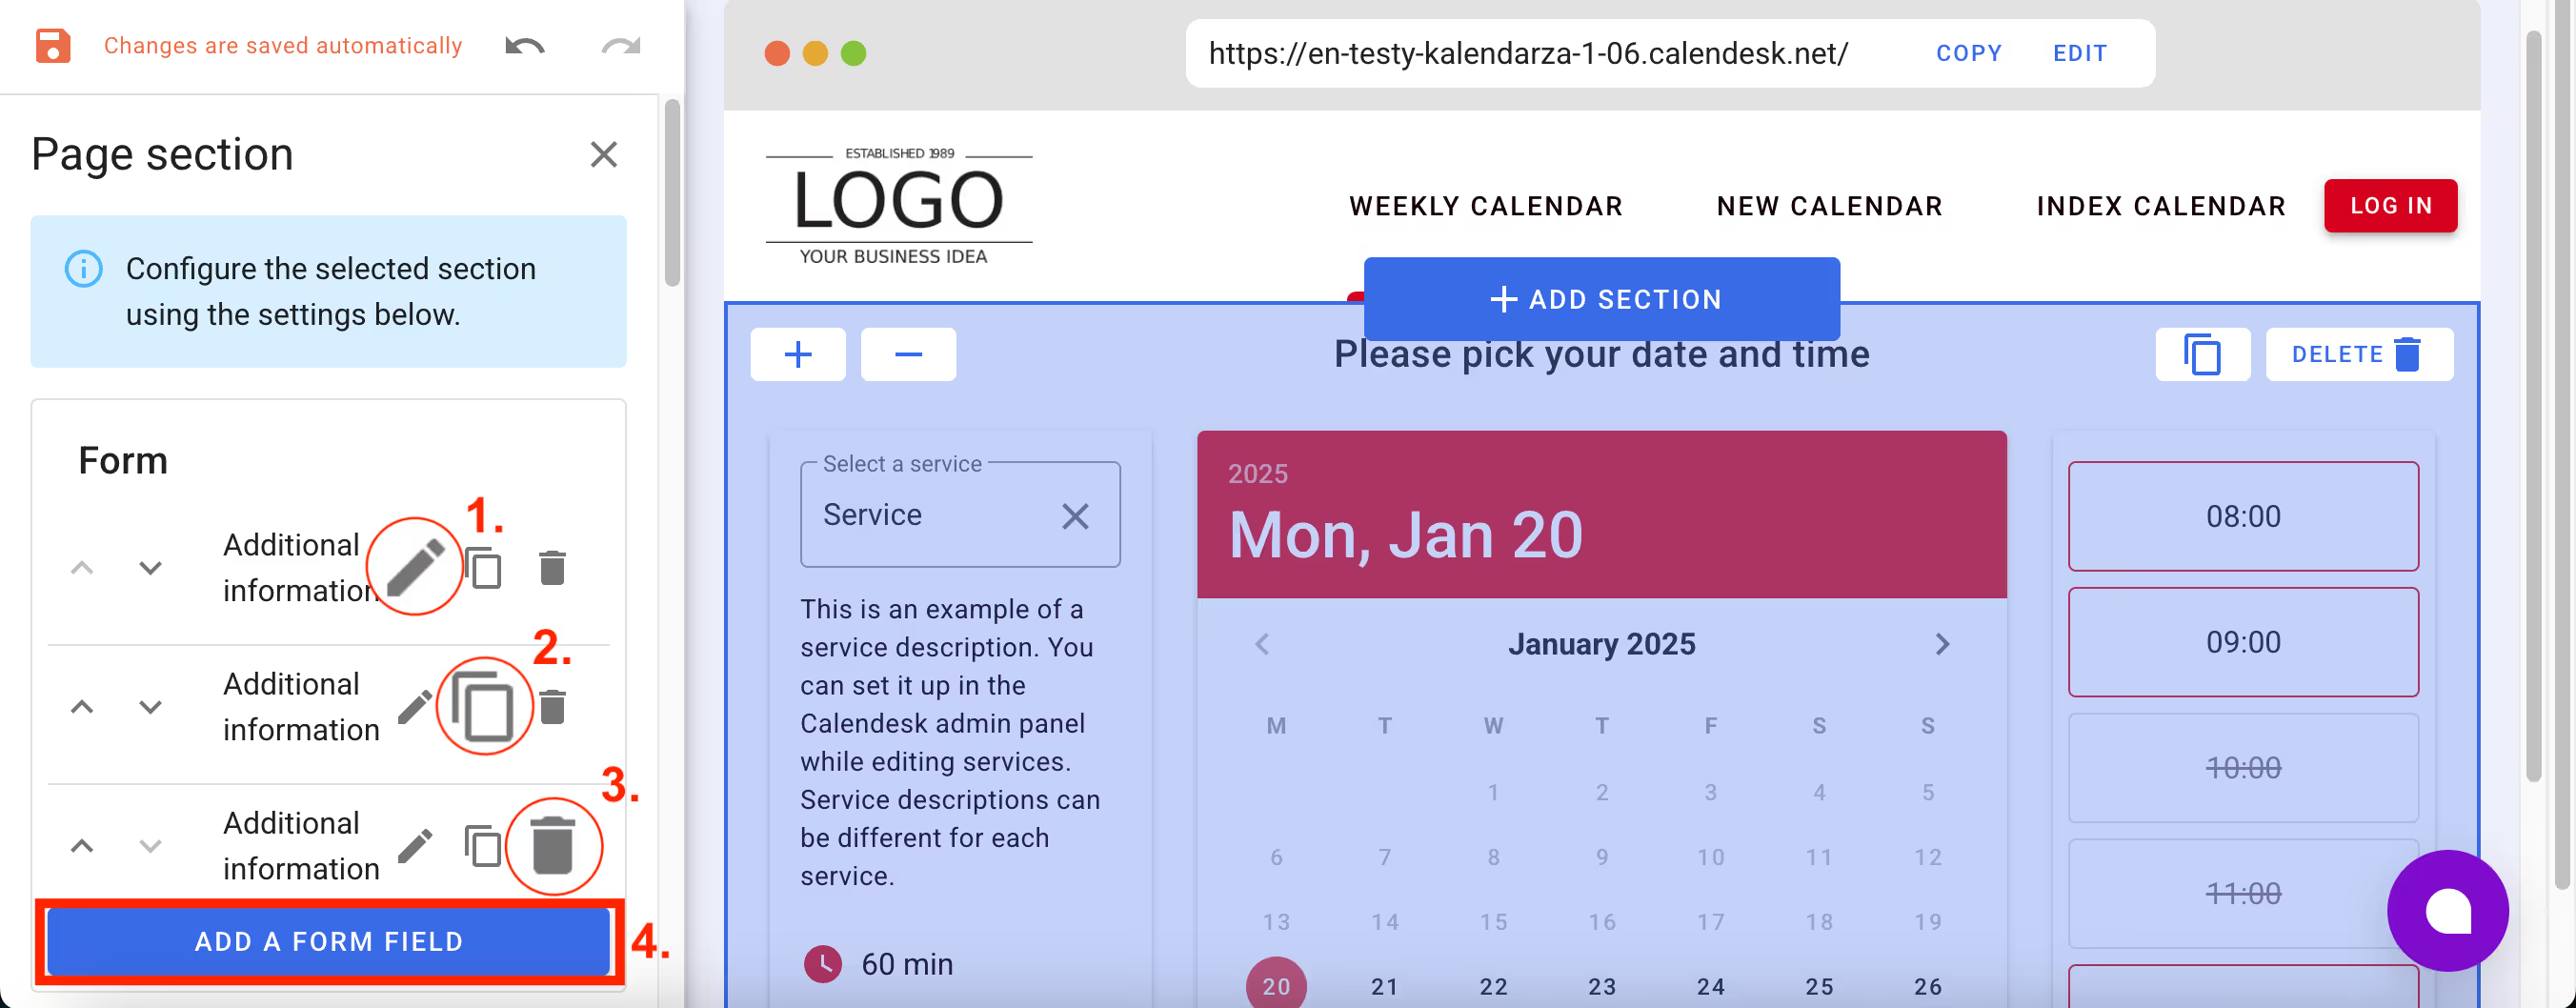
- If you don’t want to create new fields, you can select the pencil icon, which allows you to edit an existing form field. In the area indicated in the image below, you can modify the fields that will appear in the form.
- The small pencil icon (1) is the option for editing a field in the form.
- The trash can icon (3) allows you to delete a field.
- The icon between them (2) is used to duplicate existing form fields.
There is also a large blue button (4) labeled Add a form field, which you can use to add new fields to the form.
When editing or adding a new form field, you will see several options that allow you to customize the form to your needs.
- Types of Fields – You can choose from several types of form fields:
- text area – a multi-line text field,
- text field – a standard single-line text field,
- checkbox – allows the selection of an option (e.g., acceptance of terms and conditions),
- radio button – enables the creation of multiple options, where only one can be selected,
- email – a field for entering an email address,
- phone – a field for entering a phone number,
- address,
- attachments field.
- Mandatory field – Decide whether filling out or selecting a particular field is mandatory.
- Label – Information displayed within the text field, suggesting what the customer can enter.
- Description – This is placed above the form field. It is a space where you can add additional information about the form or the specific field.
- Check against the value (available only for text field) – A field where you can specify a value the customer must enter for the system to accept the booking.
Attachments Field
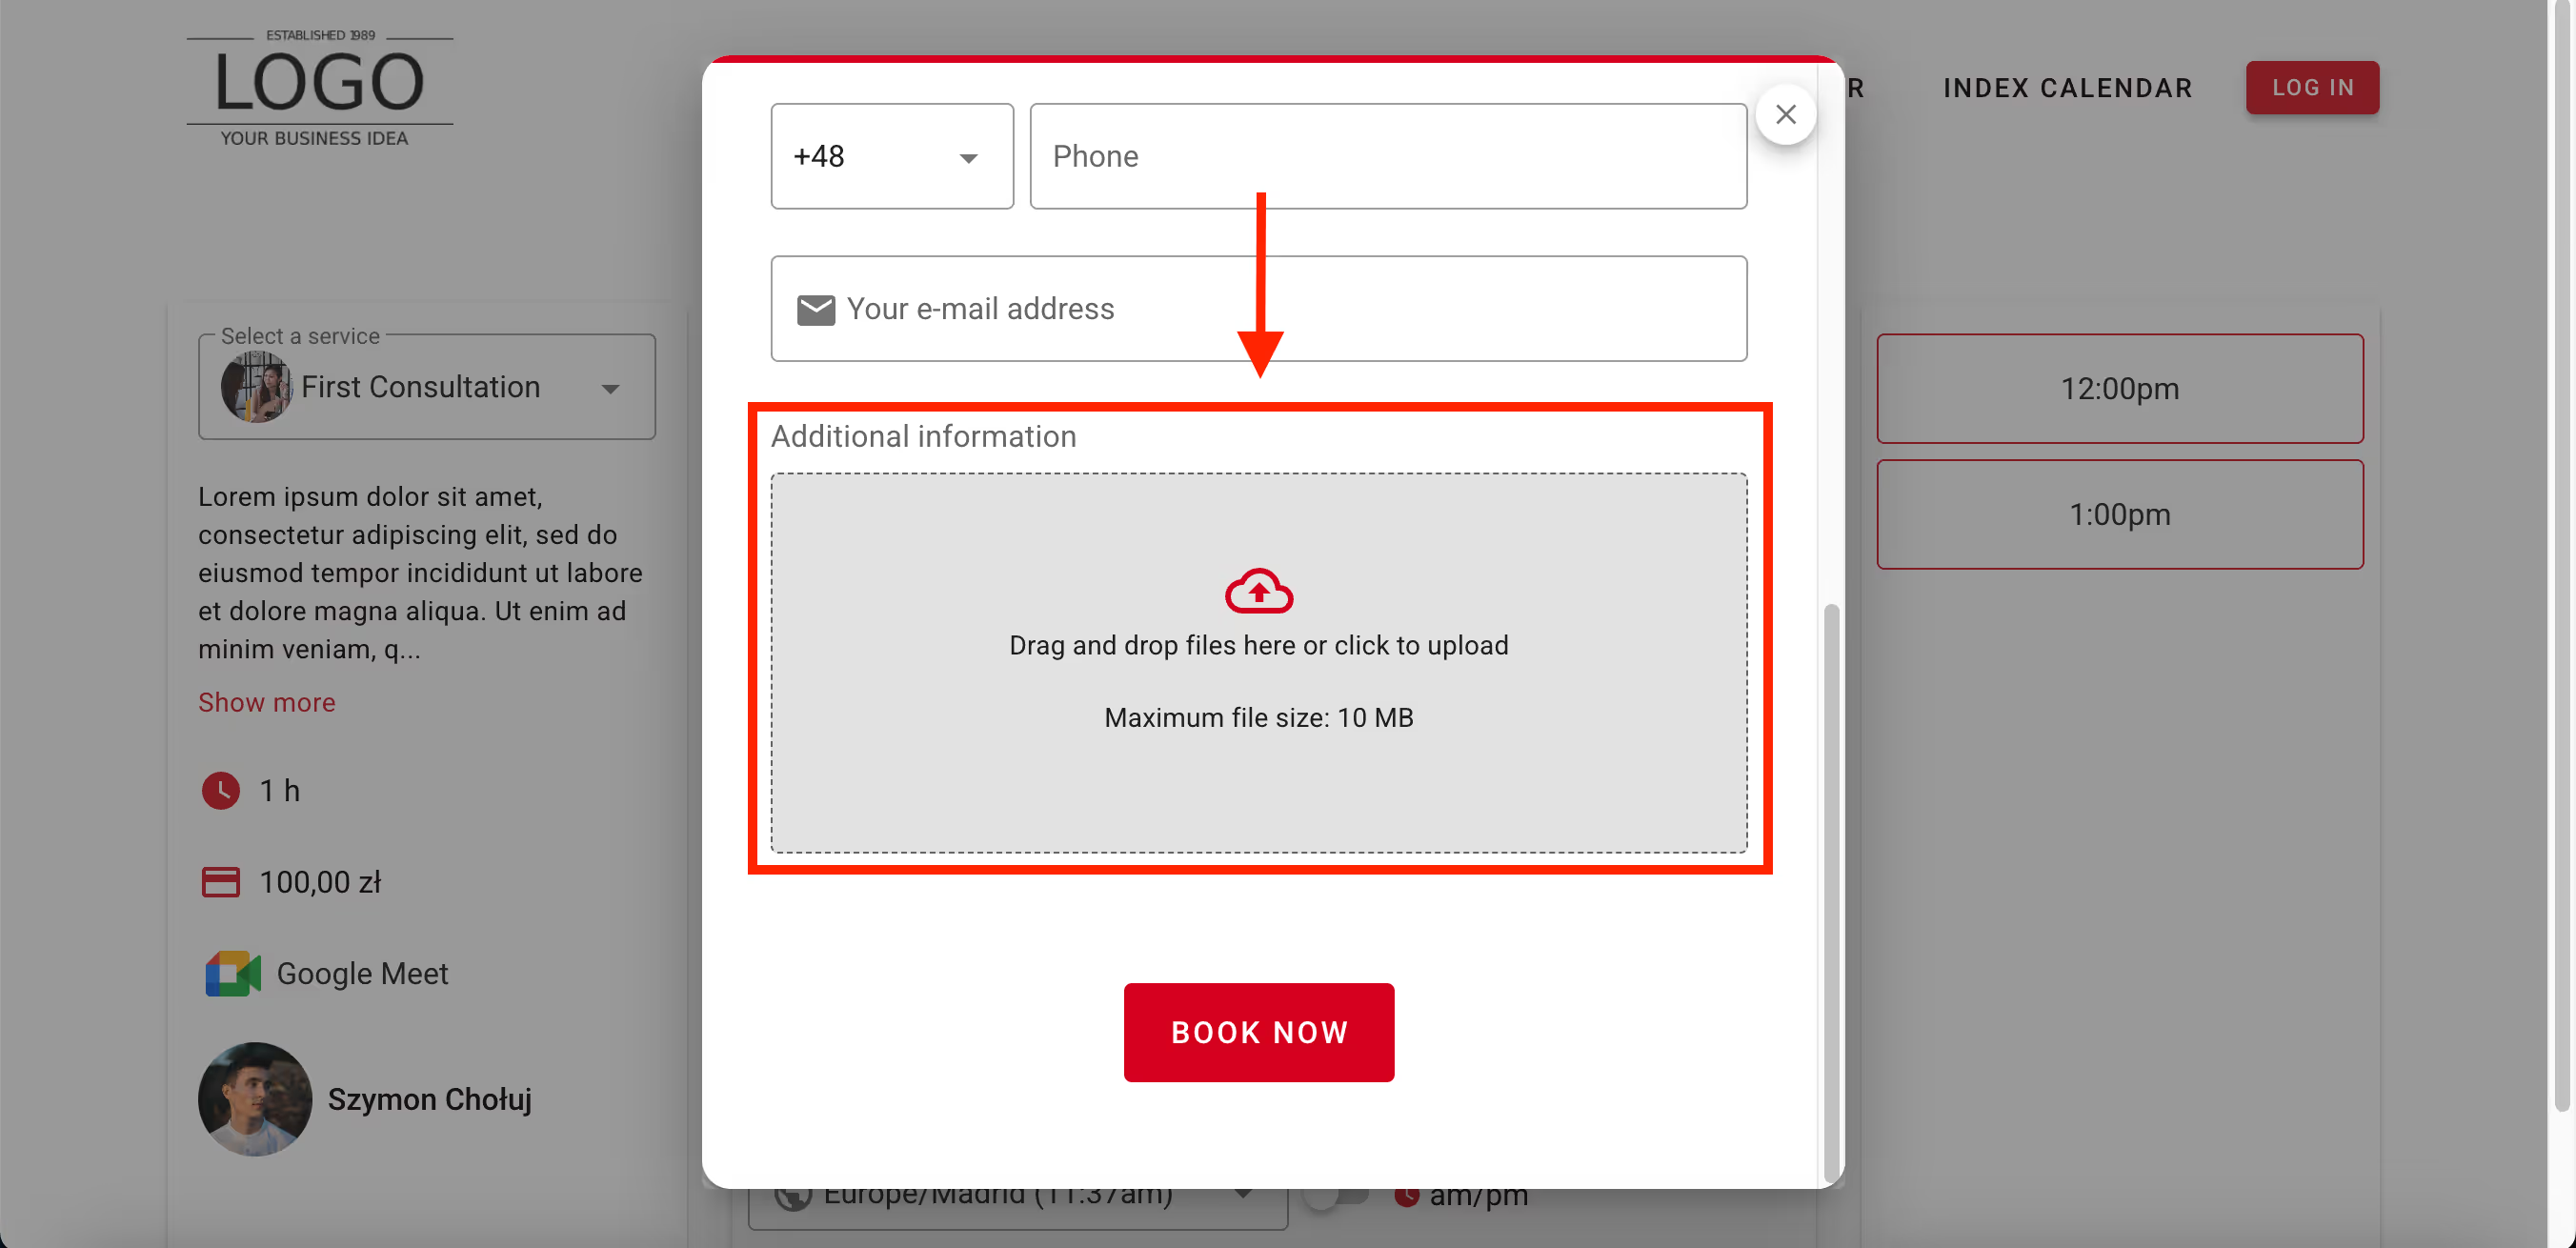
Particular attention should be given to the Attachments field. With this field, your clients will be able to submit the documents required for the booking.
Our system supports files up to a maximum of 10 MB in the following formats:
- PDF,
- XLSX,
- XLS,
- SCV,
- DOC,
- DOCX,
- JPG,
- JPEG.
- PNG,
- TXT.
If the file size or format is different from the allowed ones, your client will see an error message like the one in the image below.

The maximum number of files a customer can add to the booking form at once is equal 25. Once the client selects the files they want to attach, our system will upload them simultaneously. Files larger than 10 MB will not be added to the form. In total, a single form can accommodate up to 250 MB of files.
Where can you find the files uploaded by the client in the booking form?
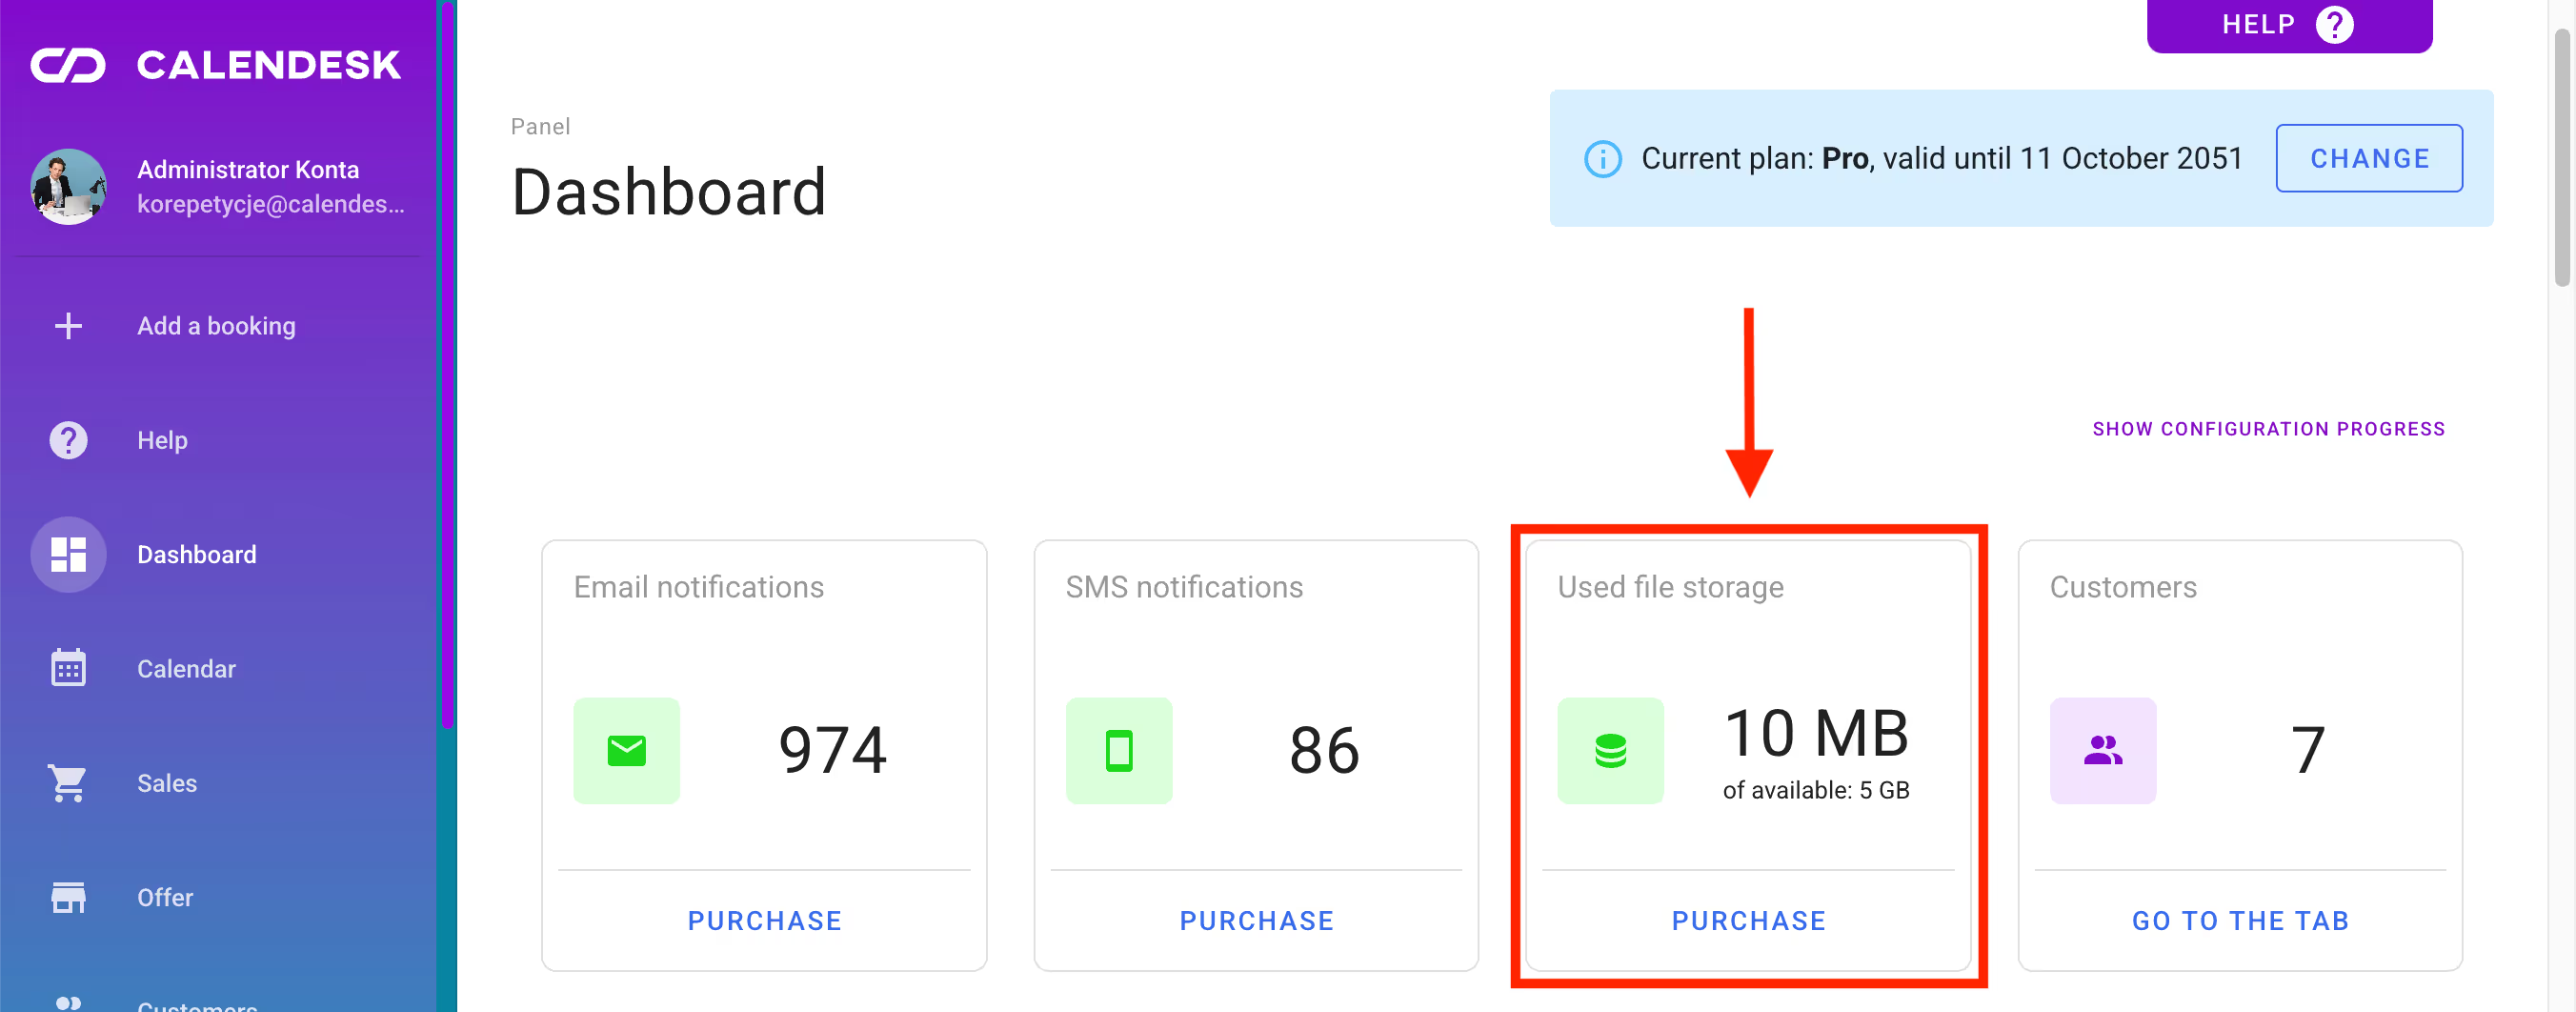
Our system continuously informs you about the available space left on your disk. To check the usage of available memory, you can go to the Dashboard tab, where you will find a tile marked in the image below:
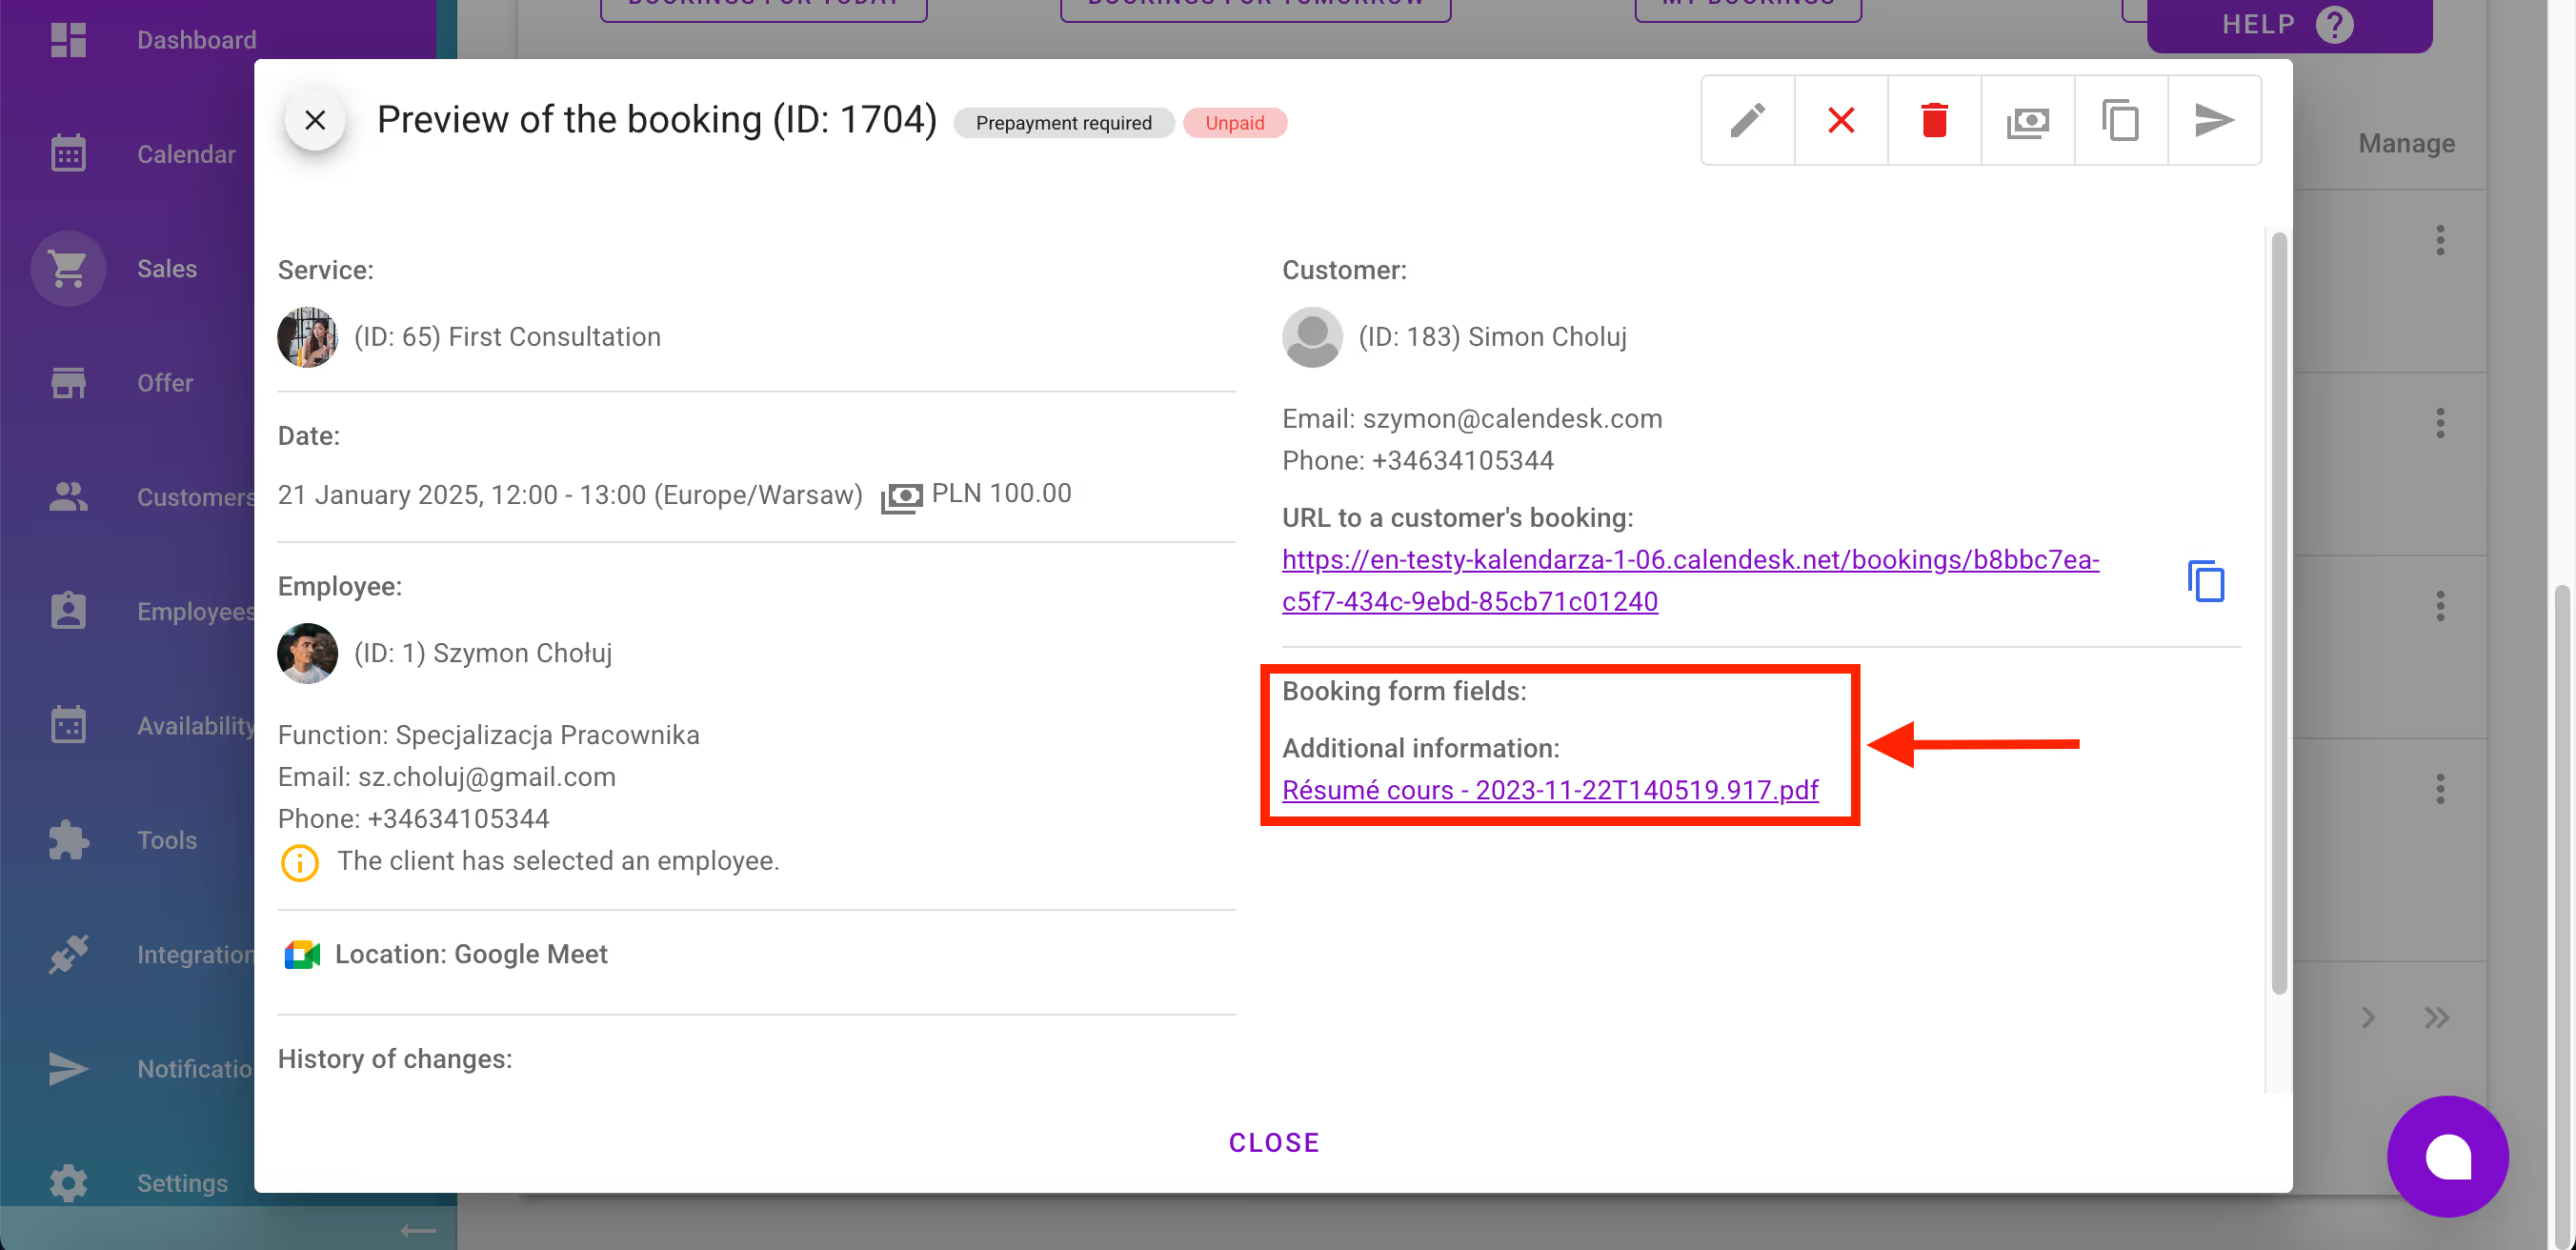
Files uploaded by the client to the booking can be downloaded directly to your computer's disk from the reservation details.
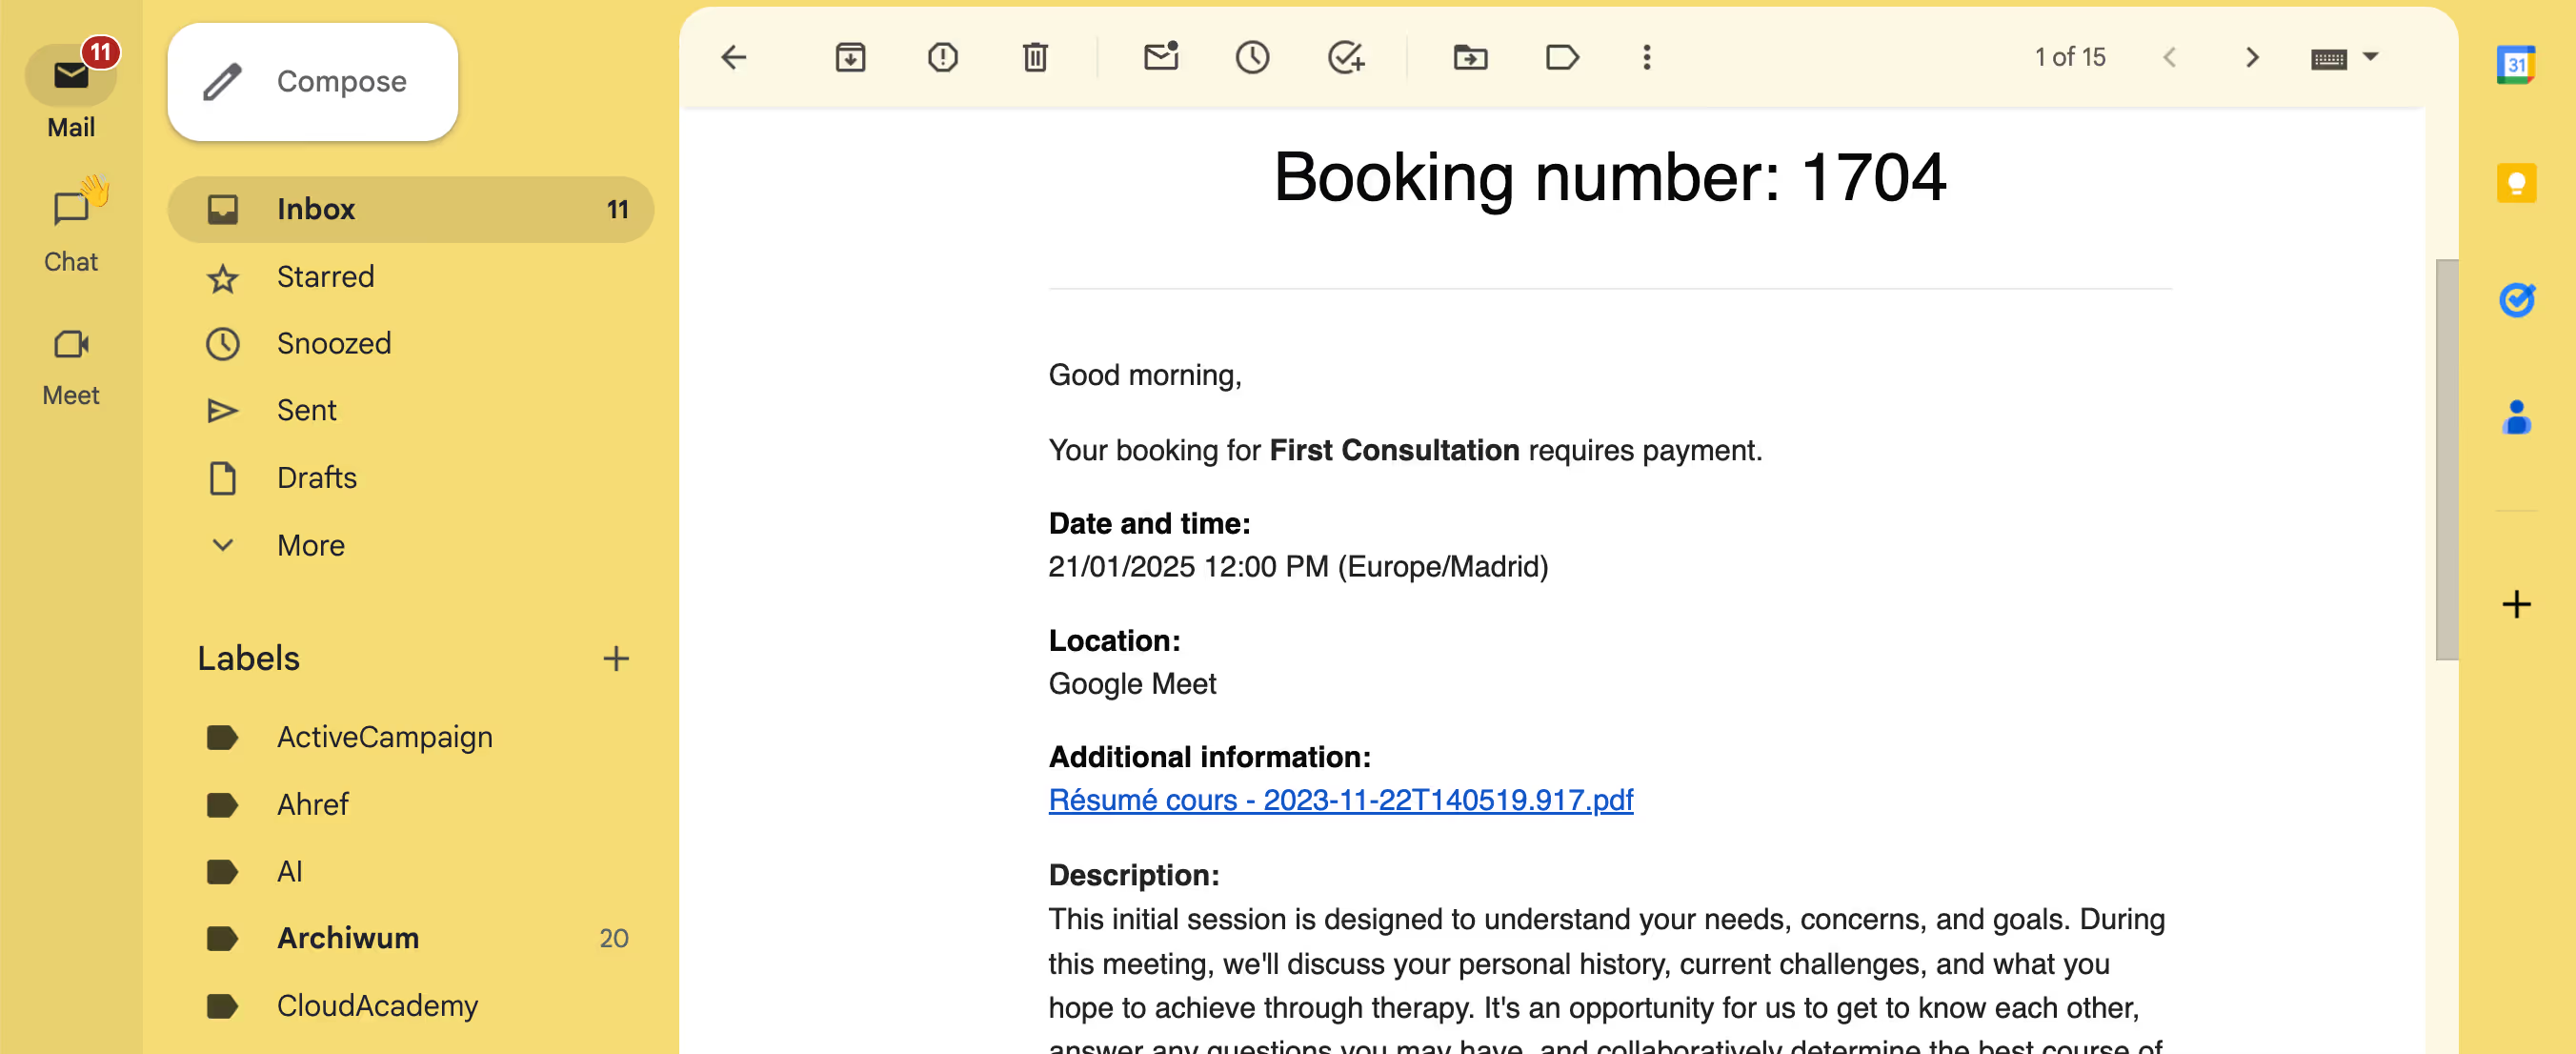
If you use a variable in the email notification template that is responsible for adding the content of additional reservation form fields, you will also have access to the files by clicking on the link in the email notification.
When downloading files to your computer, you don't need to worry about virus infections, as we have ensured that our system scans the files to reject any that pose a threat.