How to effectively manage a newsletter? From collecting email addresses to sending messages.
Newsletter
In this section, you'll learn how to collect your subscribers' email addresses and manually send them email notifications. This feature makes it easy to keep your newsletter subscribers updated on any news or changes related to your business. It’s a convenient and effective way to maintain a strong connection between you and your subscribers.
Newsletter Section
If you have a website built with Calendesk, this feature is available to you. By adding a Newsletter section, you can create a subscriber base of people interested in your business. This allows you to keep your customers informed about any updates and new developments related to your company.
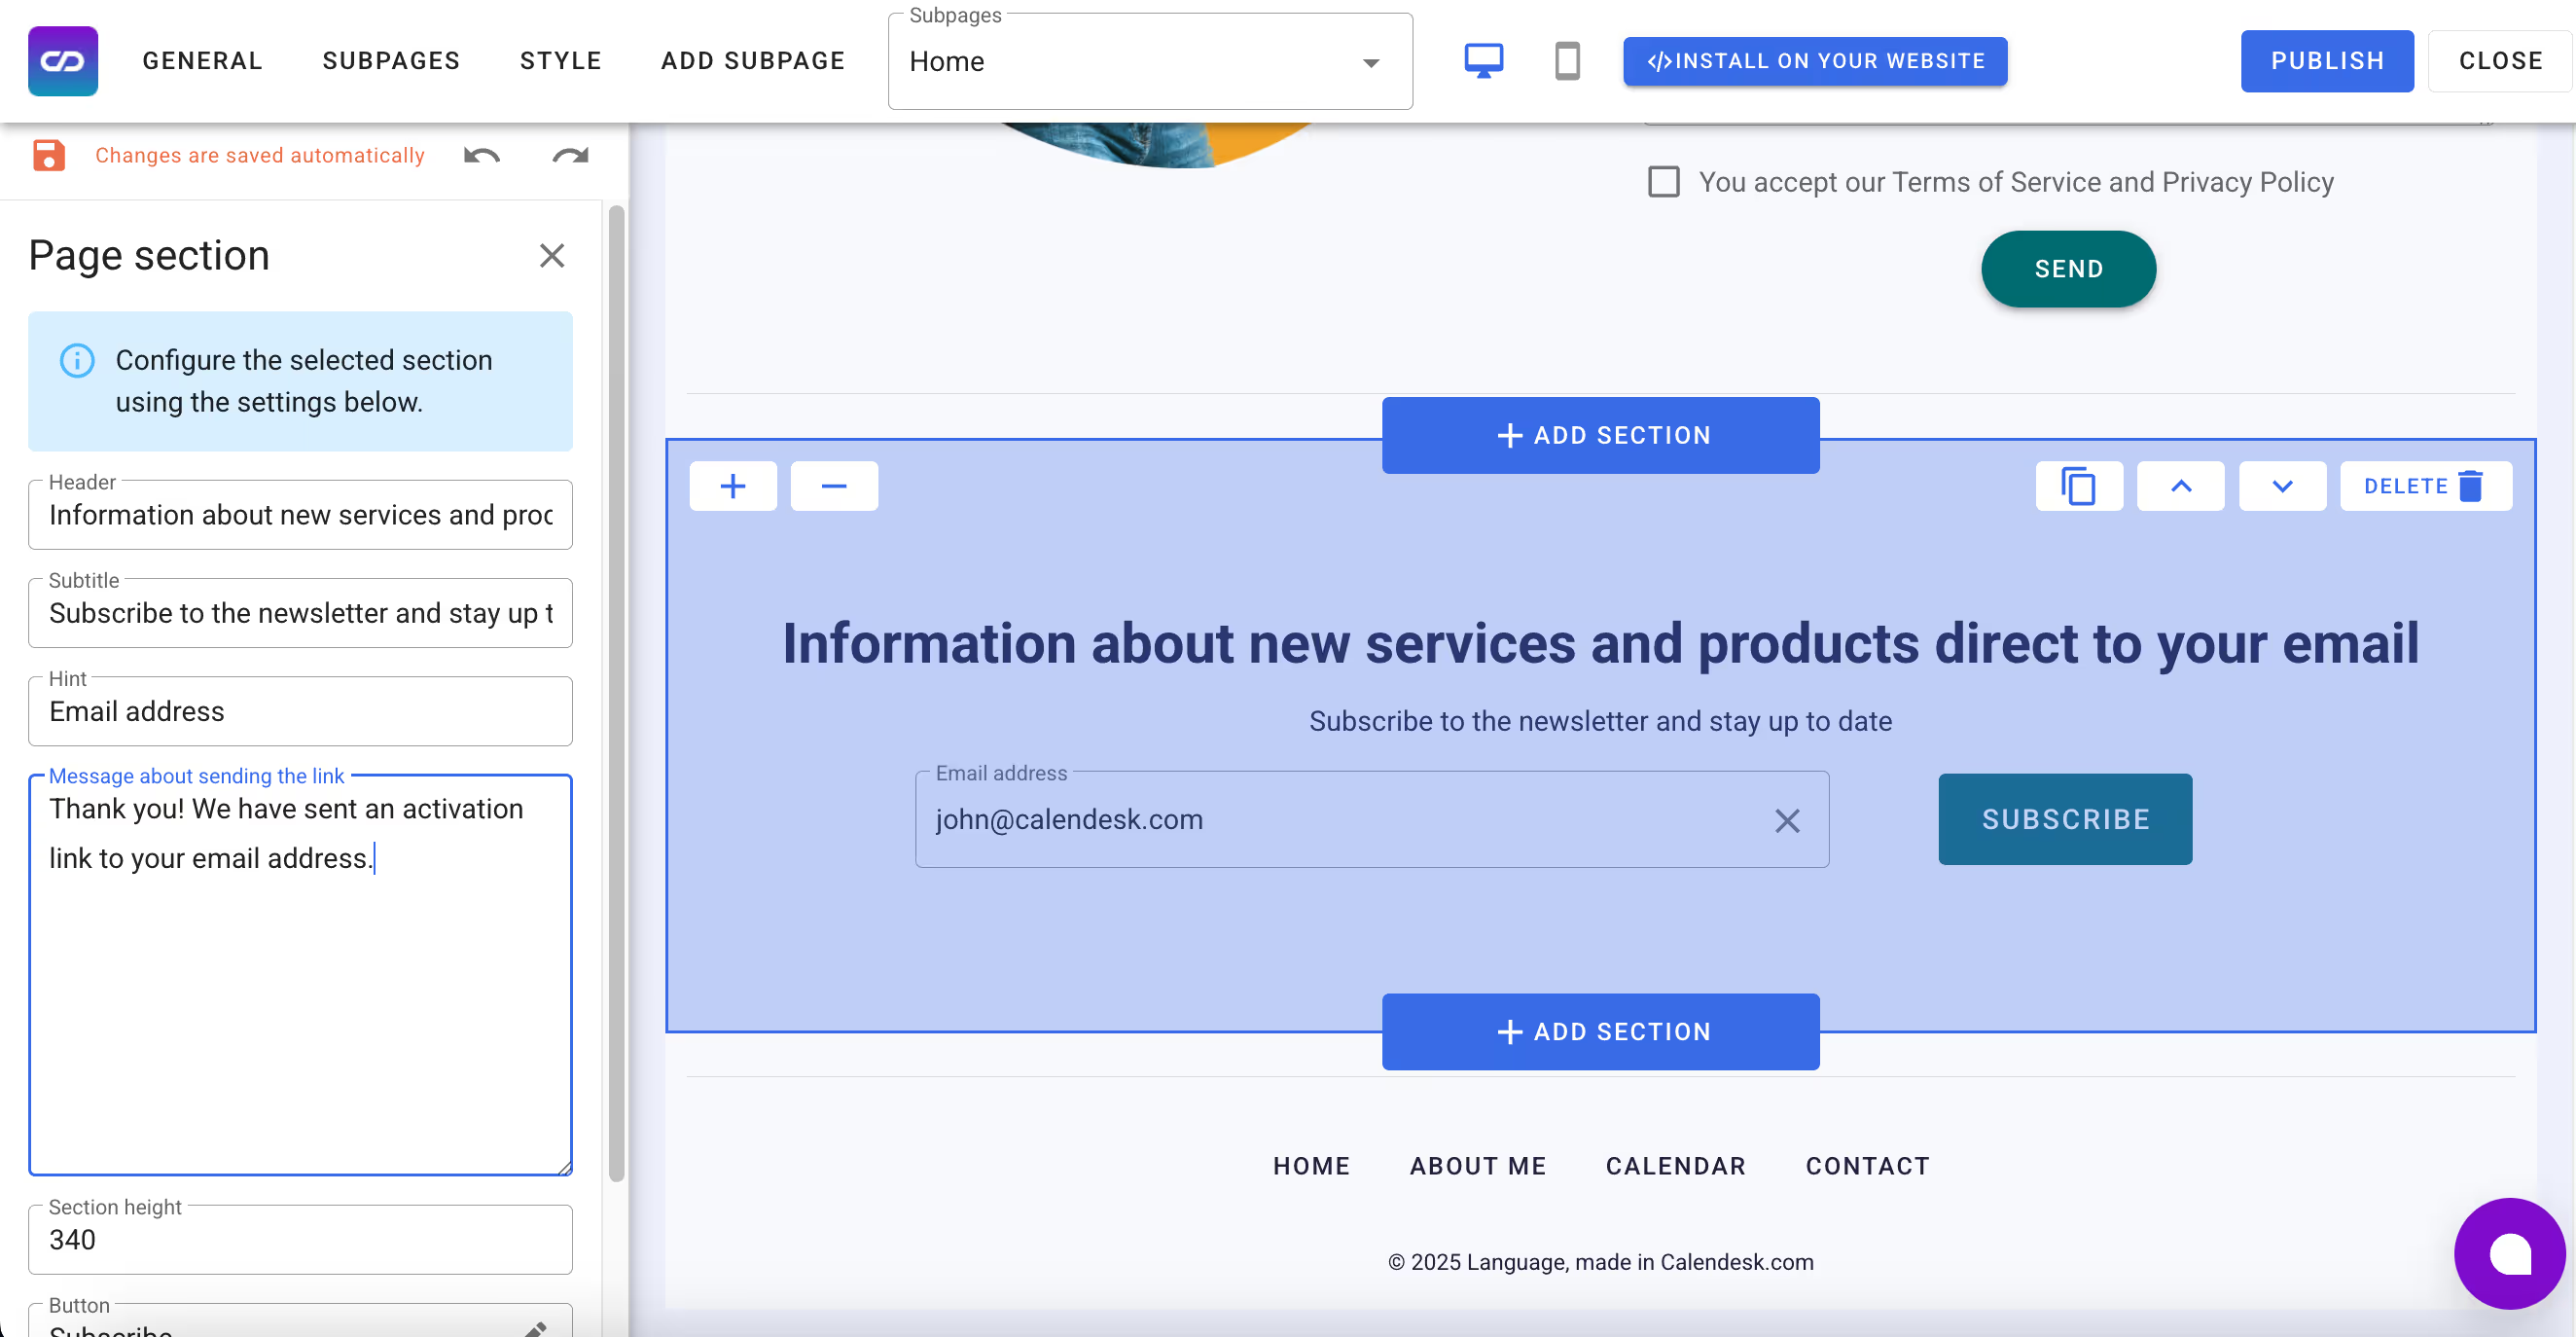
You can add the Newsletter section from the admin panel in the website builder. To learn more about adding sections, check out the article How can I personalize a website?
Subscriber Database
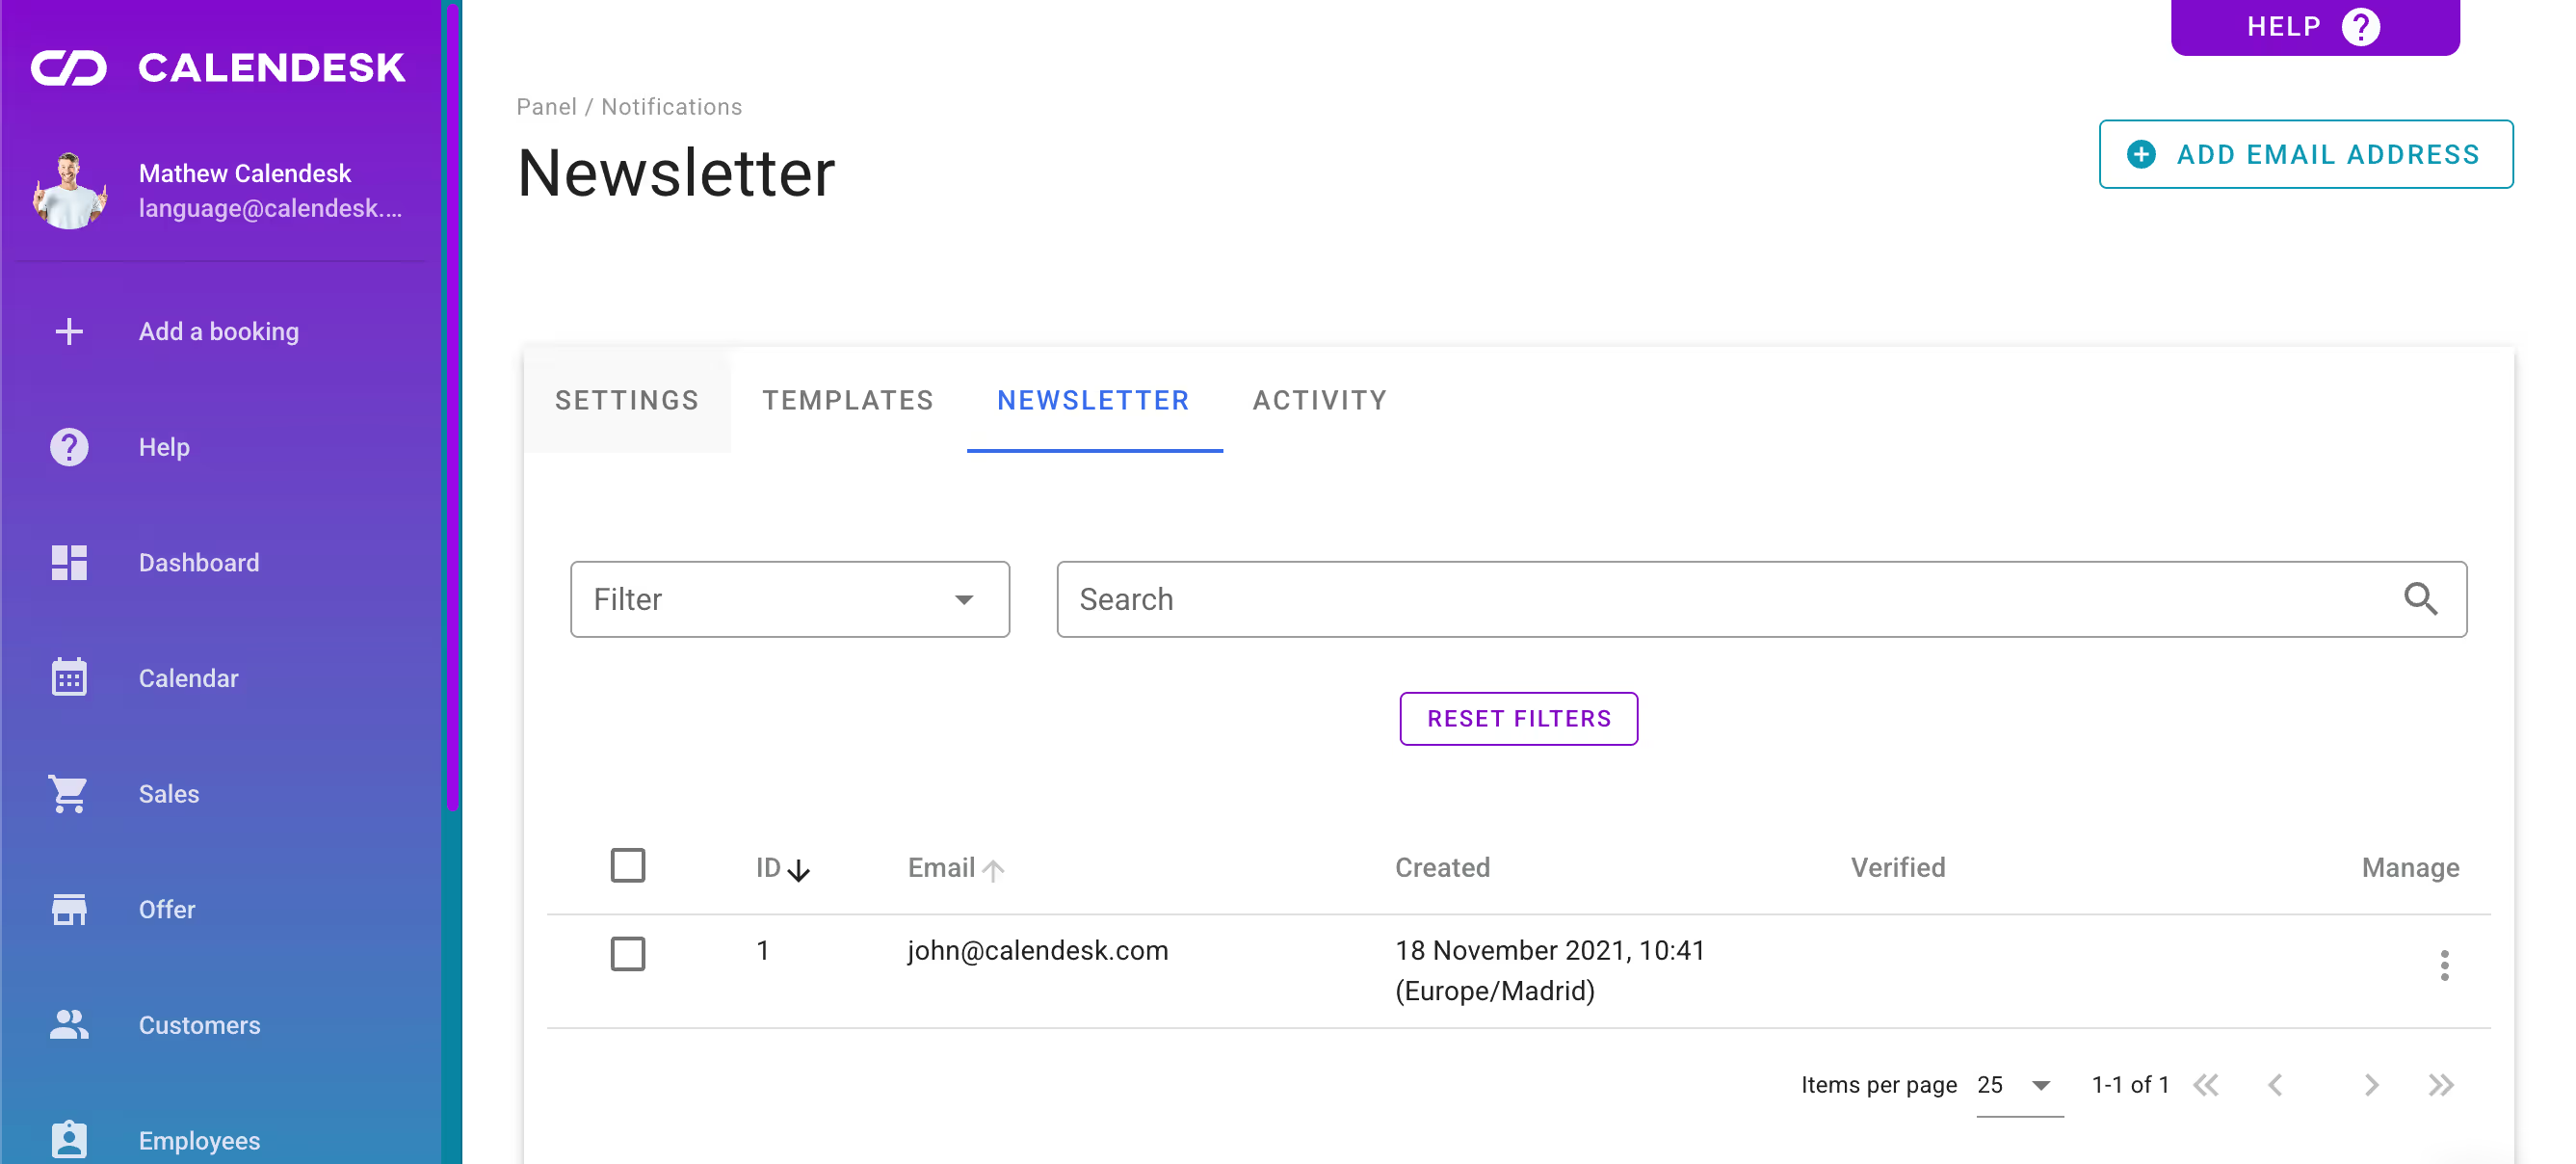
People who visit your website and enter their email address (subscribe to the newsletter) will be added to the user list visible in the Notifications – Newsletter section.
Filtering
Using the Filter and Search options, you can identify customers with confirmed and unconfirmed email addresses. The Created column shows the date the user was added to the newsletter, while the Verified column displays the date their email address was confirmed.
Email Address Confirmation
For a user to successfully subscribe to the newsletter, they must confirm ownership of their email address. Calendesk sends a verification email with a link to every user who enters their email in the newsletter section on your website. After clicking the Confirm button, the user will be redirected to your website, where a confirmation message will appear on their screen, confirming their subscription.
Send a Message
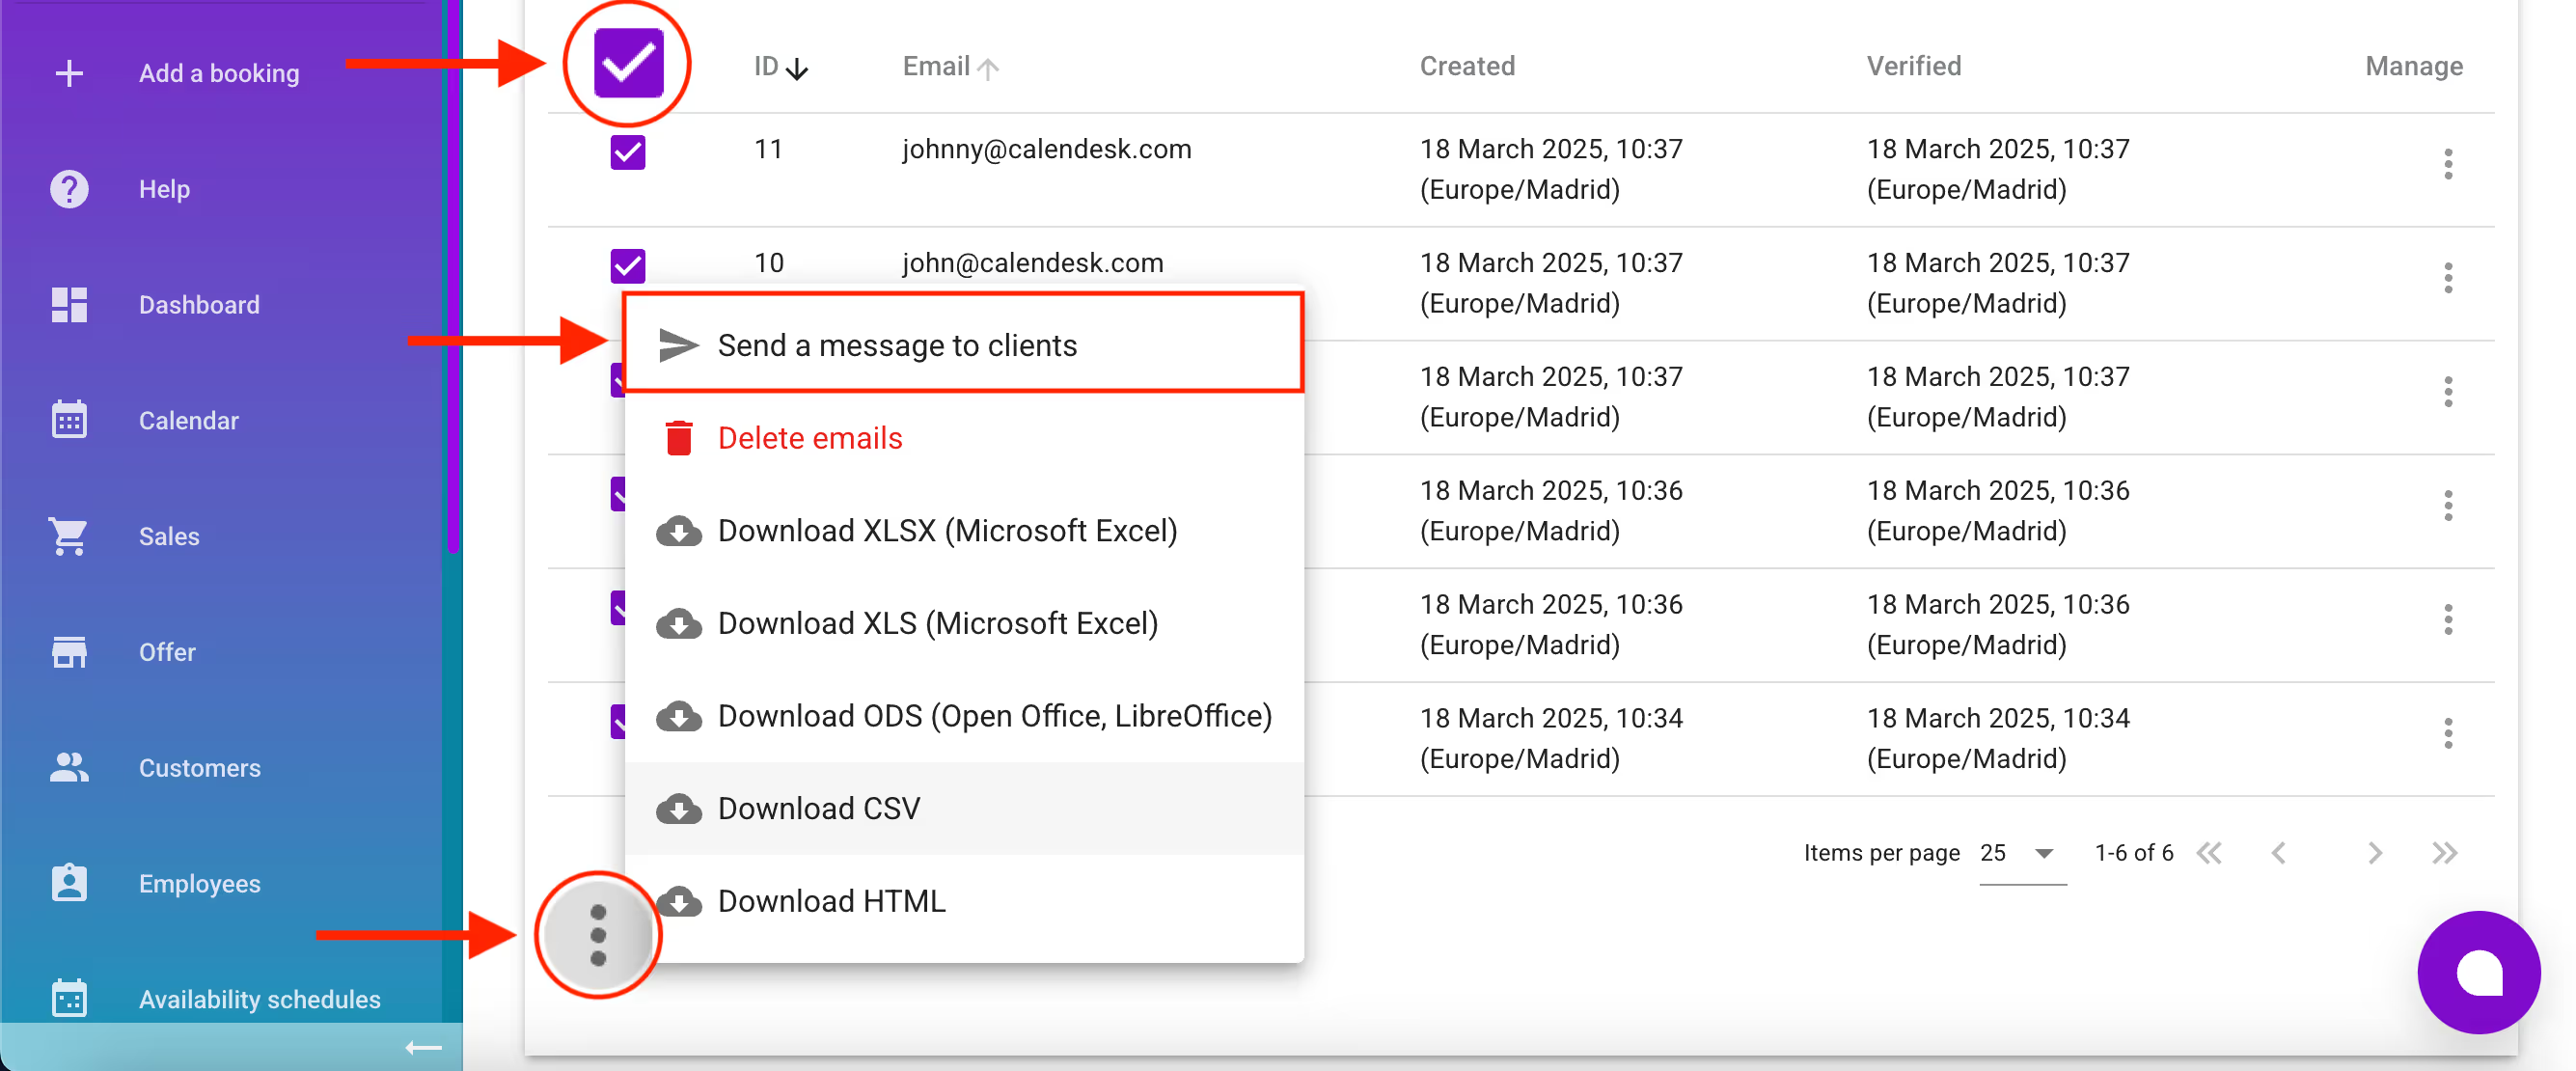
If you want to notify users of your website about something, select the recipients from the customer list in the Notifications – Newsletter tab. Then, click the three-dot button and choose Send message to clients.
At the top of the window, you'll see the selected email addresses. From this section, you can only send email messages. Below, you can enter the message title, which can include variables. Variables help automate message content—when you select a variable like Company Address, you don't have to type the full address manually; Calendesk will insert it for you.
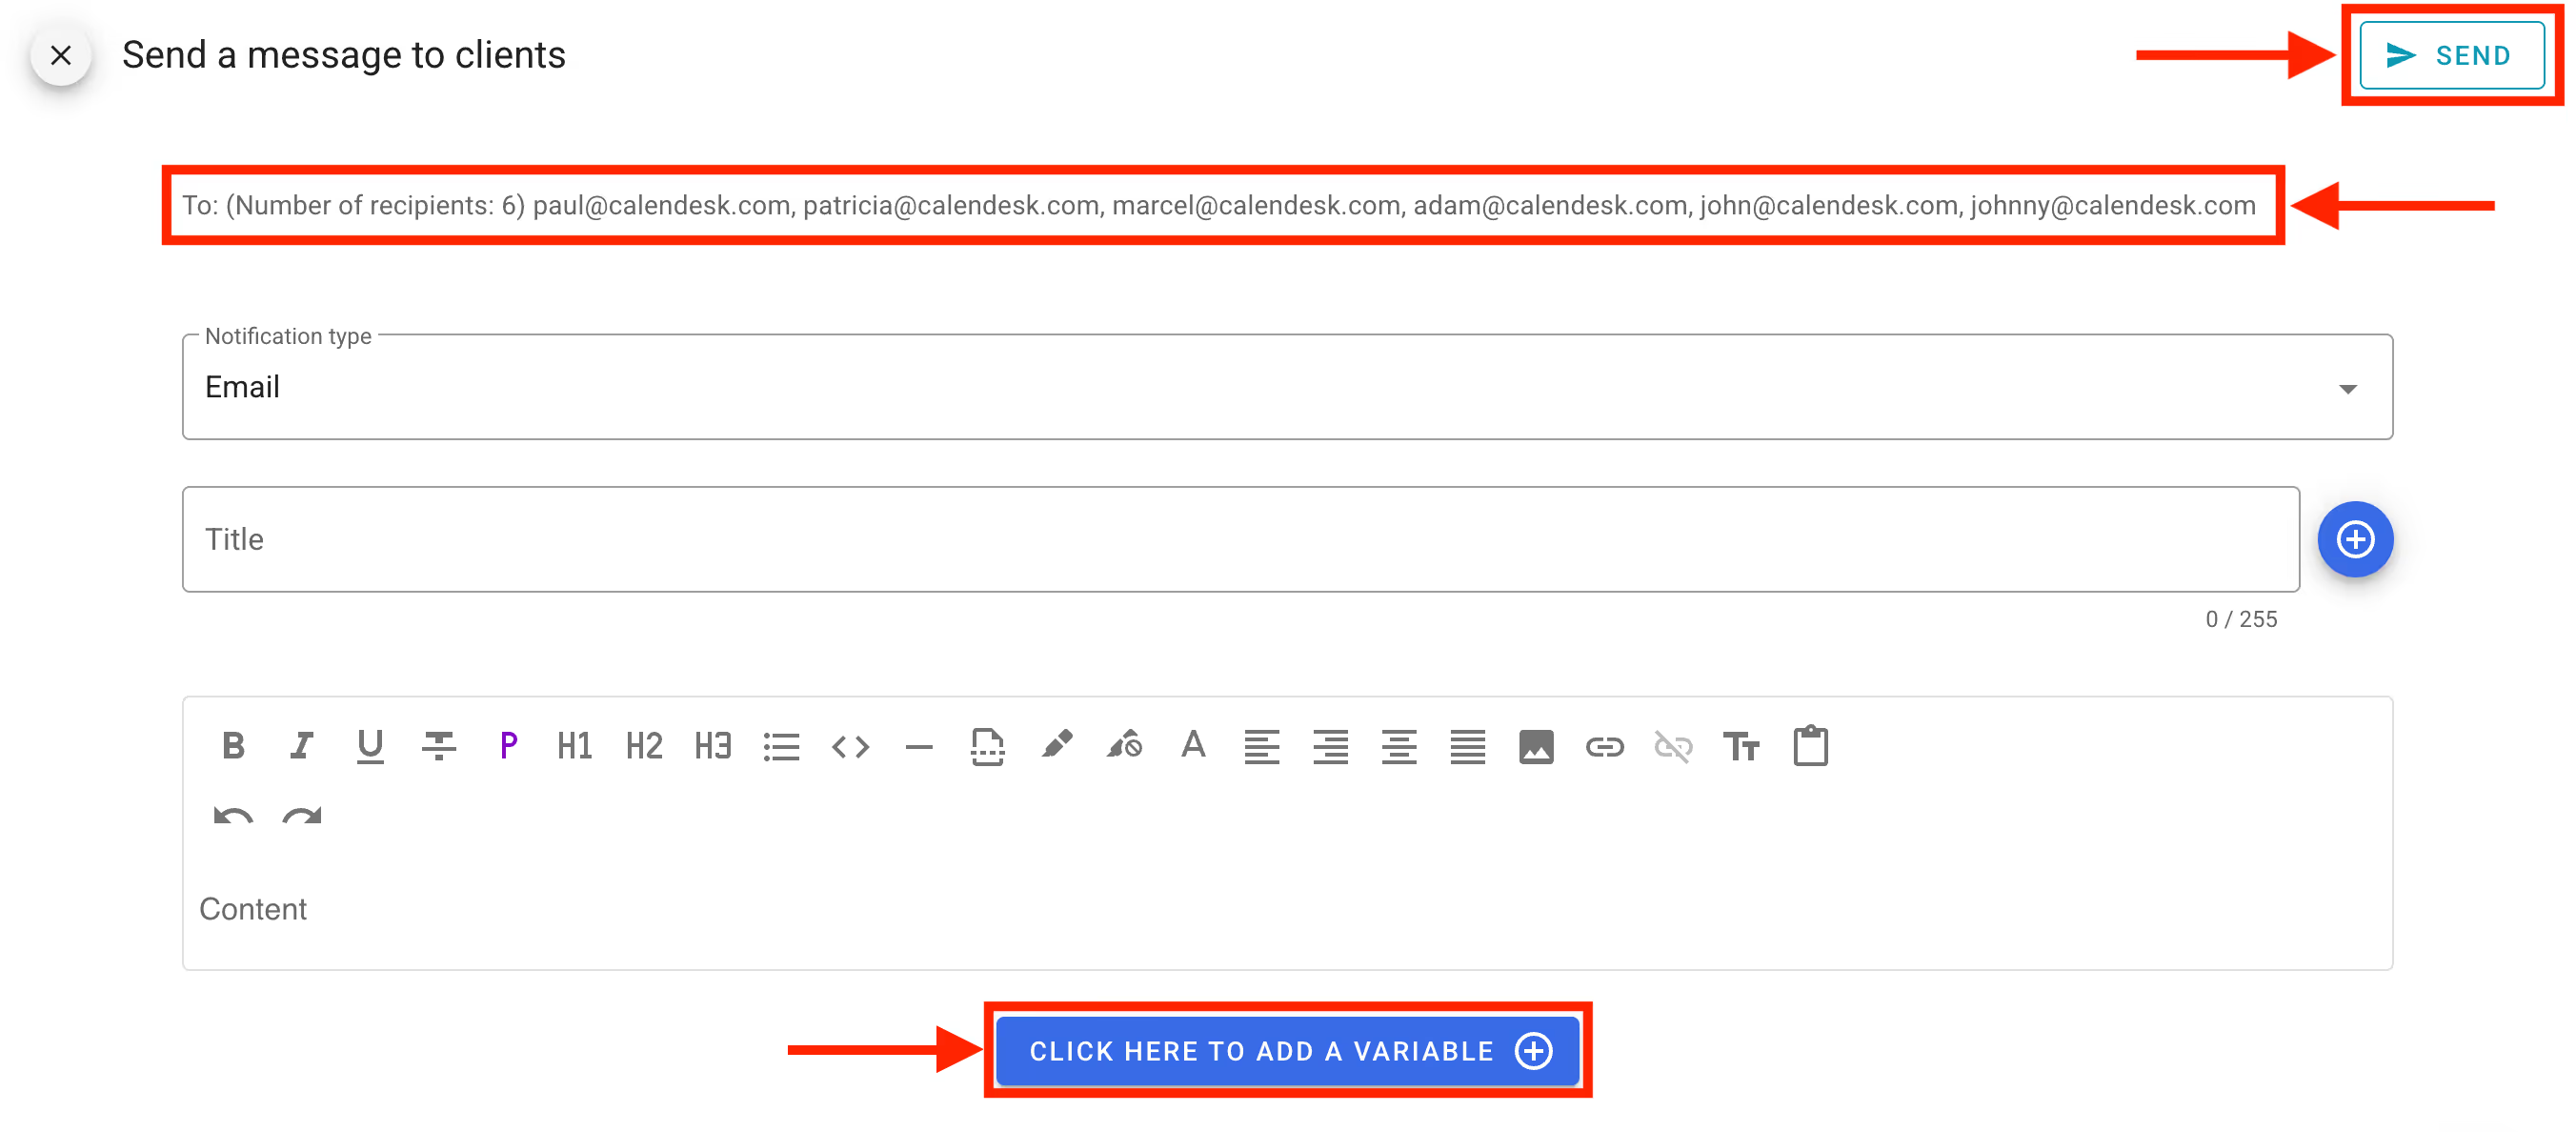
If you’d like, you can edit the text style in your email message. The toolbar above the message content provides tools to adjust the text formatting. You can also add variables to the email content to personalize your message.
Unsubscribe from the newsletter
If a subscriber wants to unsubscribe from the newsletter, you can send them a message with a link to do so. One way to include this link is by inserting the Unsubscribe URL variable (which contains the link), but this method isn't very elegant. The raw link will be long and filled with unreadable characters, making the message look messy.
If you want to create a clean and visually appealing unsubscribe link, follow these guidelines:
To create a clean and user-friendly unsubscribe link, follow these steps:
- paste the Unsubscribe URL variable,
- highlight the Unsubscribe URL variable,
- copy the highlighted variable,
- remove the variable from the message content,
- type a phrase like Click here to unsubscribe from the newsletter,
- highlight the word here,
- in the text editing toolbar, select the Add Link option,
- paste the previously copied Unsubscribe URL variable into the link field.
This way, the word here in the sentence Click here to unsubscribe from the newsletter will become a clickable link that directs users to unsubscribe. Once they click the link, their email address will be removed from your subscriber list.