How can I access and manage customers?
The Customers tab holds all your customers: the ones you added in the panel and the ones who booked on your website. This article shows how to find a customer, how to work with many customers at once and what's in a customer's profile.
The customer list
For each customer, the table shows:
- ID,
- Customer's first and last name, with the account status and their groups underneath,
- Email and Phone: click either one to copy it,
- Created, the date the customer was added,
- Manage, the actions menu.
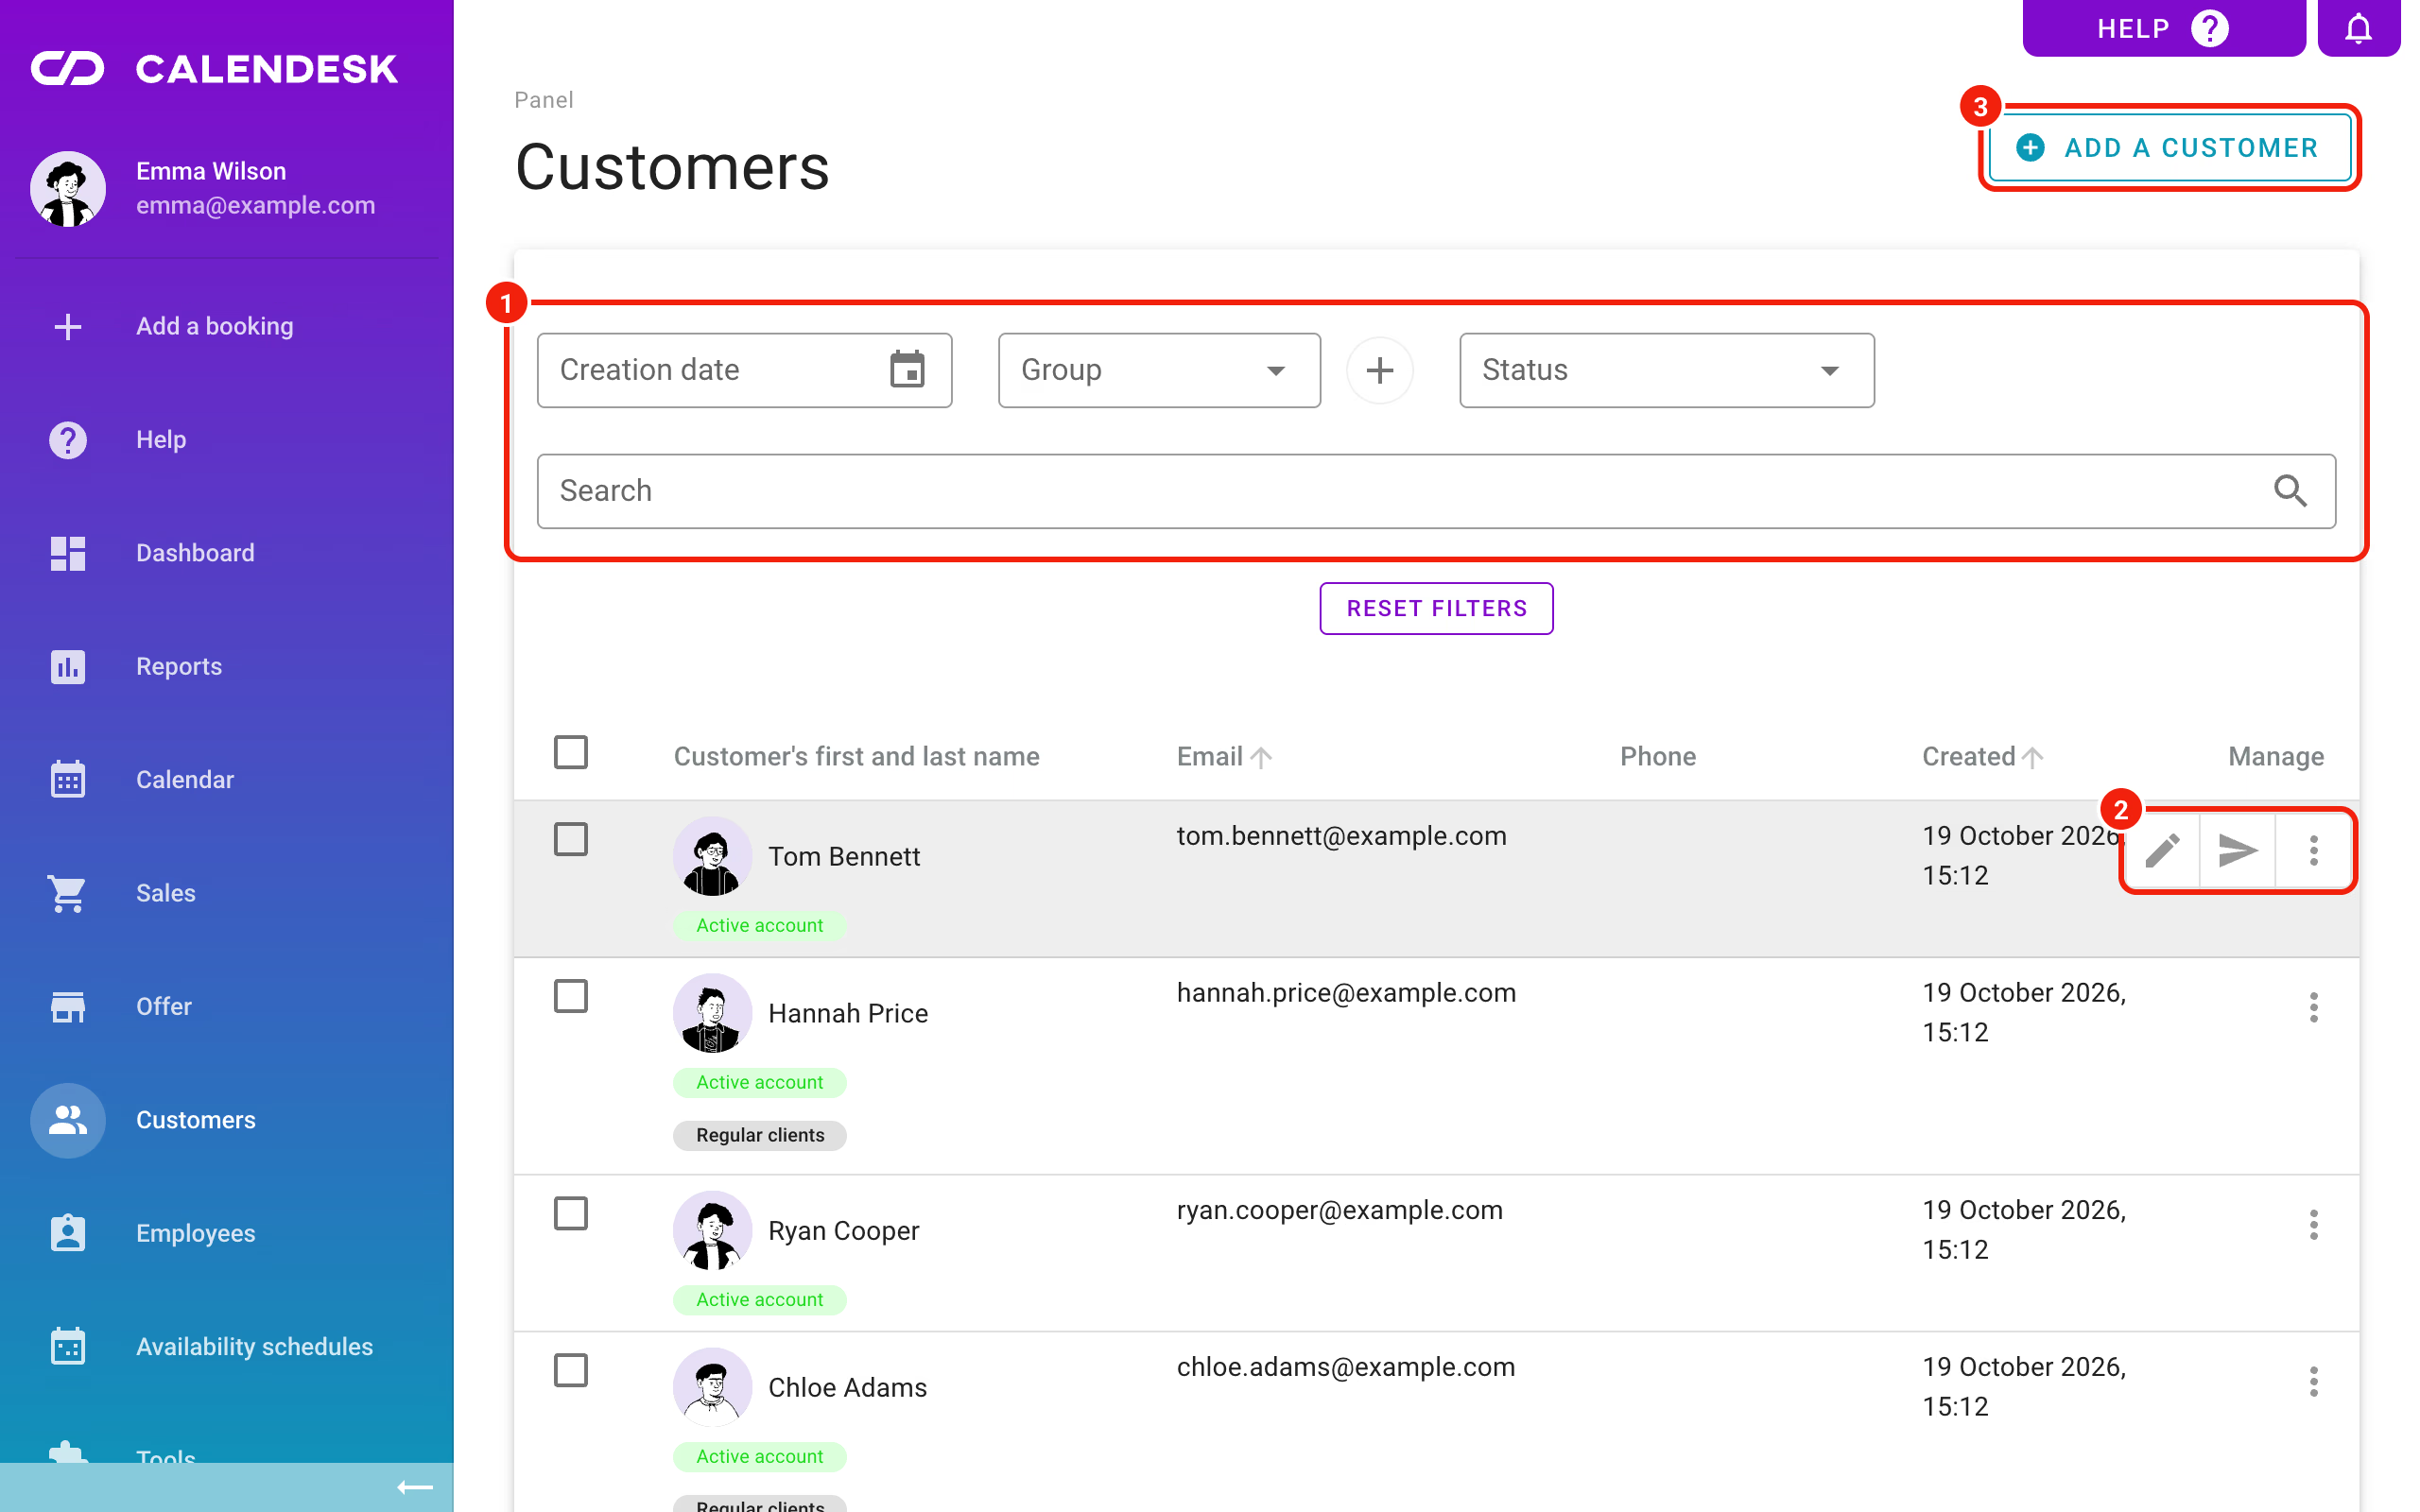
To add a new customer, click Add a customer in the top right corner. See How can I add a customer?
How do I find a customer?
The filters above the table are:
- Creation date: customers added in a chosen period,
- Group: customers in the groups you pick,
- Status: active or blocked accounts,
- Search: type the start of a first name, last name or email address, part of a phone number, the customer ID or the tax ID from their billing details.
If you turn on automatic data deletion or account history from sign-up in your privacy settings, an Account filter appears too. It separates customers with an account, those awaiting confirmation, those with no account and blocked ones. Read more in Privacy: automatic deletion of customer data, account history and passwords.
Reset filters takes you back to the full list.
What can I do with a single customer?
Click the customer's name to open their profile. Hover over a row and the Manage column shows the Edit and Send a message to the client icons. The three dots hold Set a new password, Block account or Unblock account, and Delete.
How do I manage several customers at once?
- Tick the customers in the first column. The checkbox above the list selects everyone on the current page.
- If your list runs over more than one page, click Select all records across all pages. The number shows how many there are.
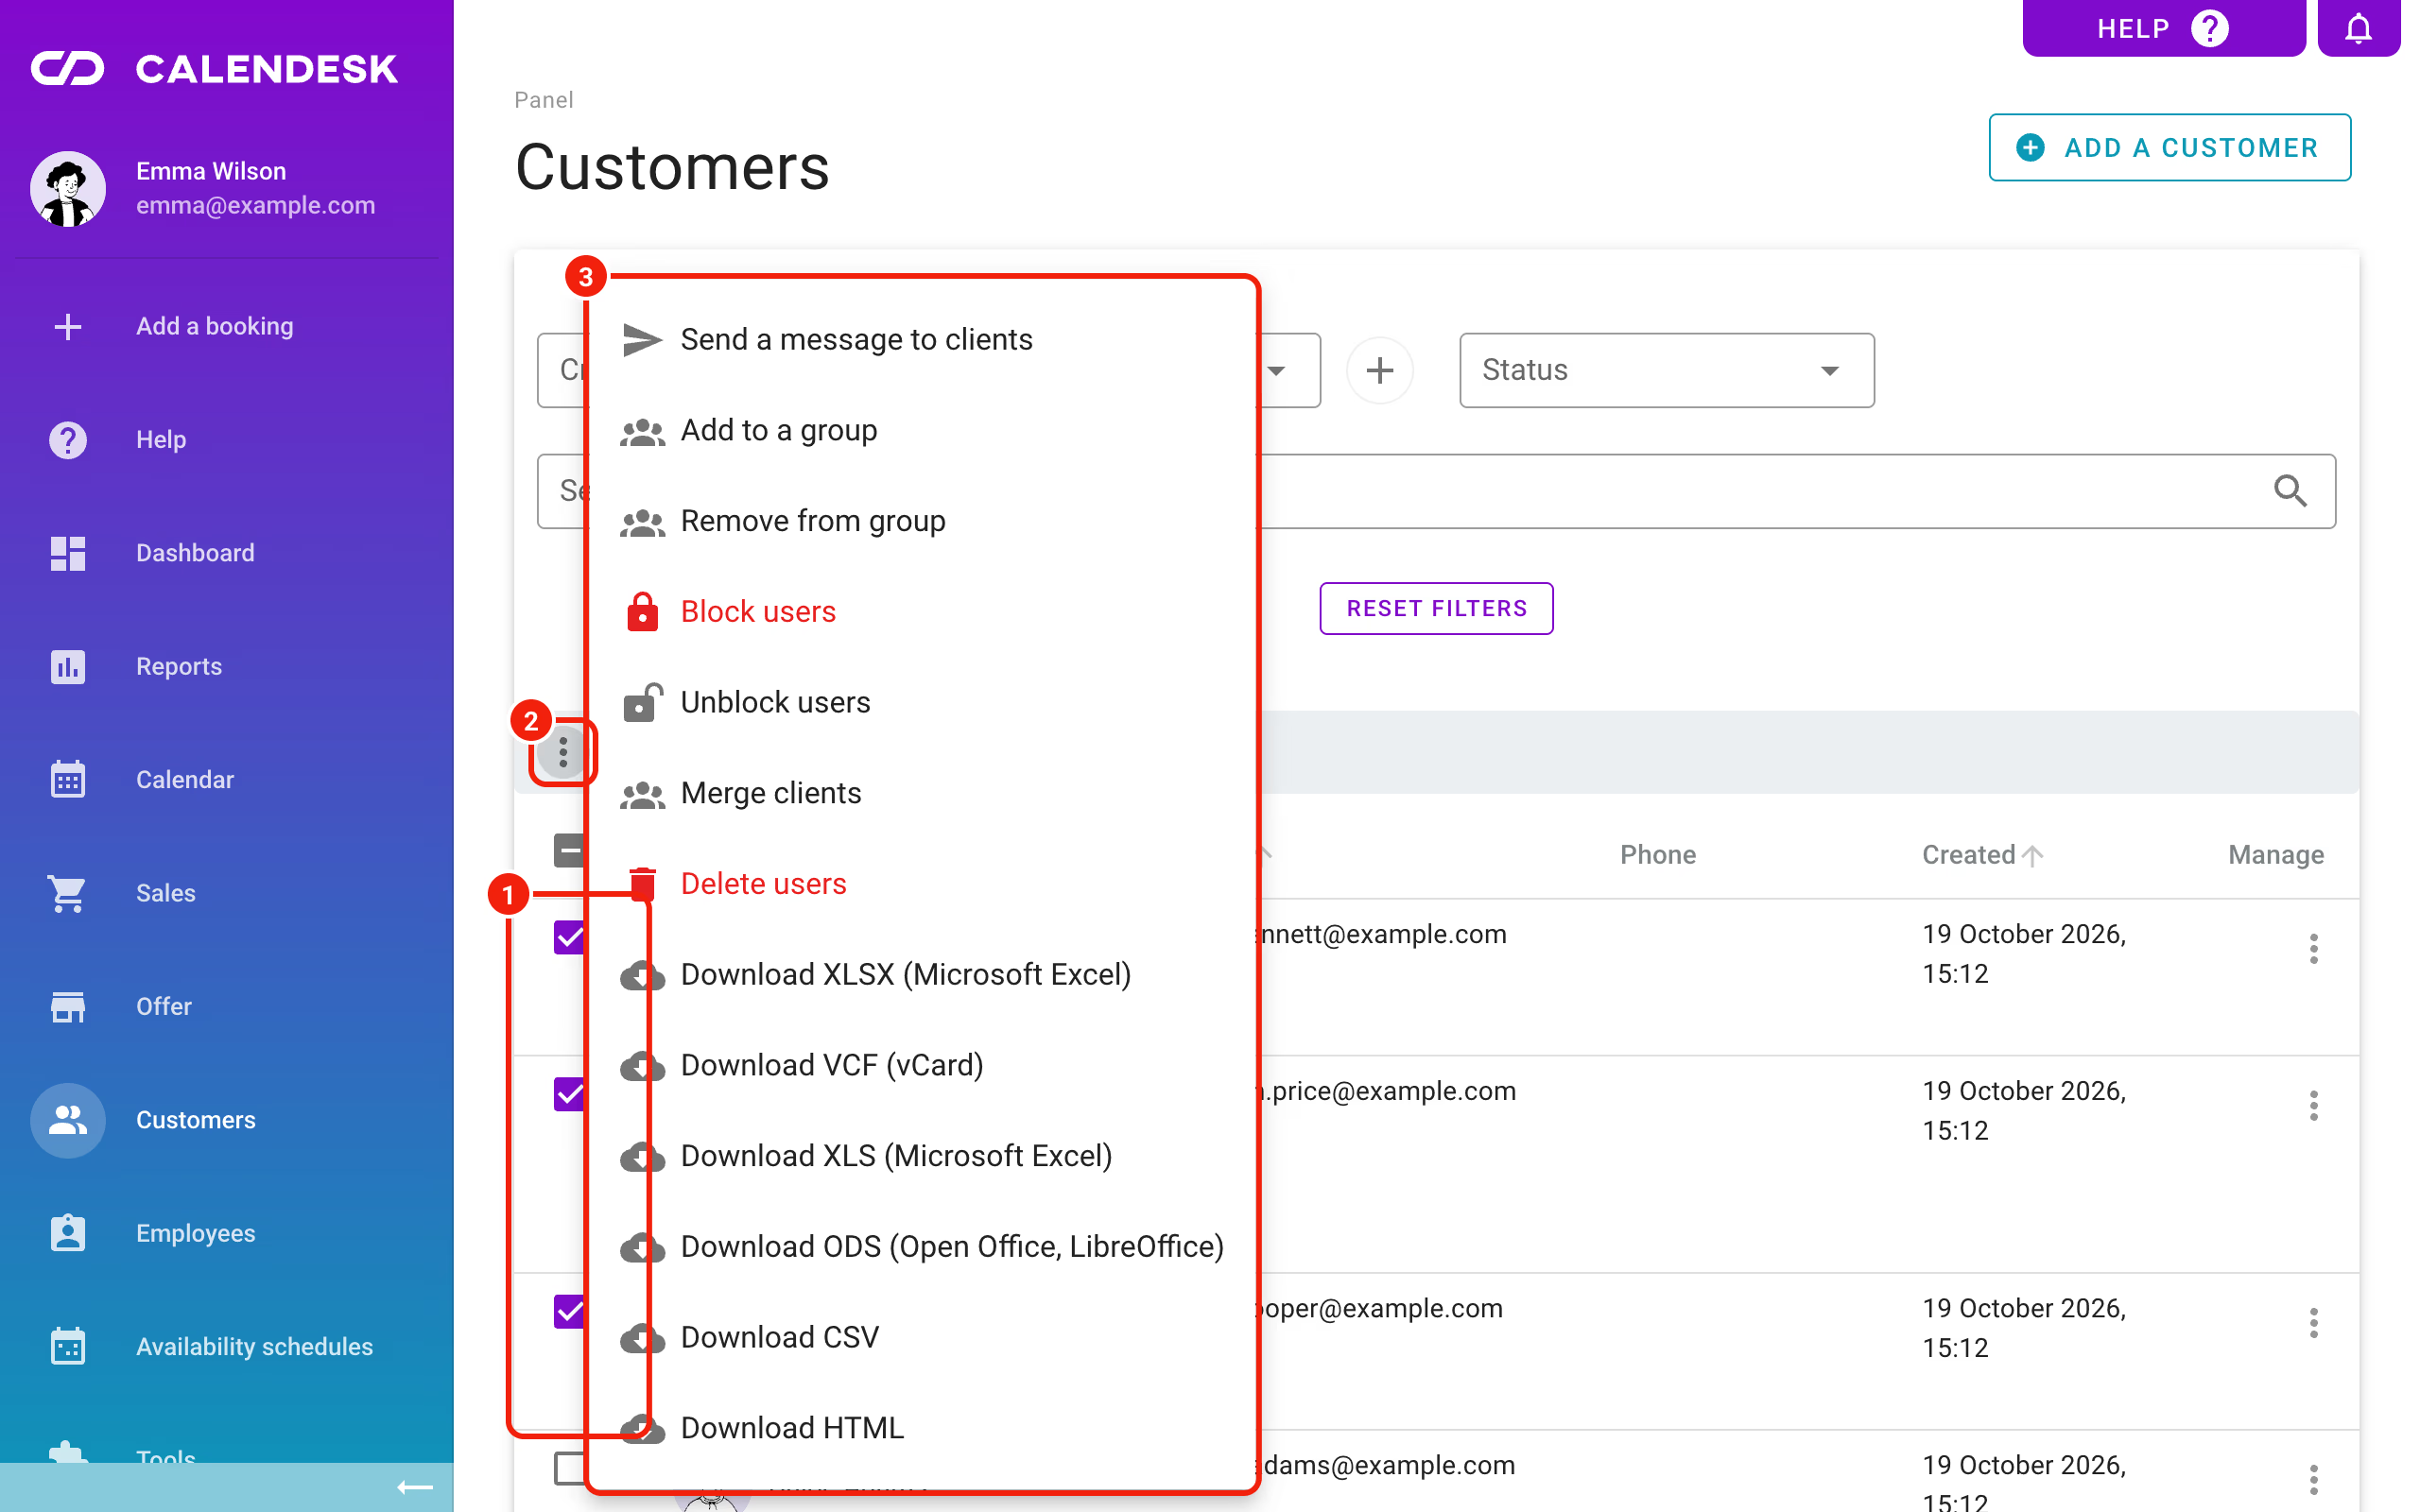
- A bar with the number of selected items appears above the table. Click the three dots on that bar and pick an action.
The actions are:
- Send a message to clients: by email, SMS or push. See How can I send notifications to customers via email, SMS, and push?
- Add to a group and Remove from group. You create groups in Settings → Groups, described in What are labels, groups, and resources and how to manage them?
- Block users: a blocked customer can't sign in on your website or book an appointment,
- Unblock users,
- Merge clients: joins 2 to 5 accounts that belong to the same person,
- Delete users: this can't be undone,
- download the list as XLSX or XLS (Microsoft Excel), VCF (vCard), ODS (Open Office, LibreOffice), CSV or HTML.
Some of these, such as merging, deleting and downloading, are only visible to people with the right permissions.
What's in a customer's profile?
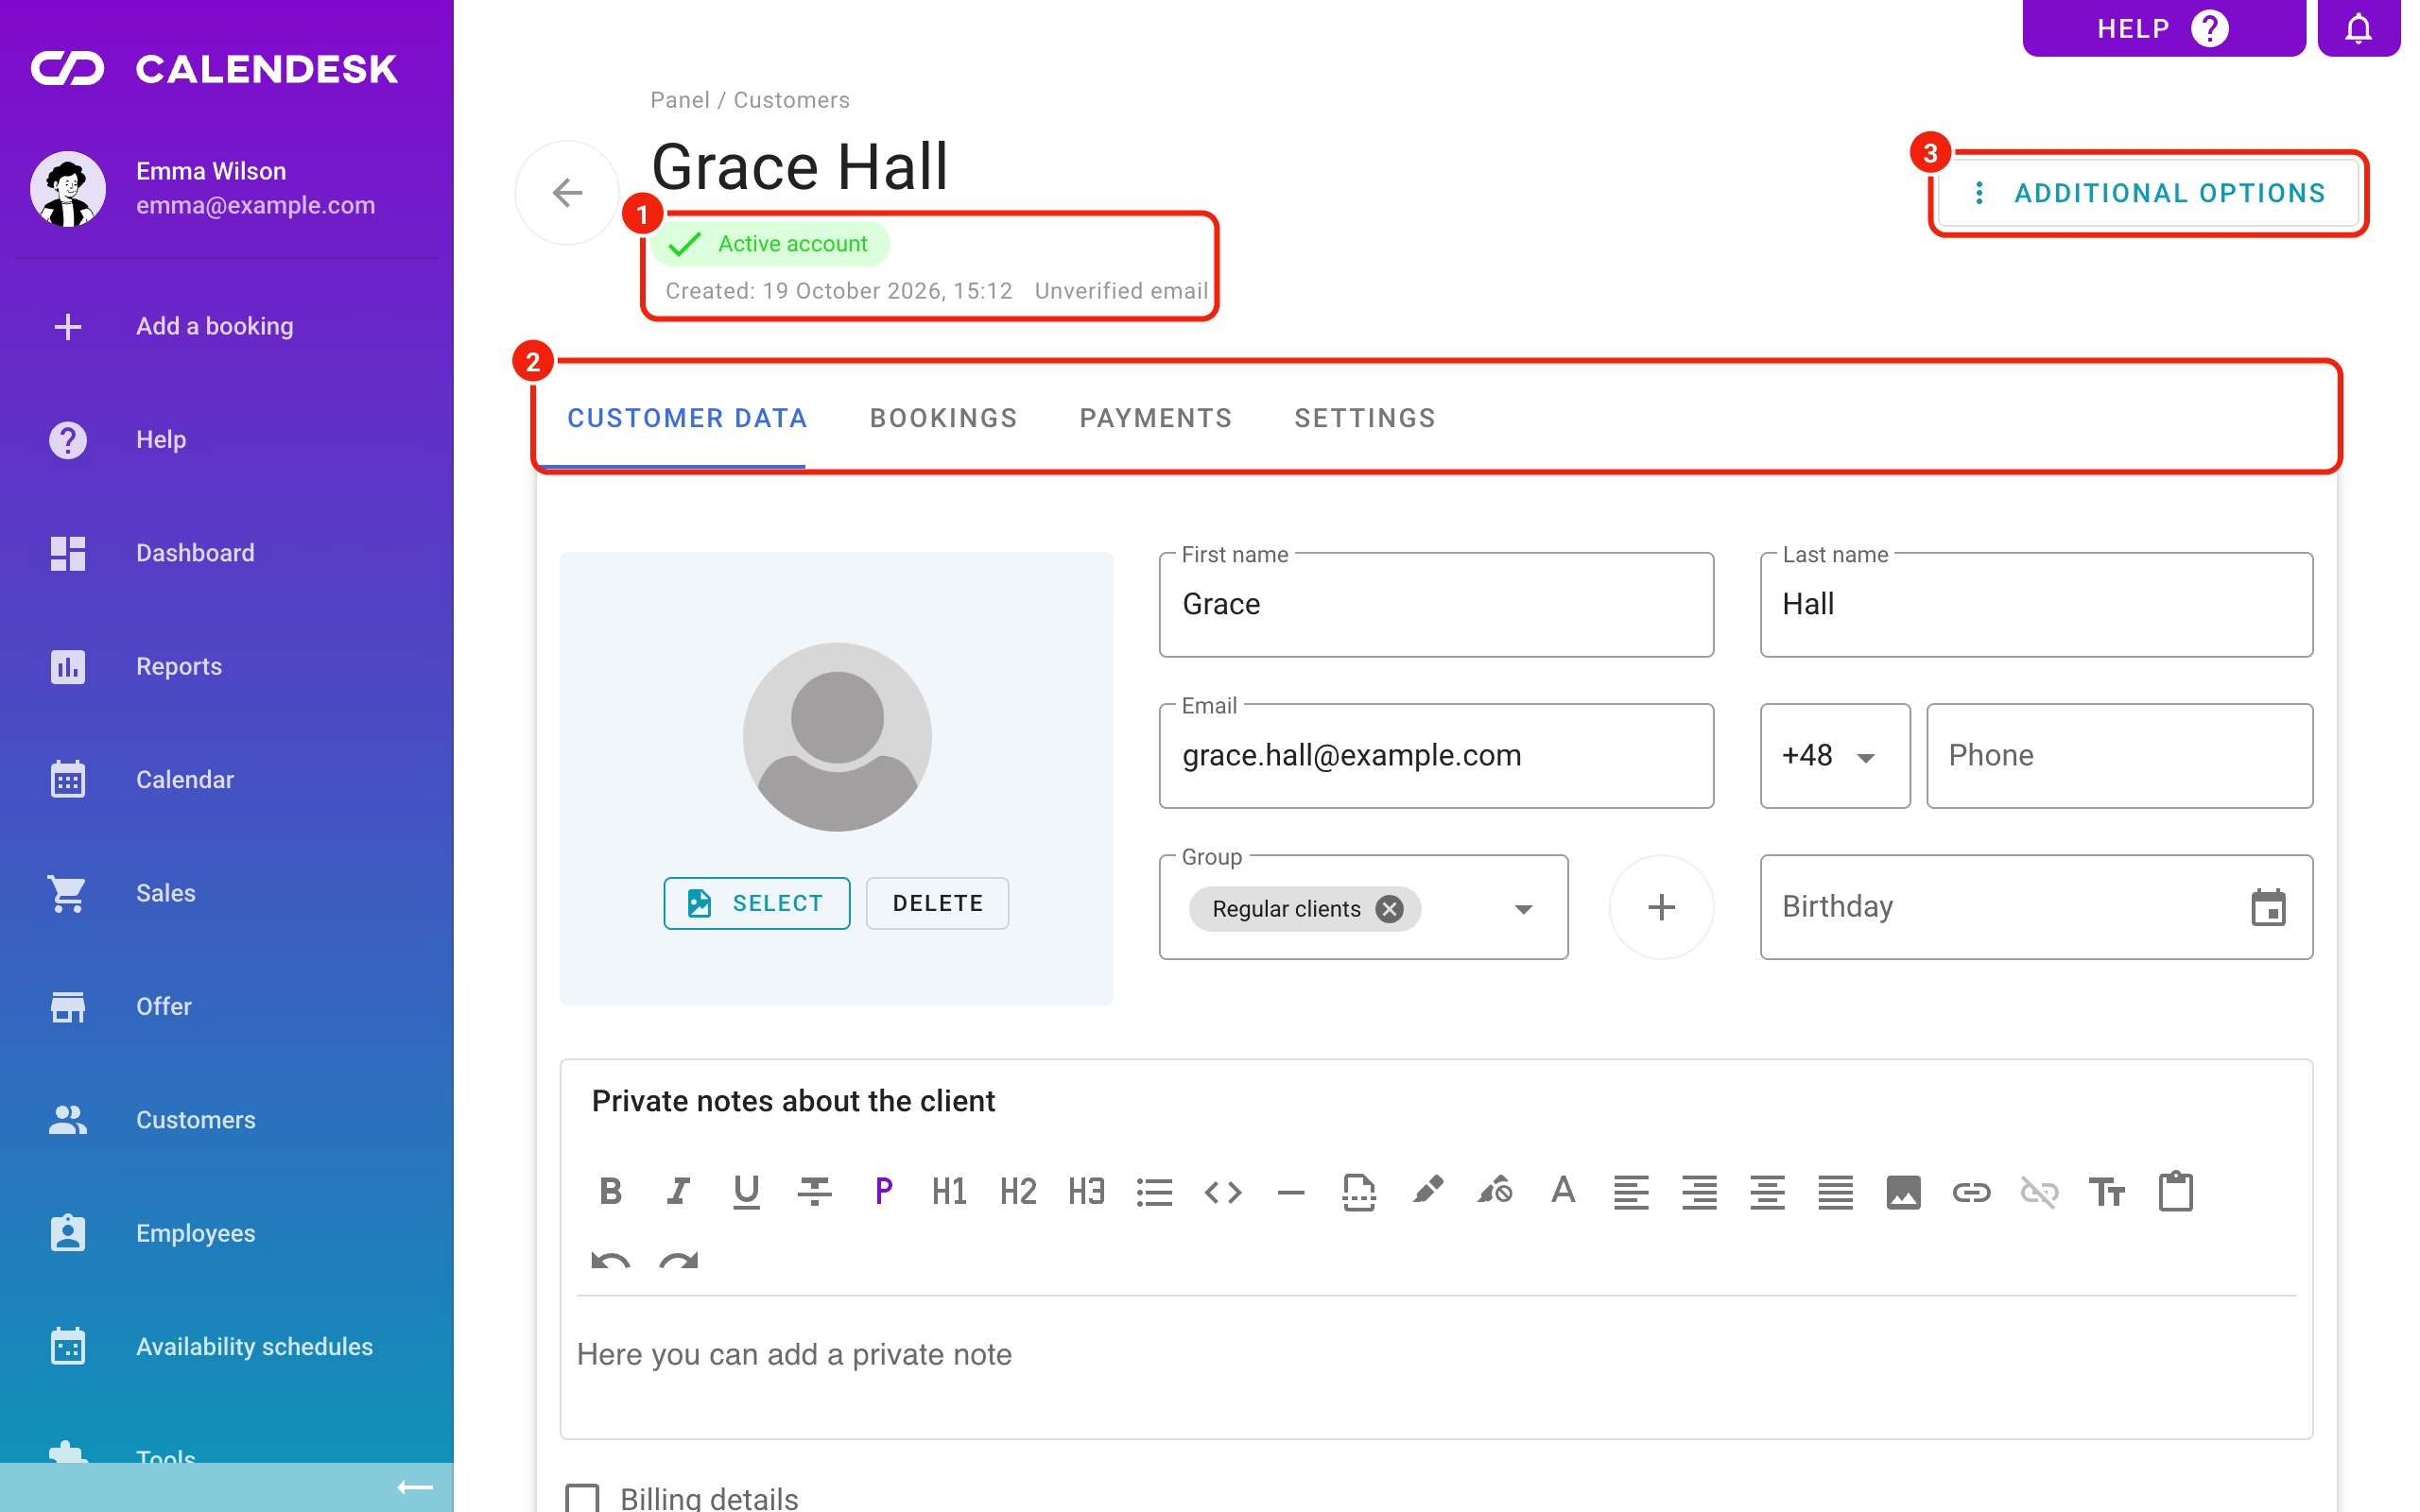
The top of the profile shows the name, the account status, when the account was created and whether the customer has verified their email address. The Additional options button on the right has the actions for this customer: Send a message to the client, Set a new password, Block account or Unblock account, Merge with another client and Delete account.
Below are four tabs: Customer data, Bookings, Payments and Settings.
Customer data
Here you edit the photo, First name, Last name, Email, phone, Group and Birthday. Use Private notes about the client for anything your team should know. The customer can't see these notes.
Tick Billing details to enter a name, address and Tax ID number. After typing the tax ID, click Download data and the panel fills in the company details. If you issue invoices through InvoiceOcean (Fakturownia), the customer's invoice uses these details. With a tax ID, the invoice is made out to the company. See How to connect Calendesk payments with InvoiceOcean (Fakturownia)?
Tick Show advanced settings to see Stripe ID, InvoiceOcean ID and Internal number. If the customer signed up for an account on your website, a GDPR consents section below shows the consents they ticked at the time.
Click Save when you're done.
Bookings
This is the list of the customer's bookings, with the same filters and actions as in Sales → Bookings. In the Manage column you can preview, edit, pay for, duplicate, cancel or delete a booking. A canceled booking stays in the system with a new status, while a deleted one is gone.
Payments
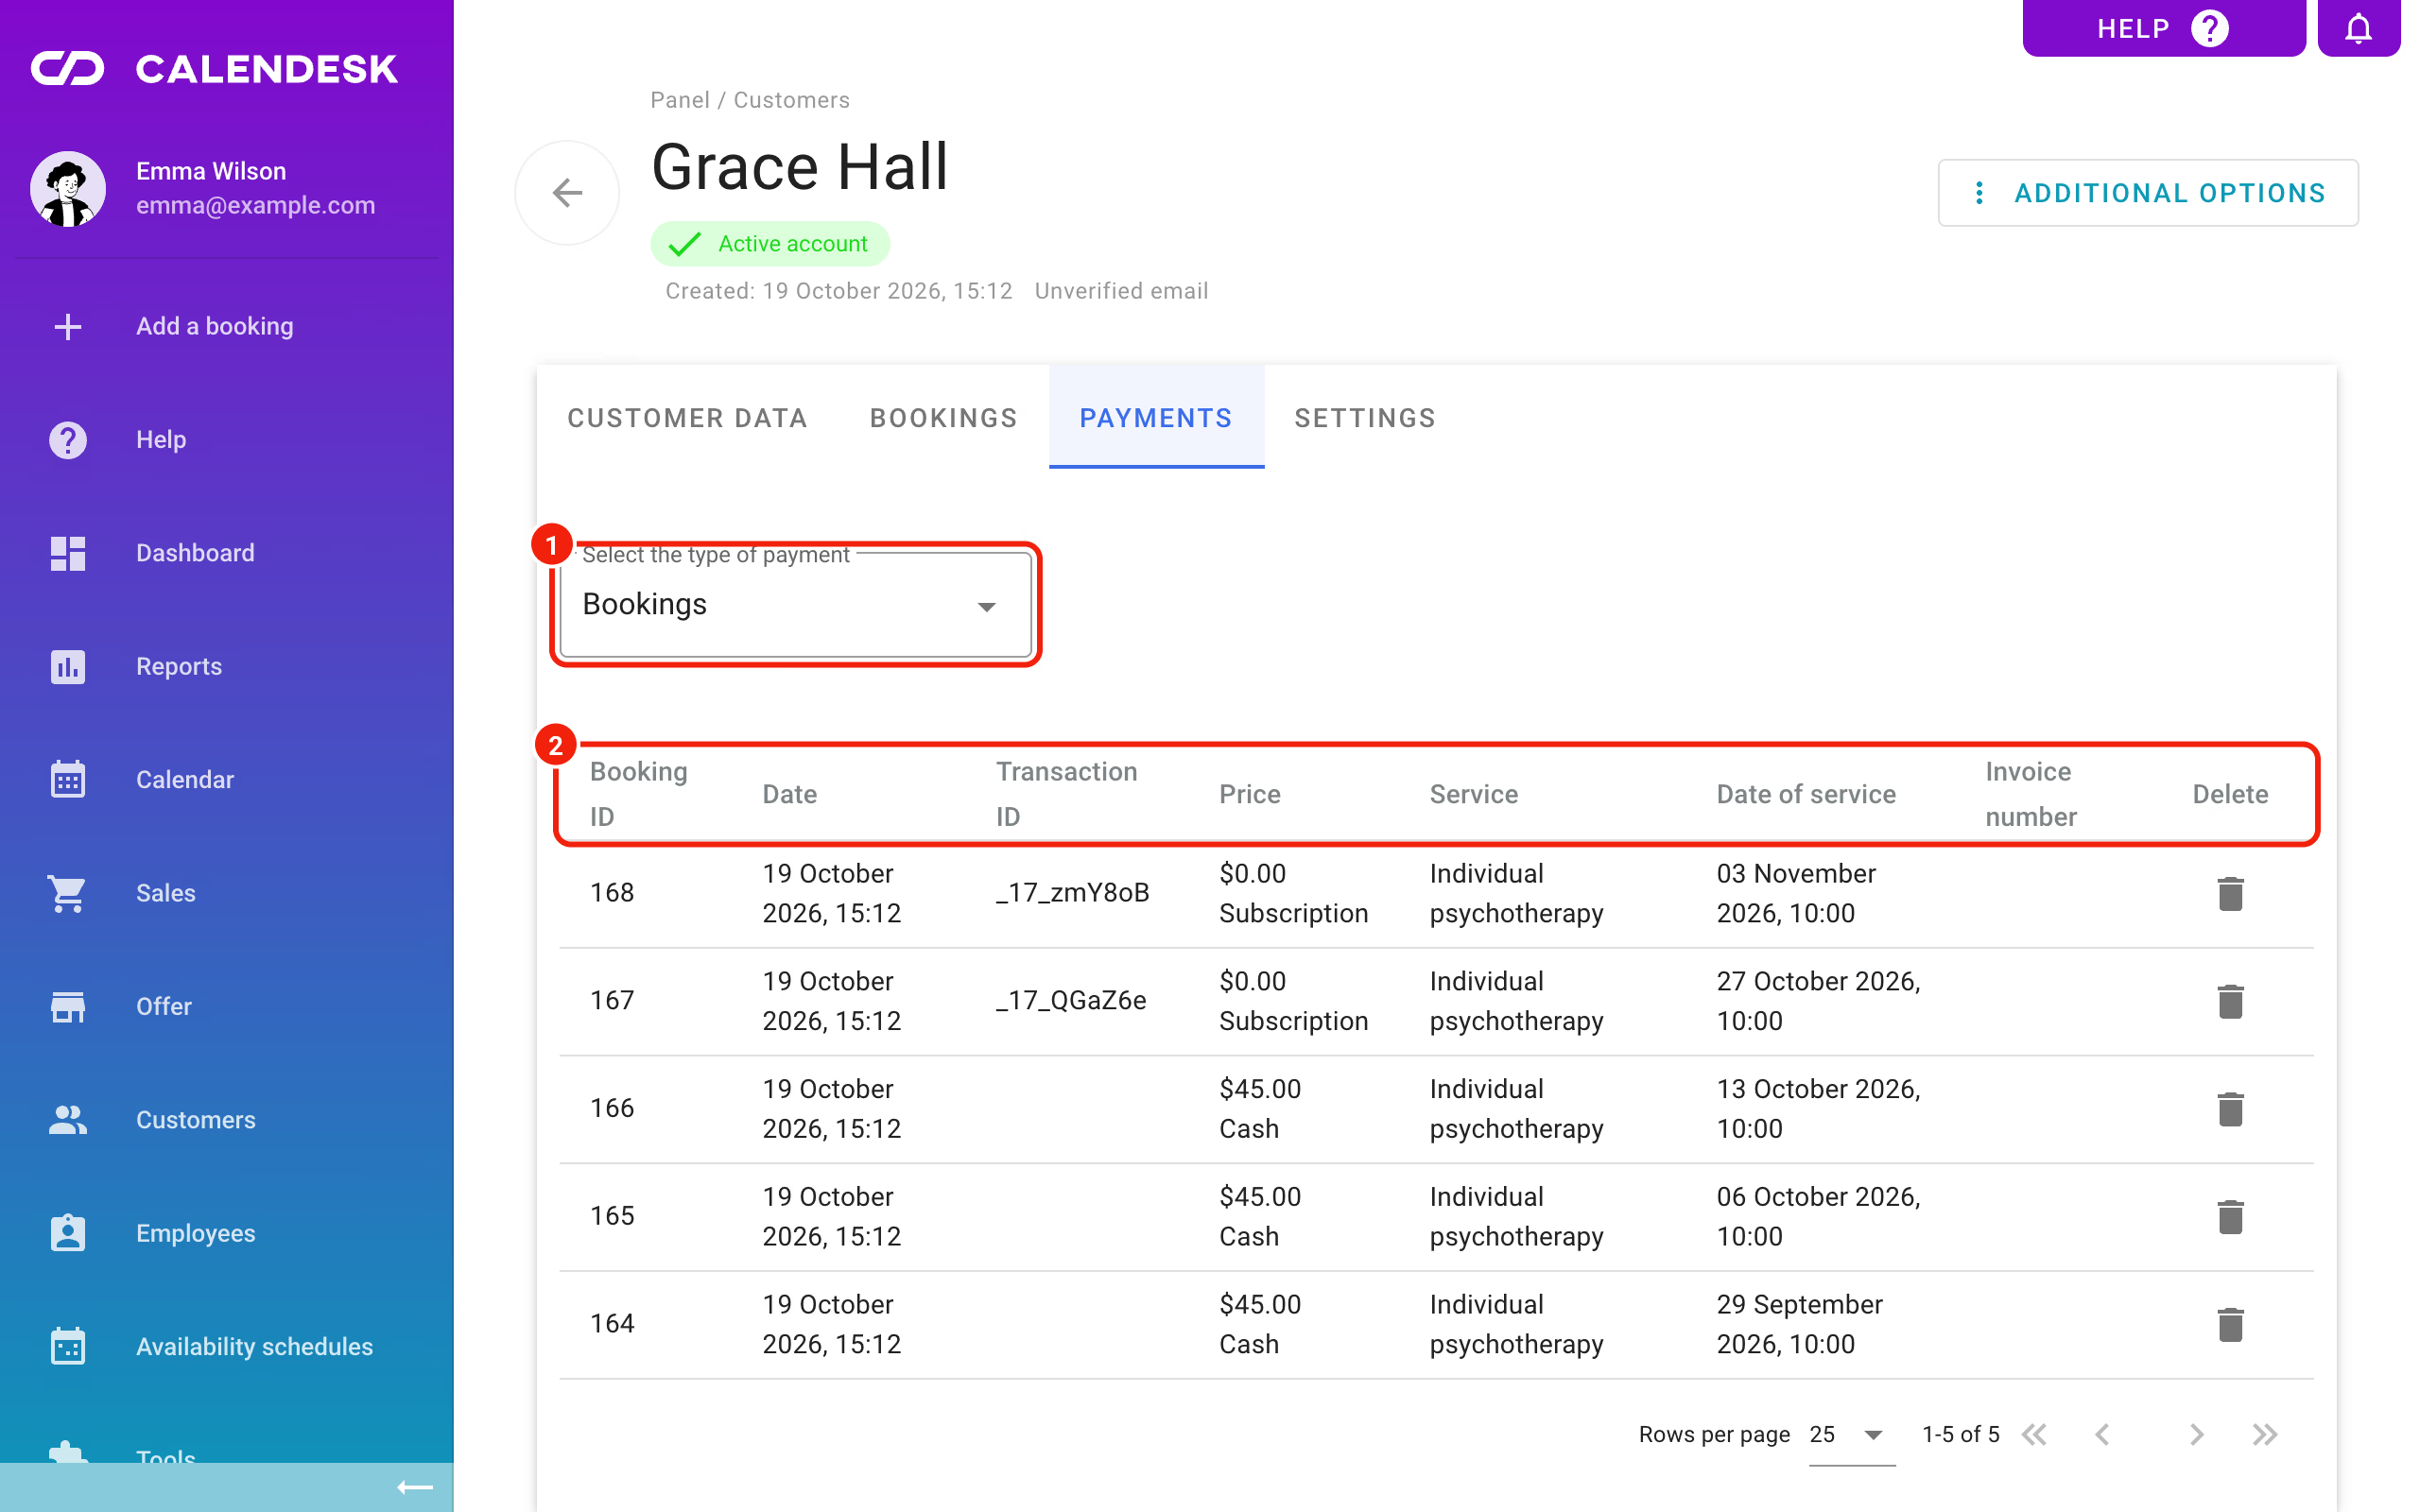
Use Select the type of payment to switch between payments for Bookings, Products and Subscriptions. For bookings, you'll see the Booking ID, Date, Transaction ID, Price, Service, Date of service and Invoice number. The invoice number appears when InvoiceOcean is connected and the invoice was issued. The last column lets you delete a payment.
Settings
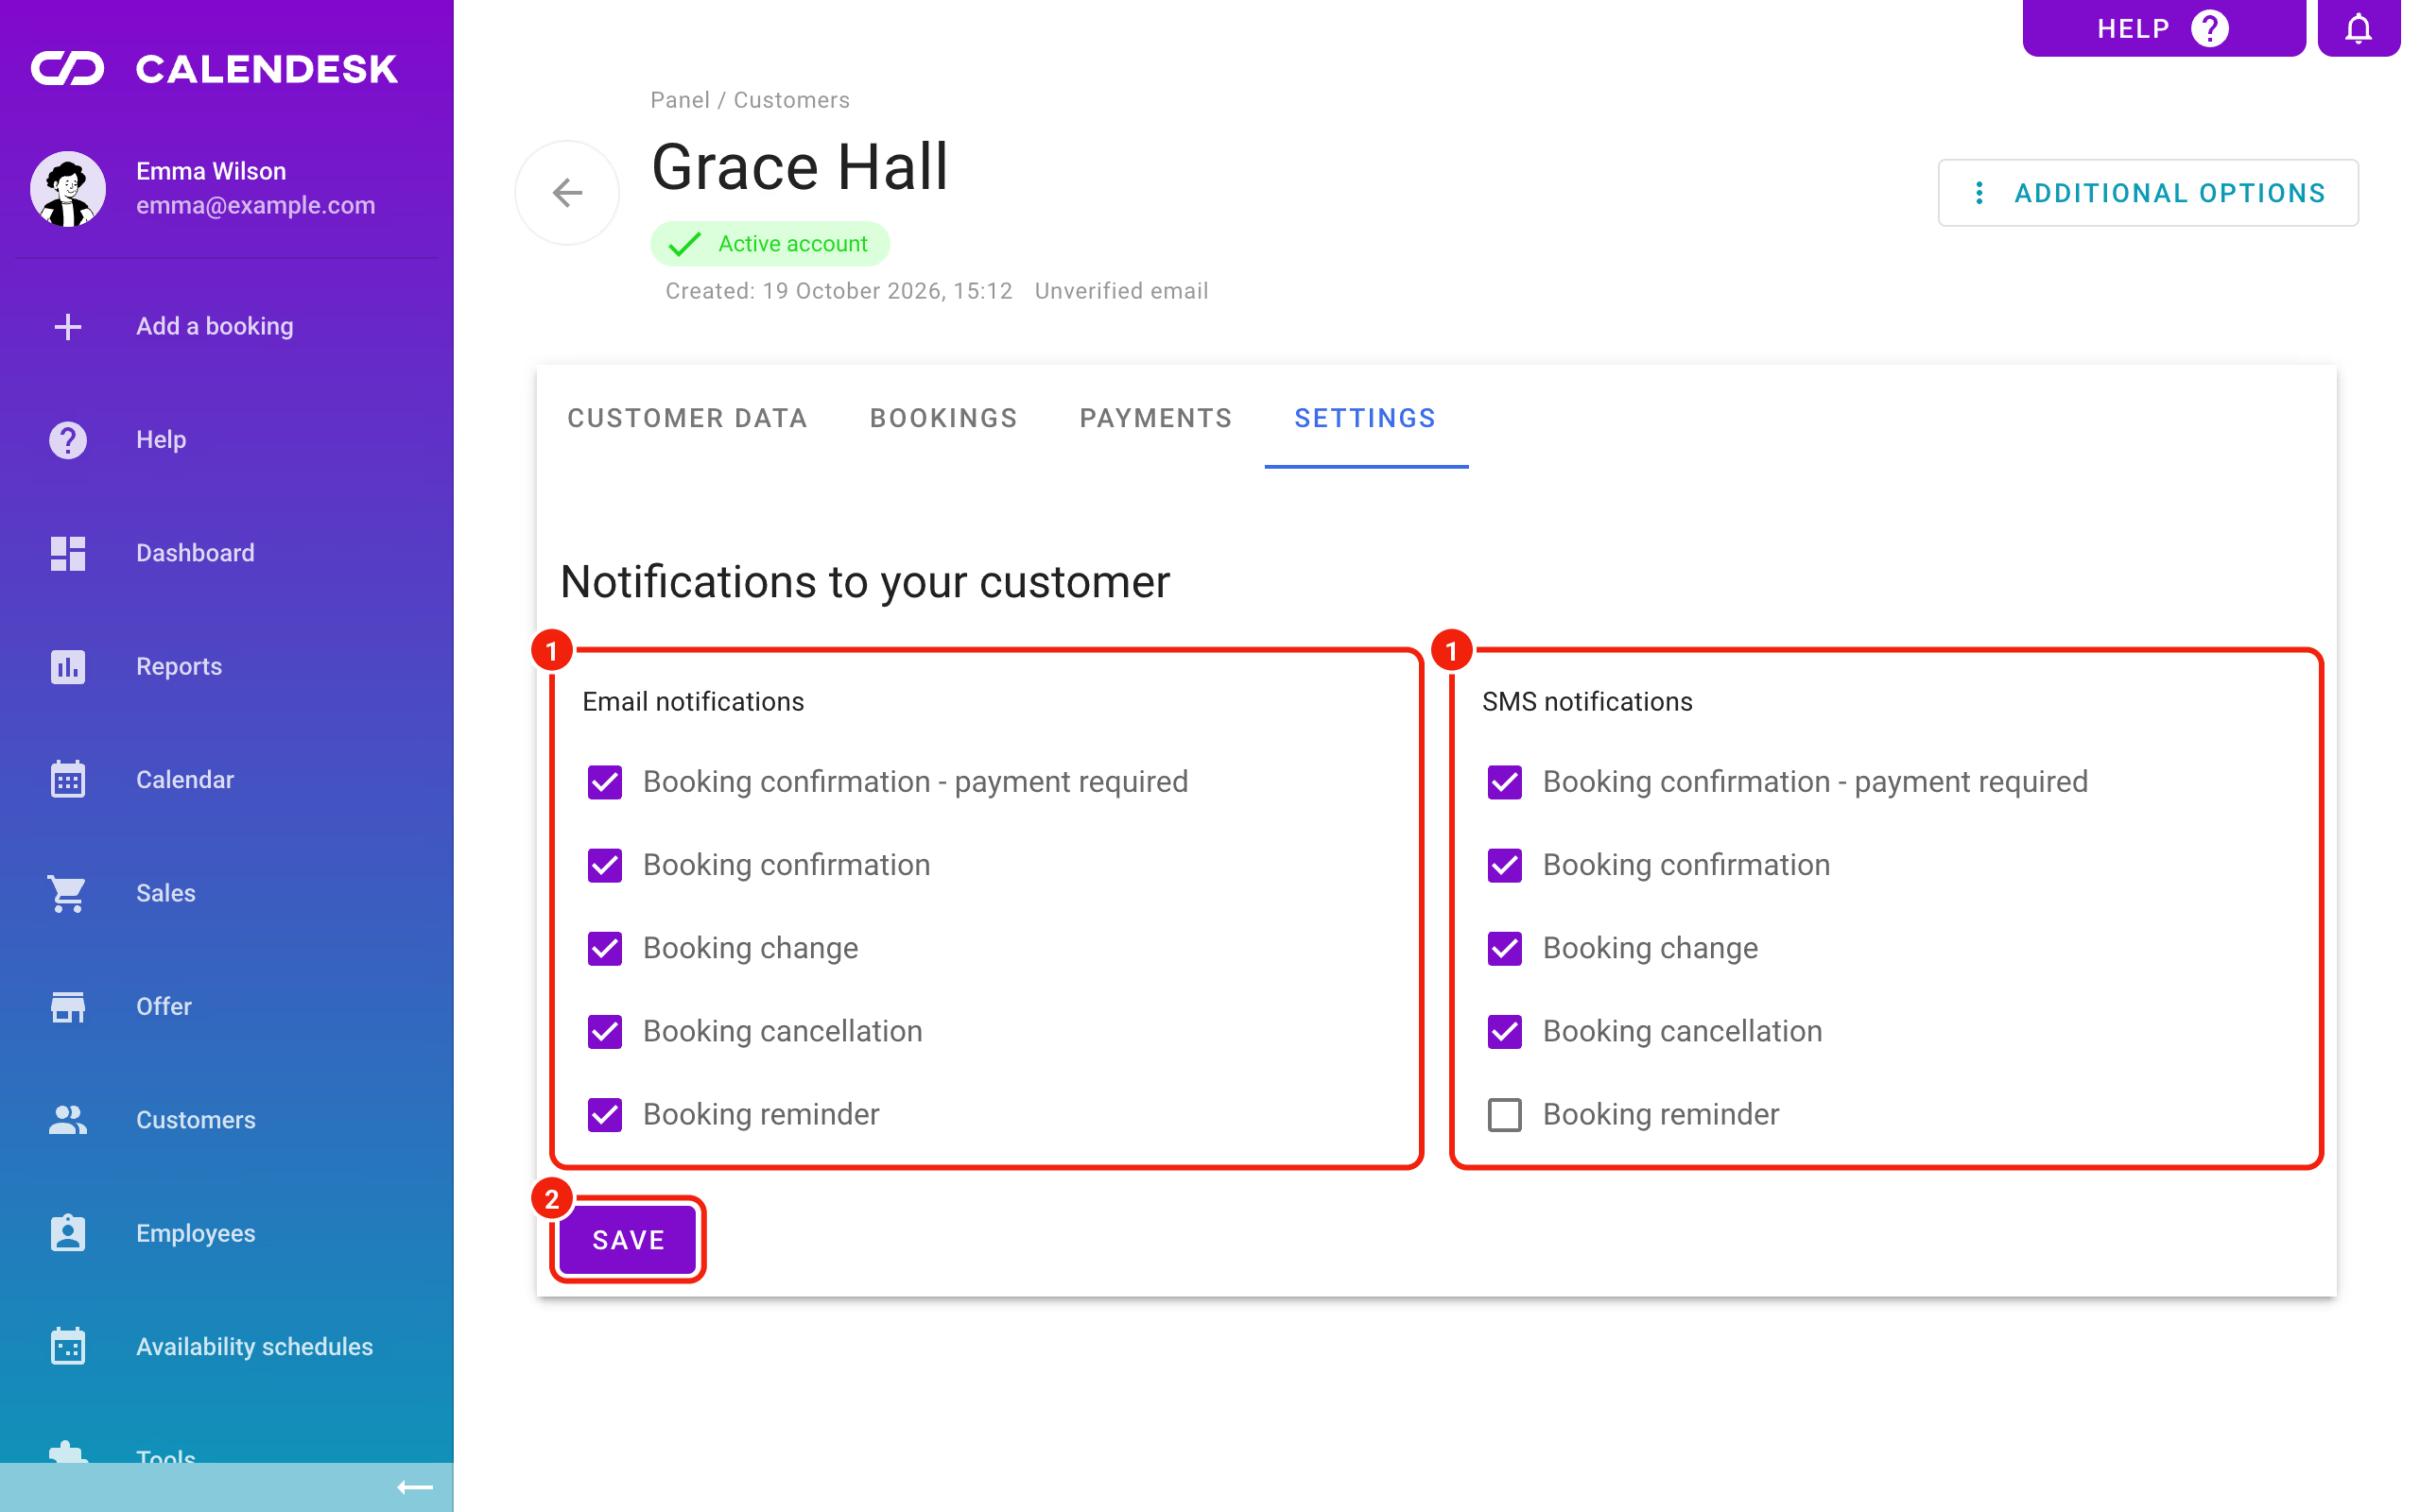
Here you turn off specific notifications for this customer. There are two columns, Email notifications and SMS notifications, each with checkboxes for Booking confirmation - payment required, Booking confirmation, Booking change, Booking cancellation and Booking reminder. Untick the ones the customer shouldn't get and click Save.
A customer only gets a notification when it's ticked here and turned on for all customers in Notifications → Settings. That setup is described in How can I edit email, SMS, and push notifications?
Frequently asked questions (FAQ)
A customer has two accounts. How do I combine them?
Tick both accounts in the list and choose Merge clients, or open the profile and click Additional options → Merge with another client. Pick the Account to keep. Bookings and notification history move to that account, notes are combined and the other accounts are deleted. The customer doesn't get any message. Accounts with payments or subscriptions can't be merged, and merging can't be undone.
What happens when I block a customer?
They can't sign in on your website or book a new appointment. Their details and bookings stay in the panel. Use Unblock account to lift the block.
How do I export my customer list to Excel?
Tick the customers, click the three dots on the bar above the table and choose Download XLSX (Microsoft Excel). To export everyone, select all records across all pages first.