How to use Calendesk with Zapier?
Connect Calendesk with over 5,000 integrations!
Zapier allows you to create chains of connections and automation between seemingly unrelated applications from various businesses worldwide. Thanks to the Calendesk and Zapier integration, our system has become open to over 3,000 applications from around the world.
Would you like to send an additional email or text message to the client immediately after booking?
Or maybe you want to add customer data to MailChimp and include it in your marketing processes?
How about sending a booking schedule update notification to Slack?
If the above app names don’t mean anything to you, don’t worry! Instead, think about how you could use the data from Calendesk and what you could do with it. The process is straightforward:
- Your customer creates a booking with Calendesk.
- Calendesk sends this information to your Zapier integration.
- You decide what should happen with this data. Next, choose an application in Zapier that you wish to process the data. Then, select, e.g., Gmail and send an additional booking email to someone who may need to know about it, or maybe you prefer to add the user email to your address book in Google?
How to start using Zapier and Calendesk?
Generate an API Key for Calendesk
Check out this article to see how to generate API keys, or follow the below instructions:
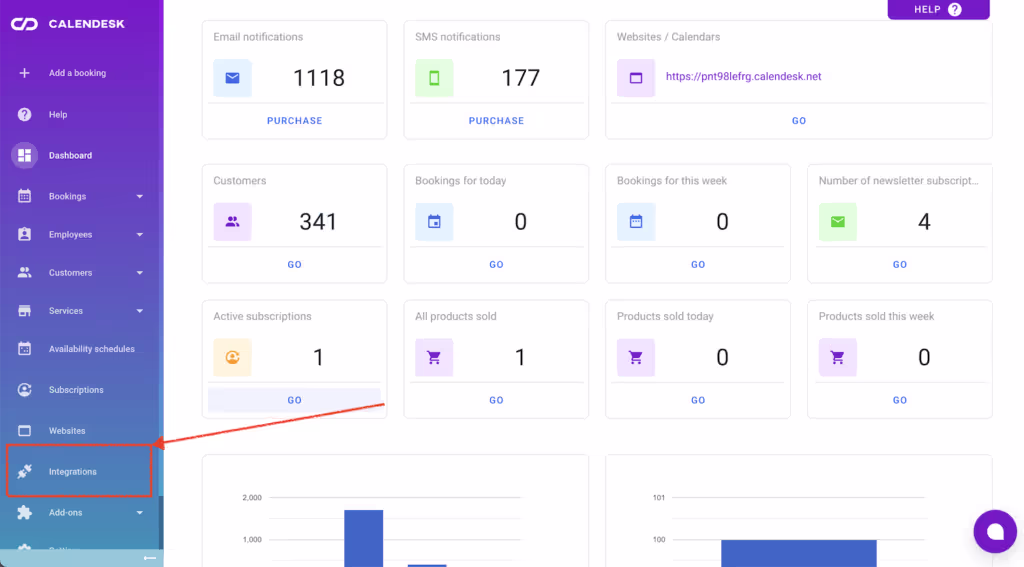
- Sign in to Calendesk Admin Panel
- Click Integrations from the main menu.
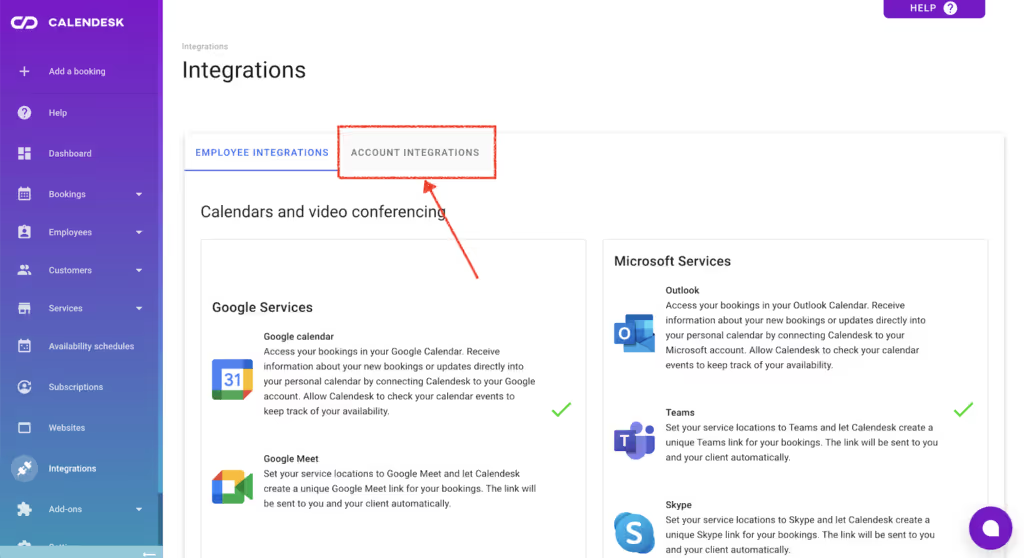
- Select Account Integrations and scroll to API.
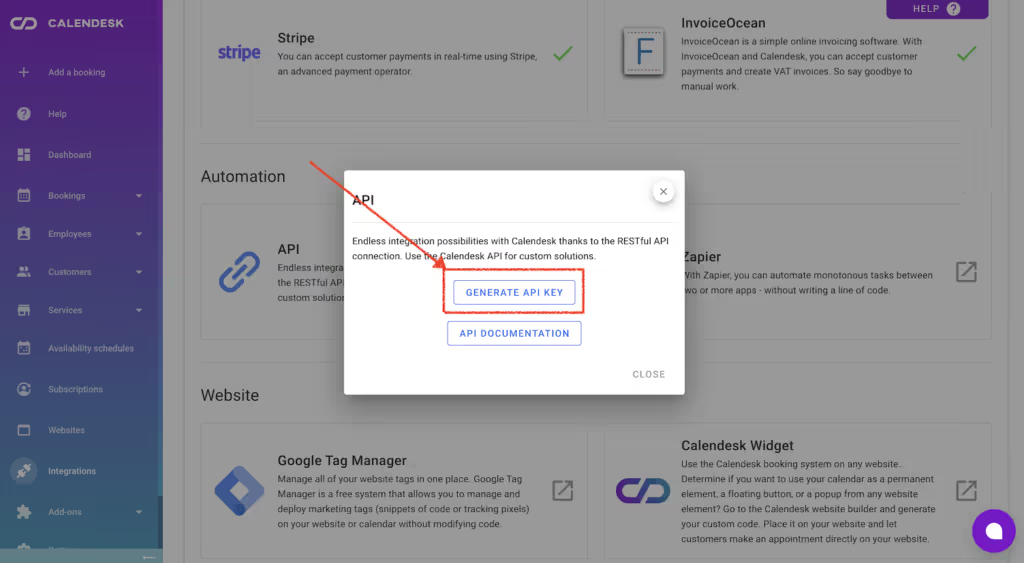
- Select API and click Generate API Key.
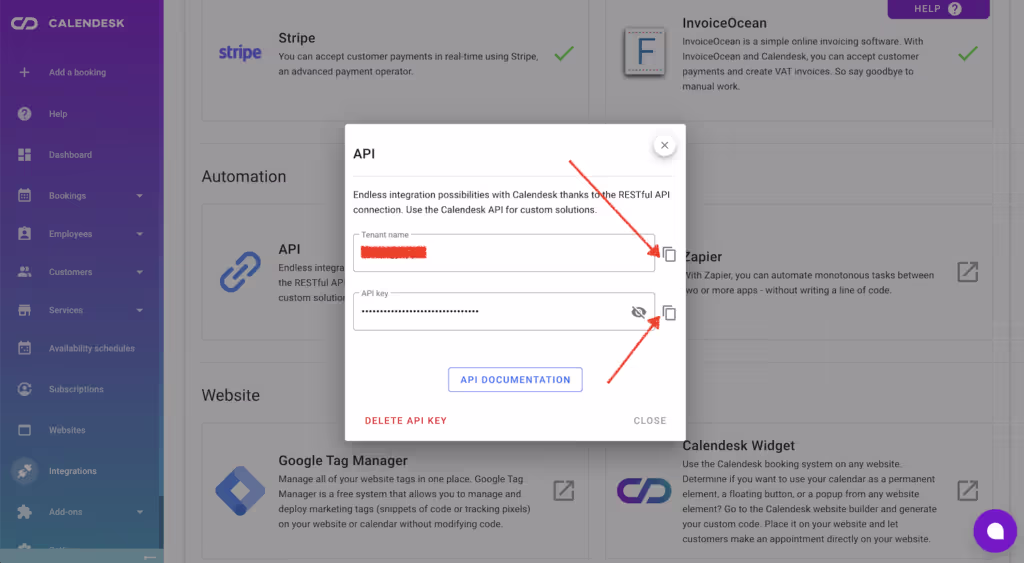
- Copy the tenant name and the API key to your clipboard.