How to add a service?
Adding services
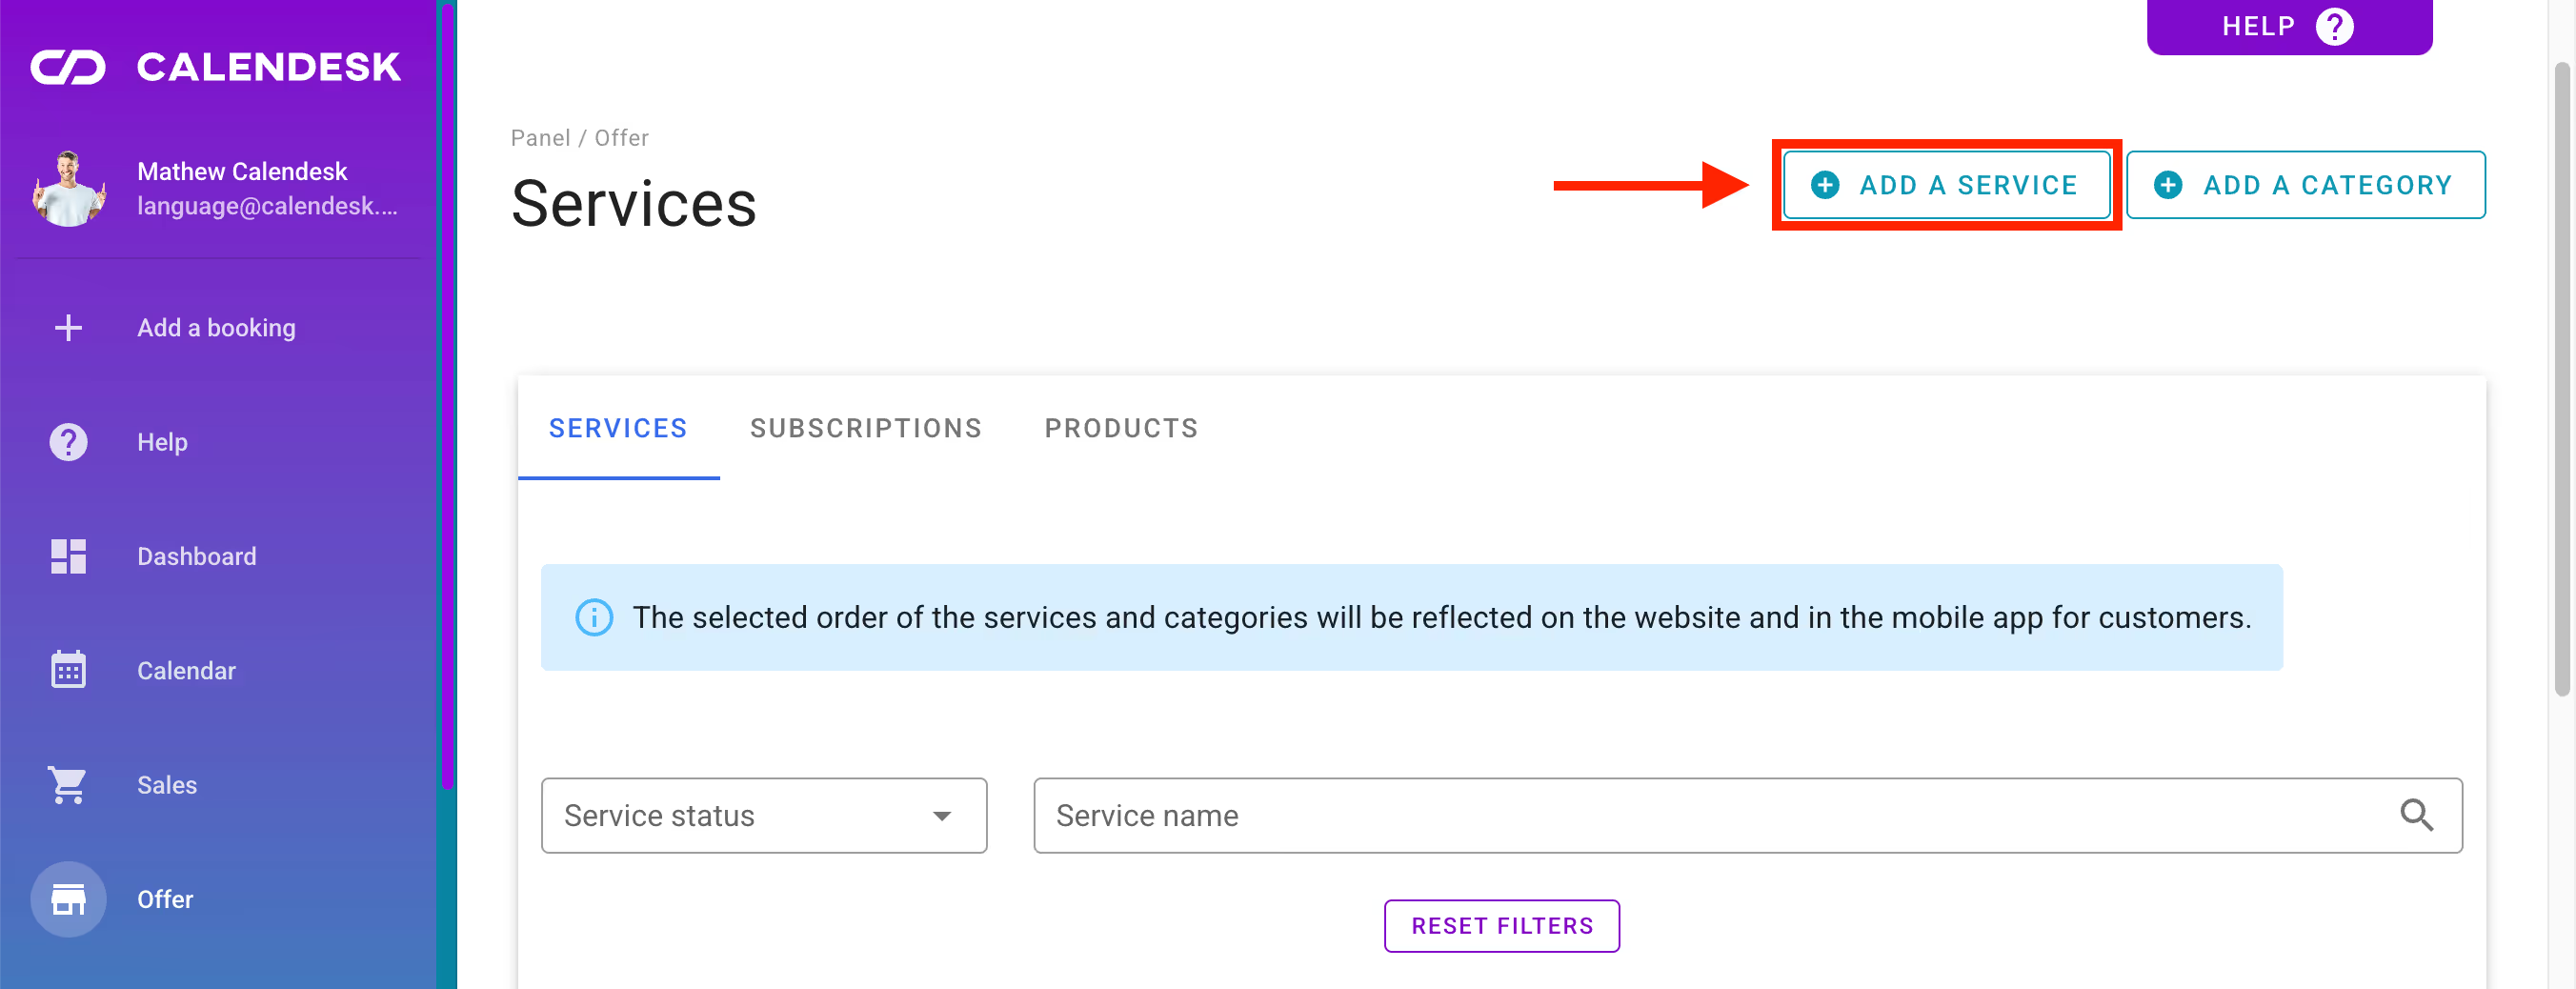
In the Offer – Services section, you can add a new service that your customers can use. You can add it using the Add a Service button.
Filling in service information
In the form that appears after clicking the Add a service button, you will see fields that you need to fill in with data. This information will be visible in the booking calendar for your customers:
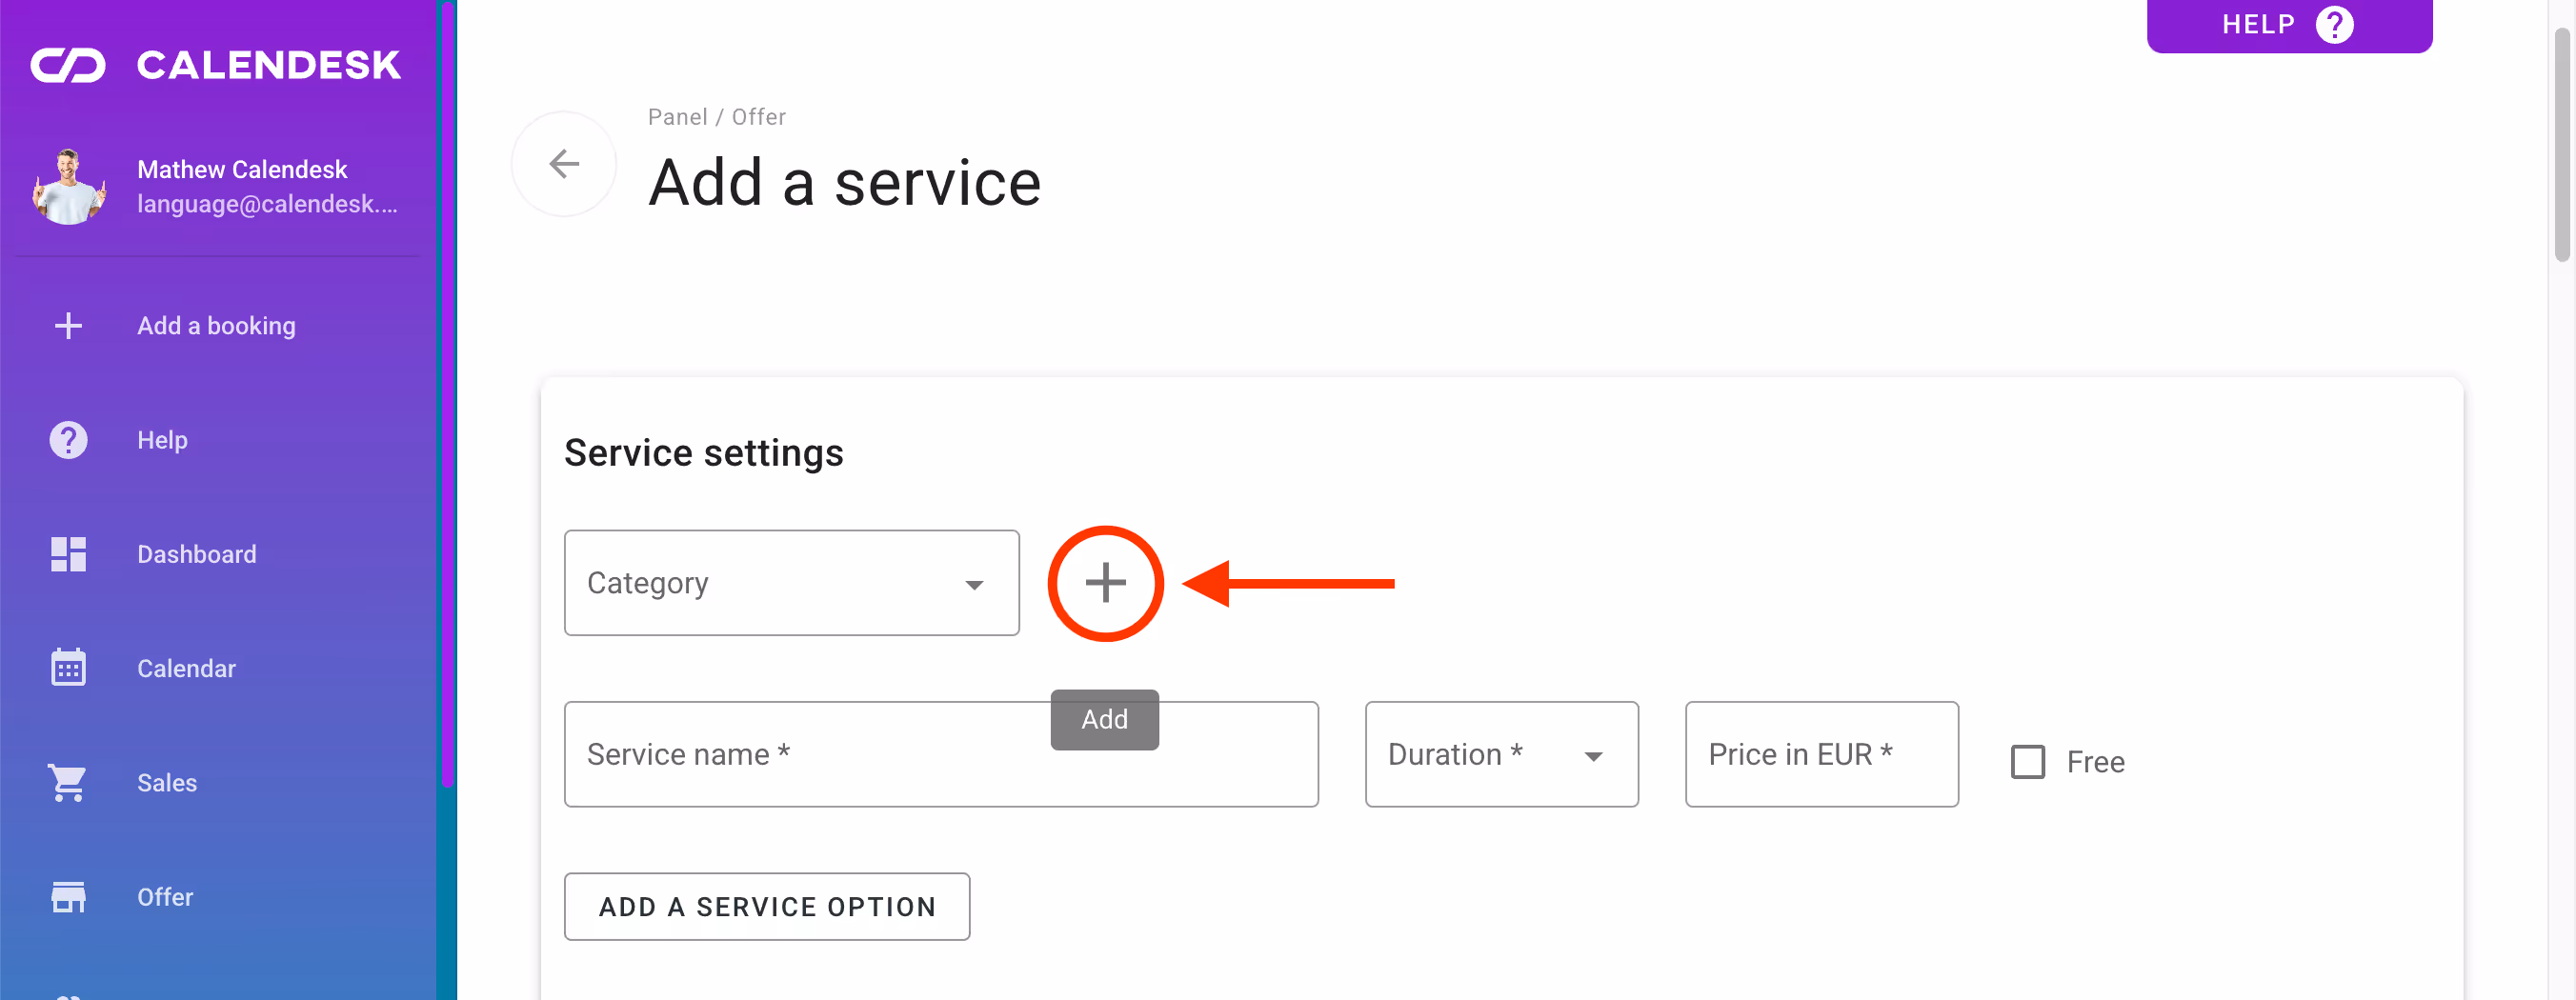
- You can add categories by clicking the + button or Add Category, in the Offer tab window, or in the form, in the section marked below:
- Services are always grouped into categories. Each service must have a specified duration and a price at which it will be performed. If the service is paid, it must cost at least 0.5 USD. On the Calendesk platform, it is possible to add a service priced below 0.5 USD, but the online payment system – Stripe – will not allow the payment for such a booking to be accepted.
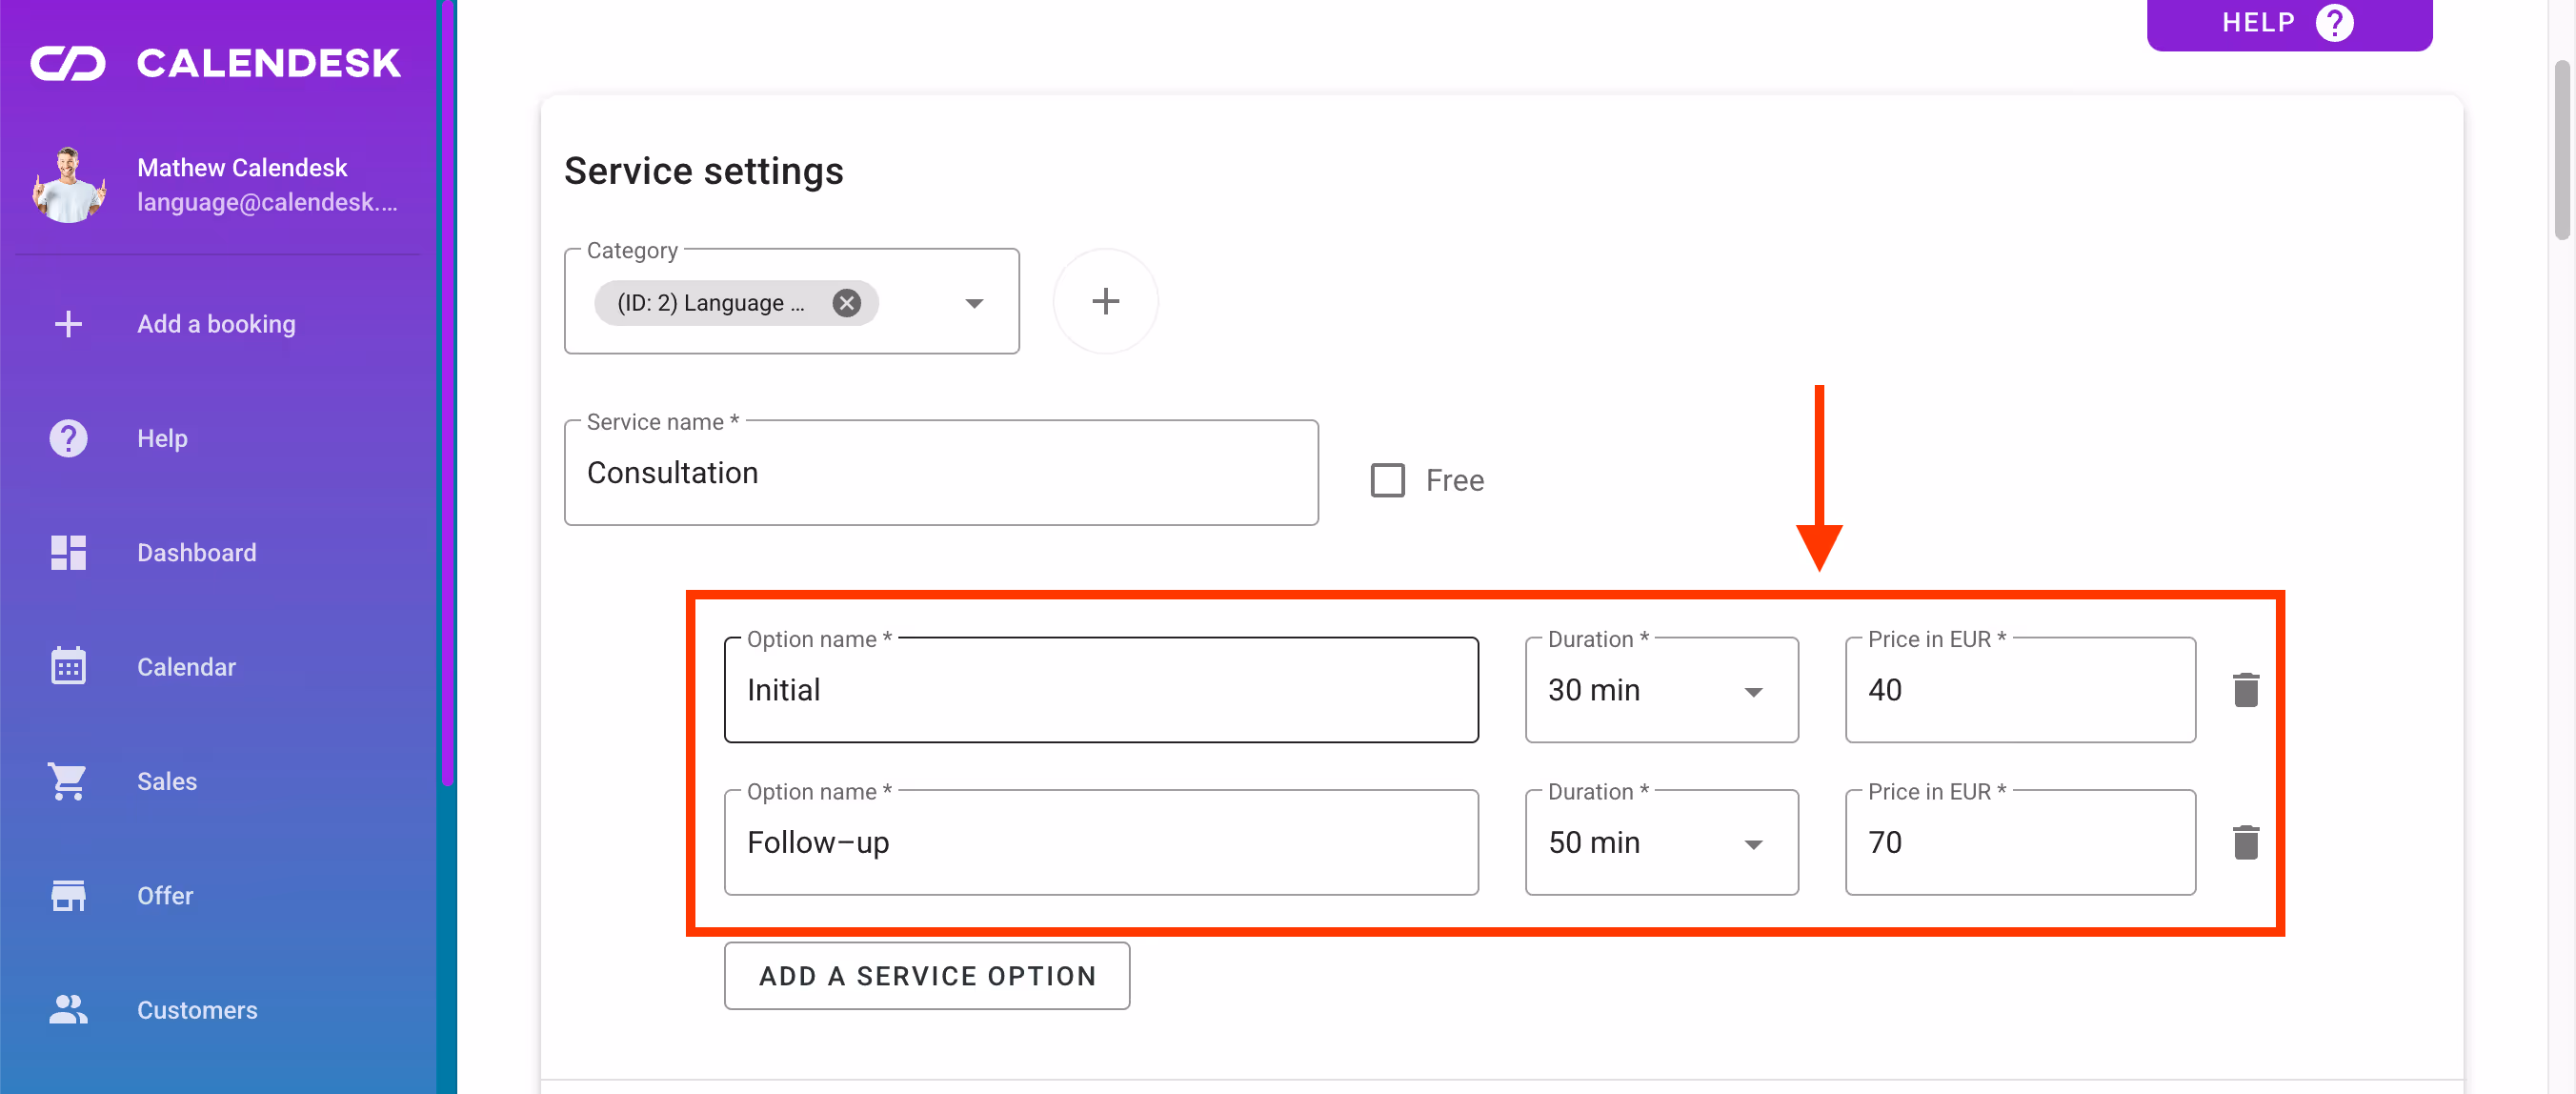
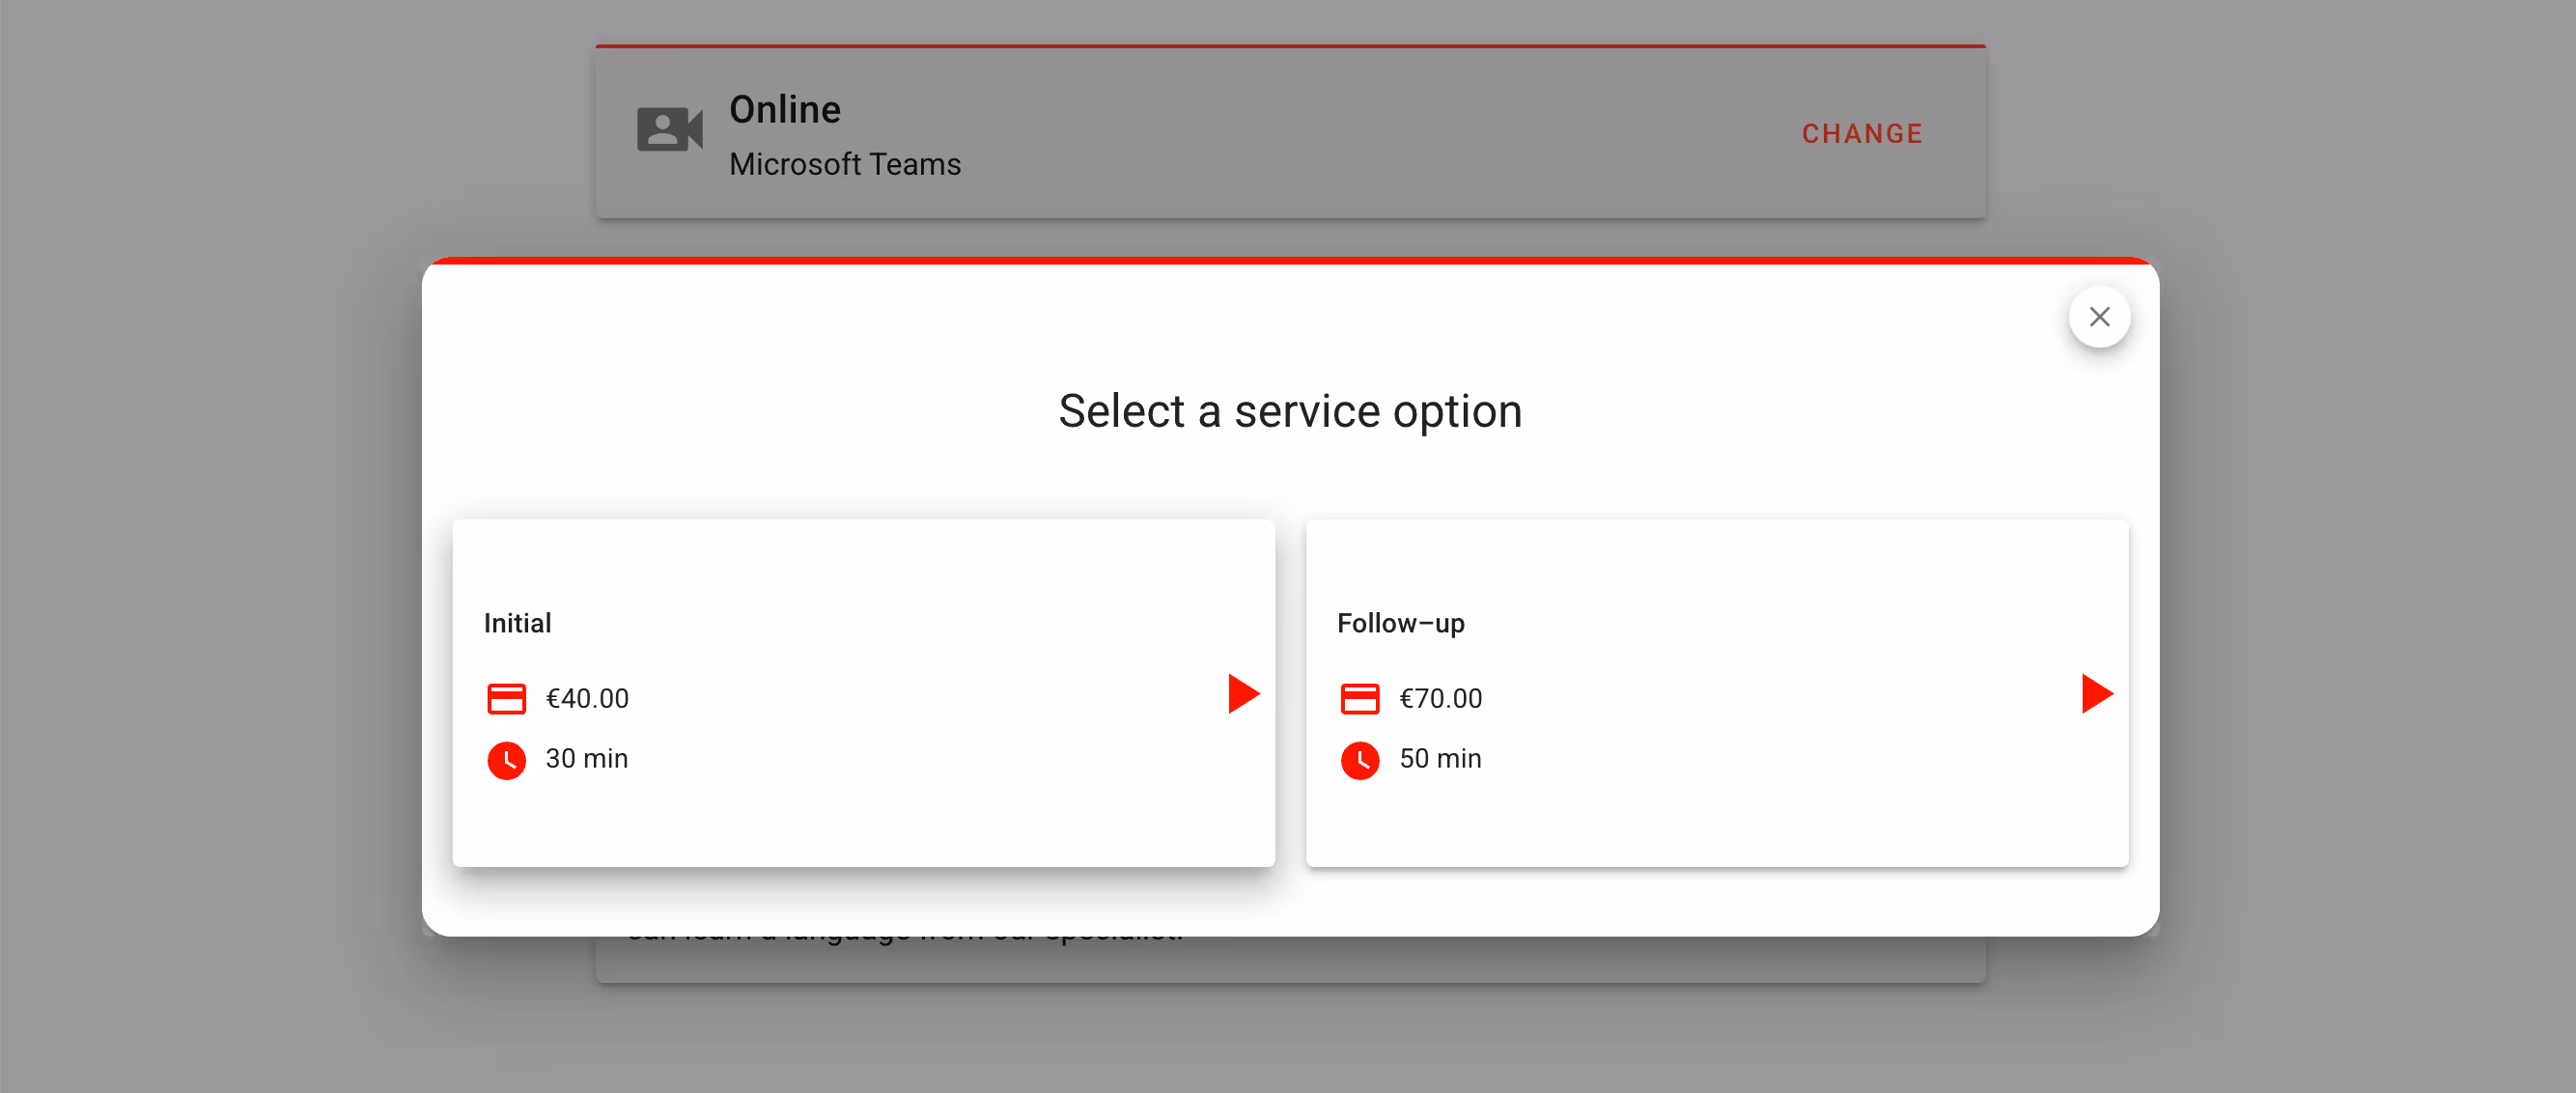
- Service options are versions of a service available to customers in your calendar. You can only assign a name, price, and duration to a service option. It is not possible to change the location of the service option or assign an employee to perform that specific service option. There is no limit to the number of service options you can add. Service options are visible in the Offer – Services tab, in the service settings (see the picture below). On the website, the service options will only be visible after selecting the type of service, as shown in the picture below.
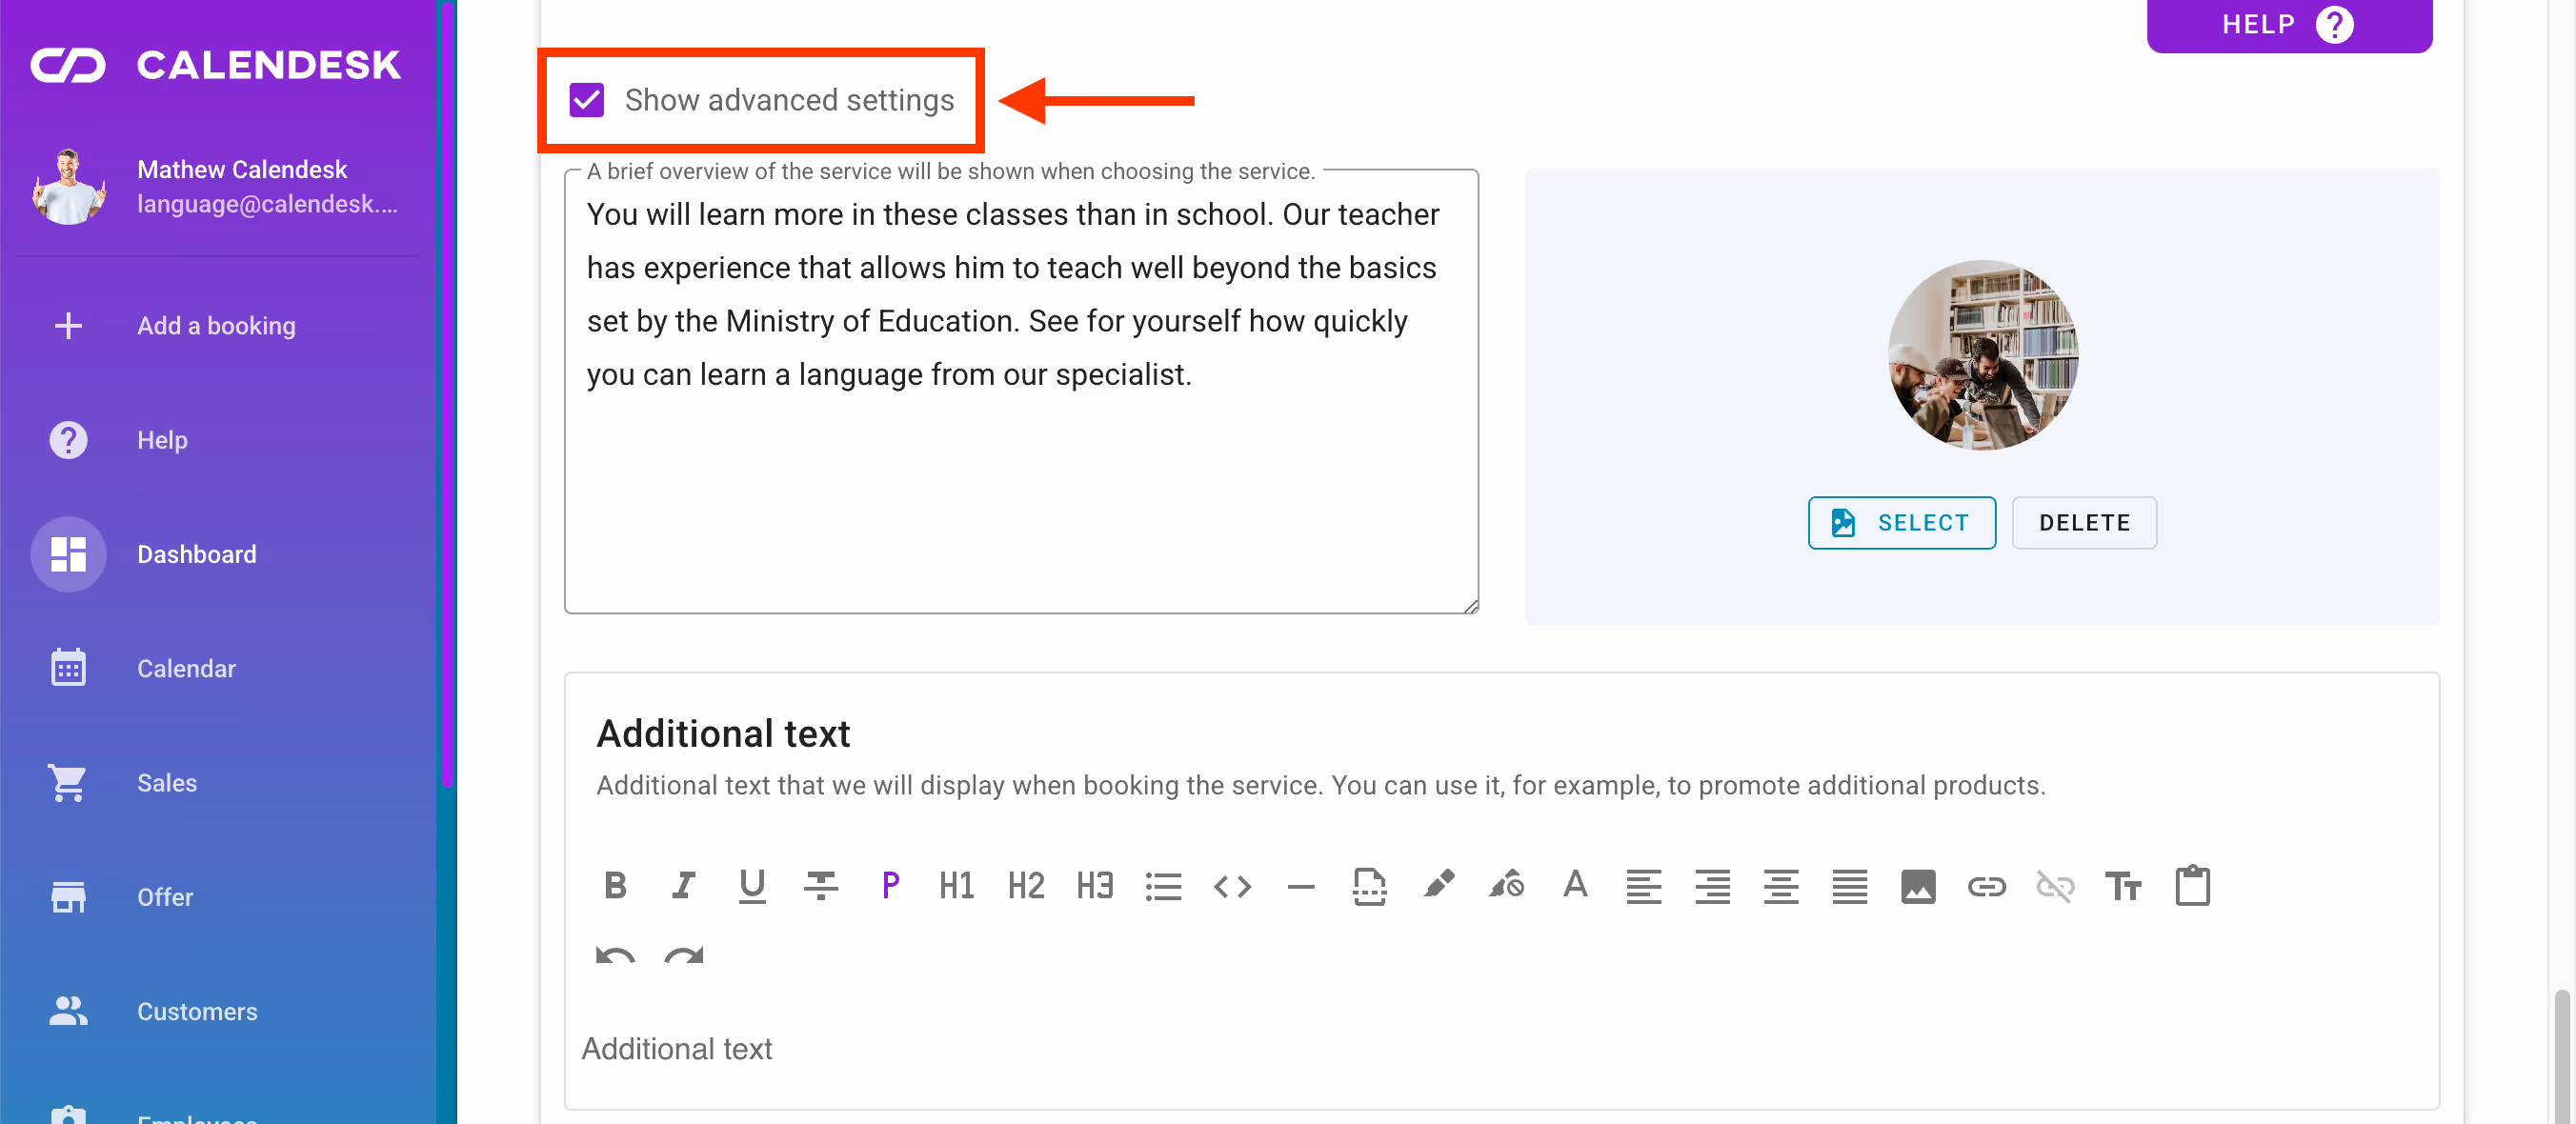
- The service description is a brief overview of the service that is visible in the calendar shared with customers. The image is an element that helps your customers get a better idea of what the service looks like. It enhances the aesthetic value of your website. To see the option to add the elements mentioned above, you need to check the checkbox labeled Show advanced settings as shown in the image below
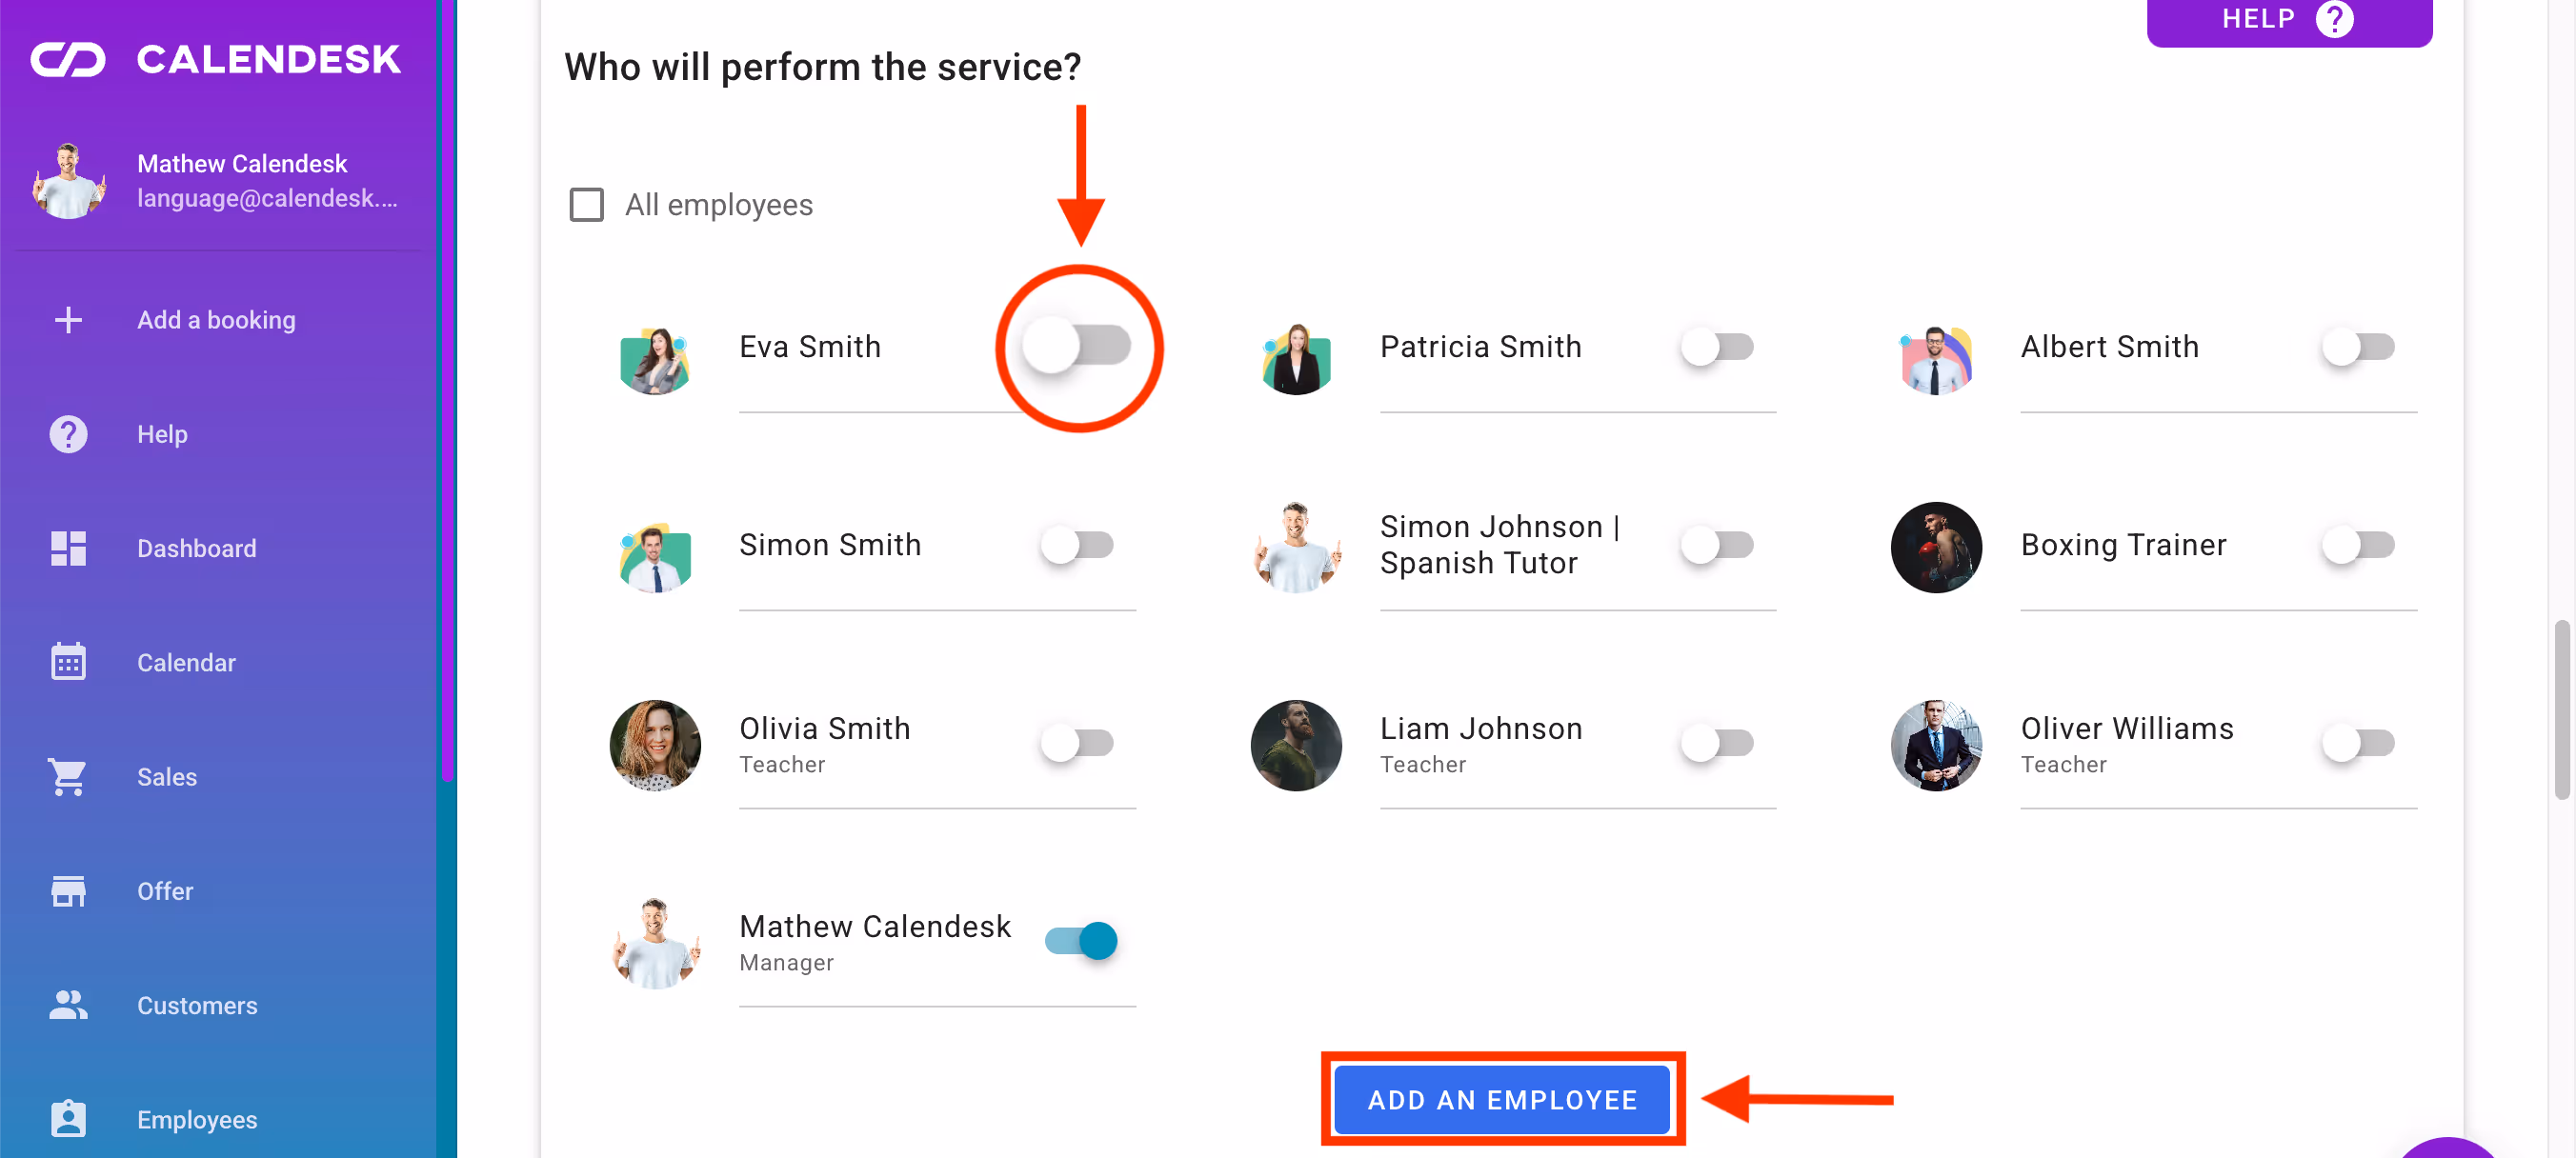
- Who will perform the service? – Here, you choose the employees to whom your customers can book appointments. In the booking system, on the website, when customers book a service, they will see the employees you assign to that service. In this section, you can add a new employee. You can read about how to add a new employee in the article How to add an employee?.
Booking settings
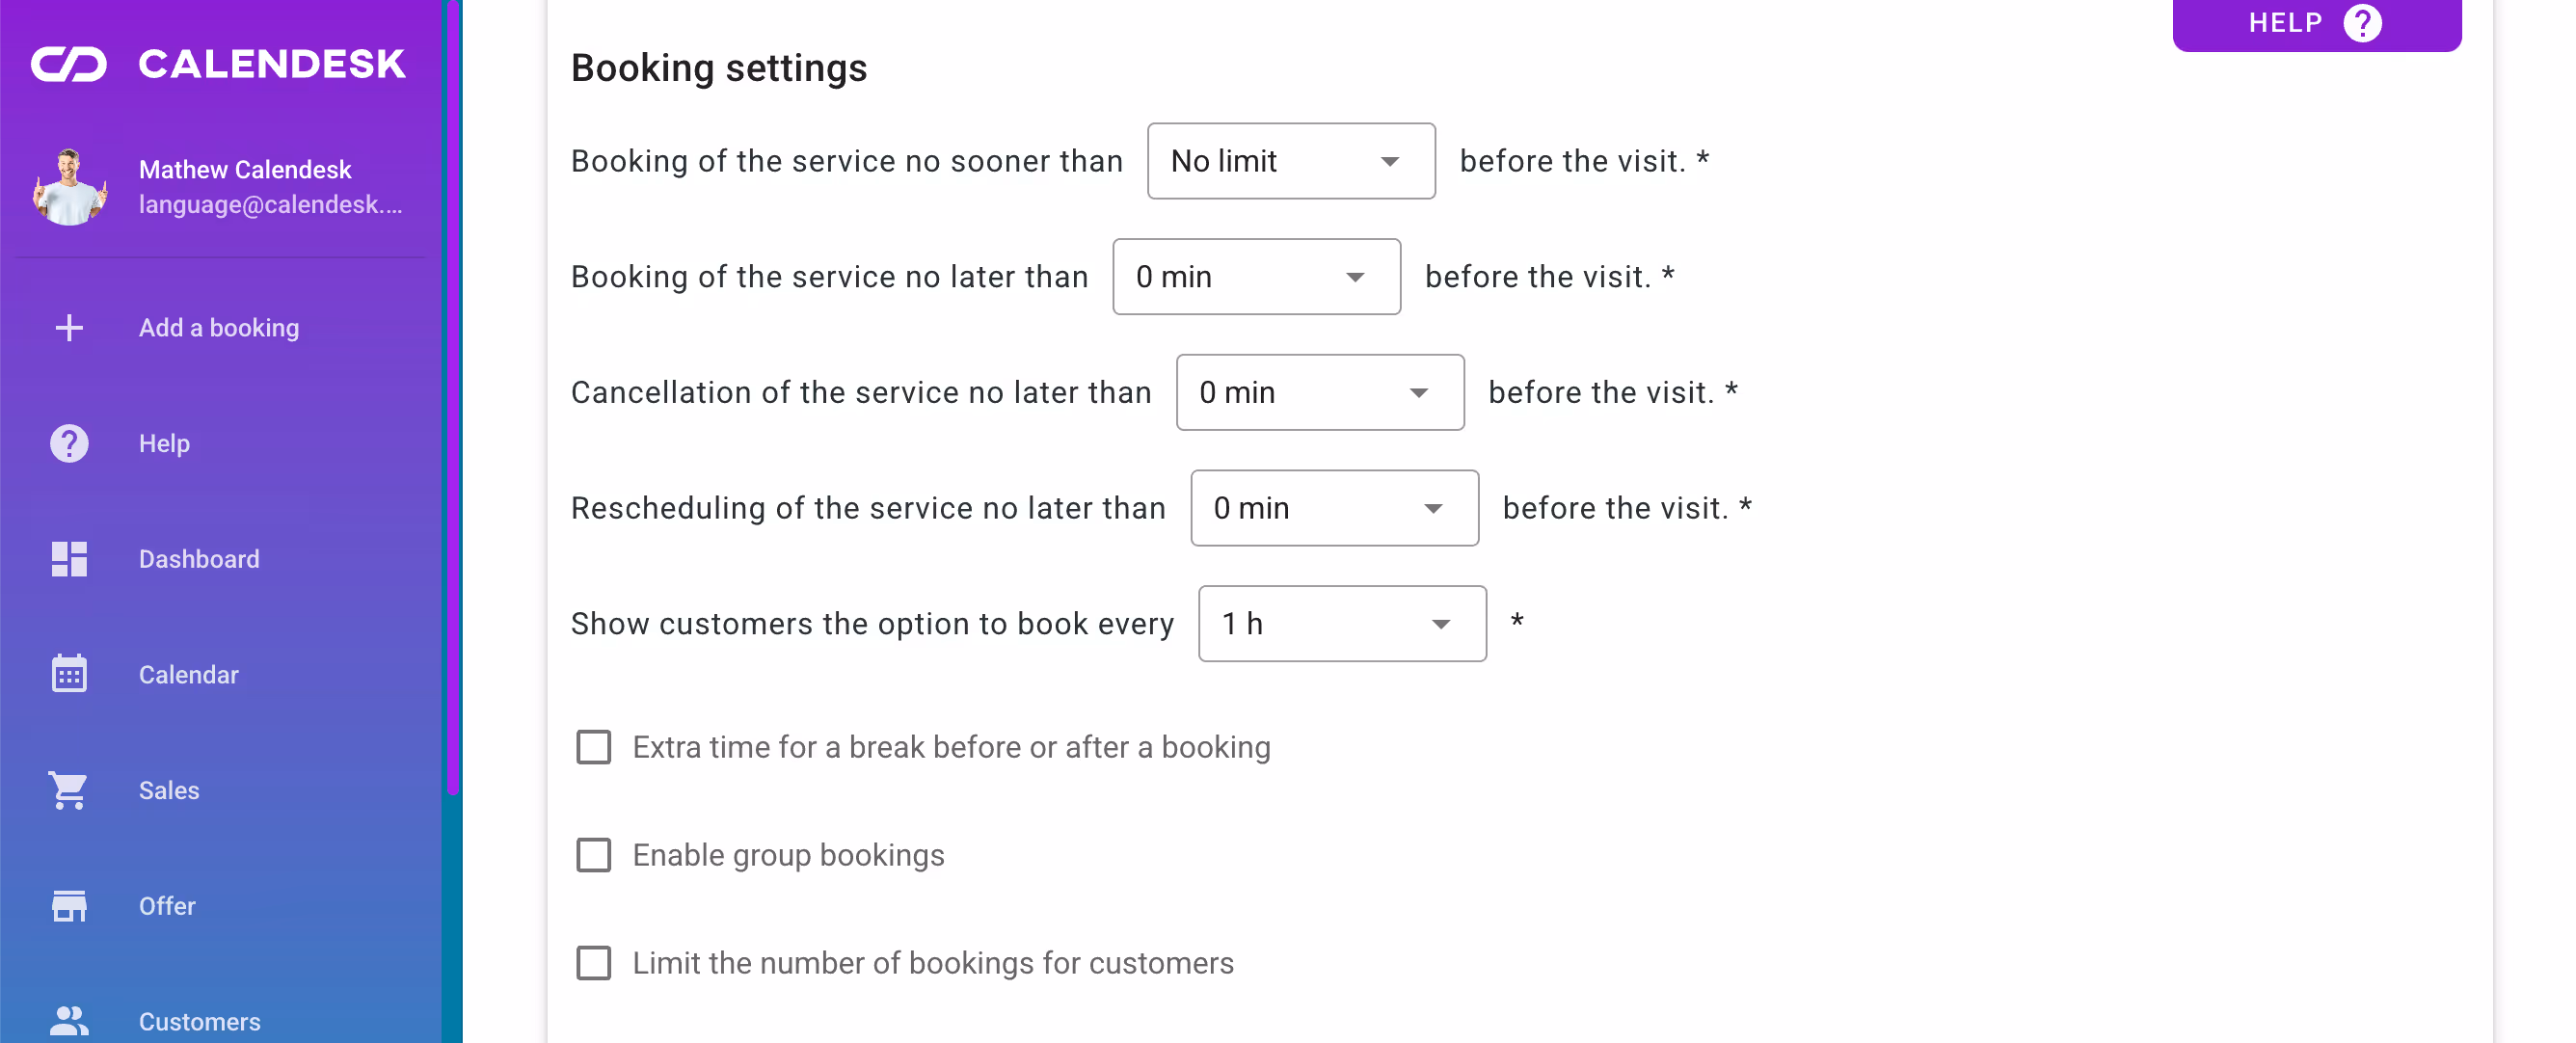
After entering the data, you still need to set up the booking settings. Here, you define:
- how far in advance and how long before the appointment a customer can make a booking,
- how much time before the appointment a customer can cancel it,
- the latest time a customer can reschedule the service,
- how often customers can book an appointment,
- and additional options in the form of checkboxes, such as: an extra break before or after the booking, the option to enable group bookings, or the ability to limit the number of bookings per customer.
The next step is to configure the payment settings for the service. The Calendesk platform needs to know whether to redirect the customer to payment at the time of booking. To do this, you need to decide whether to check or leave unchecked the following options:
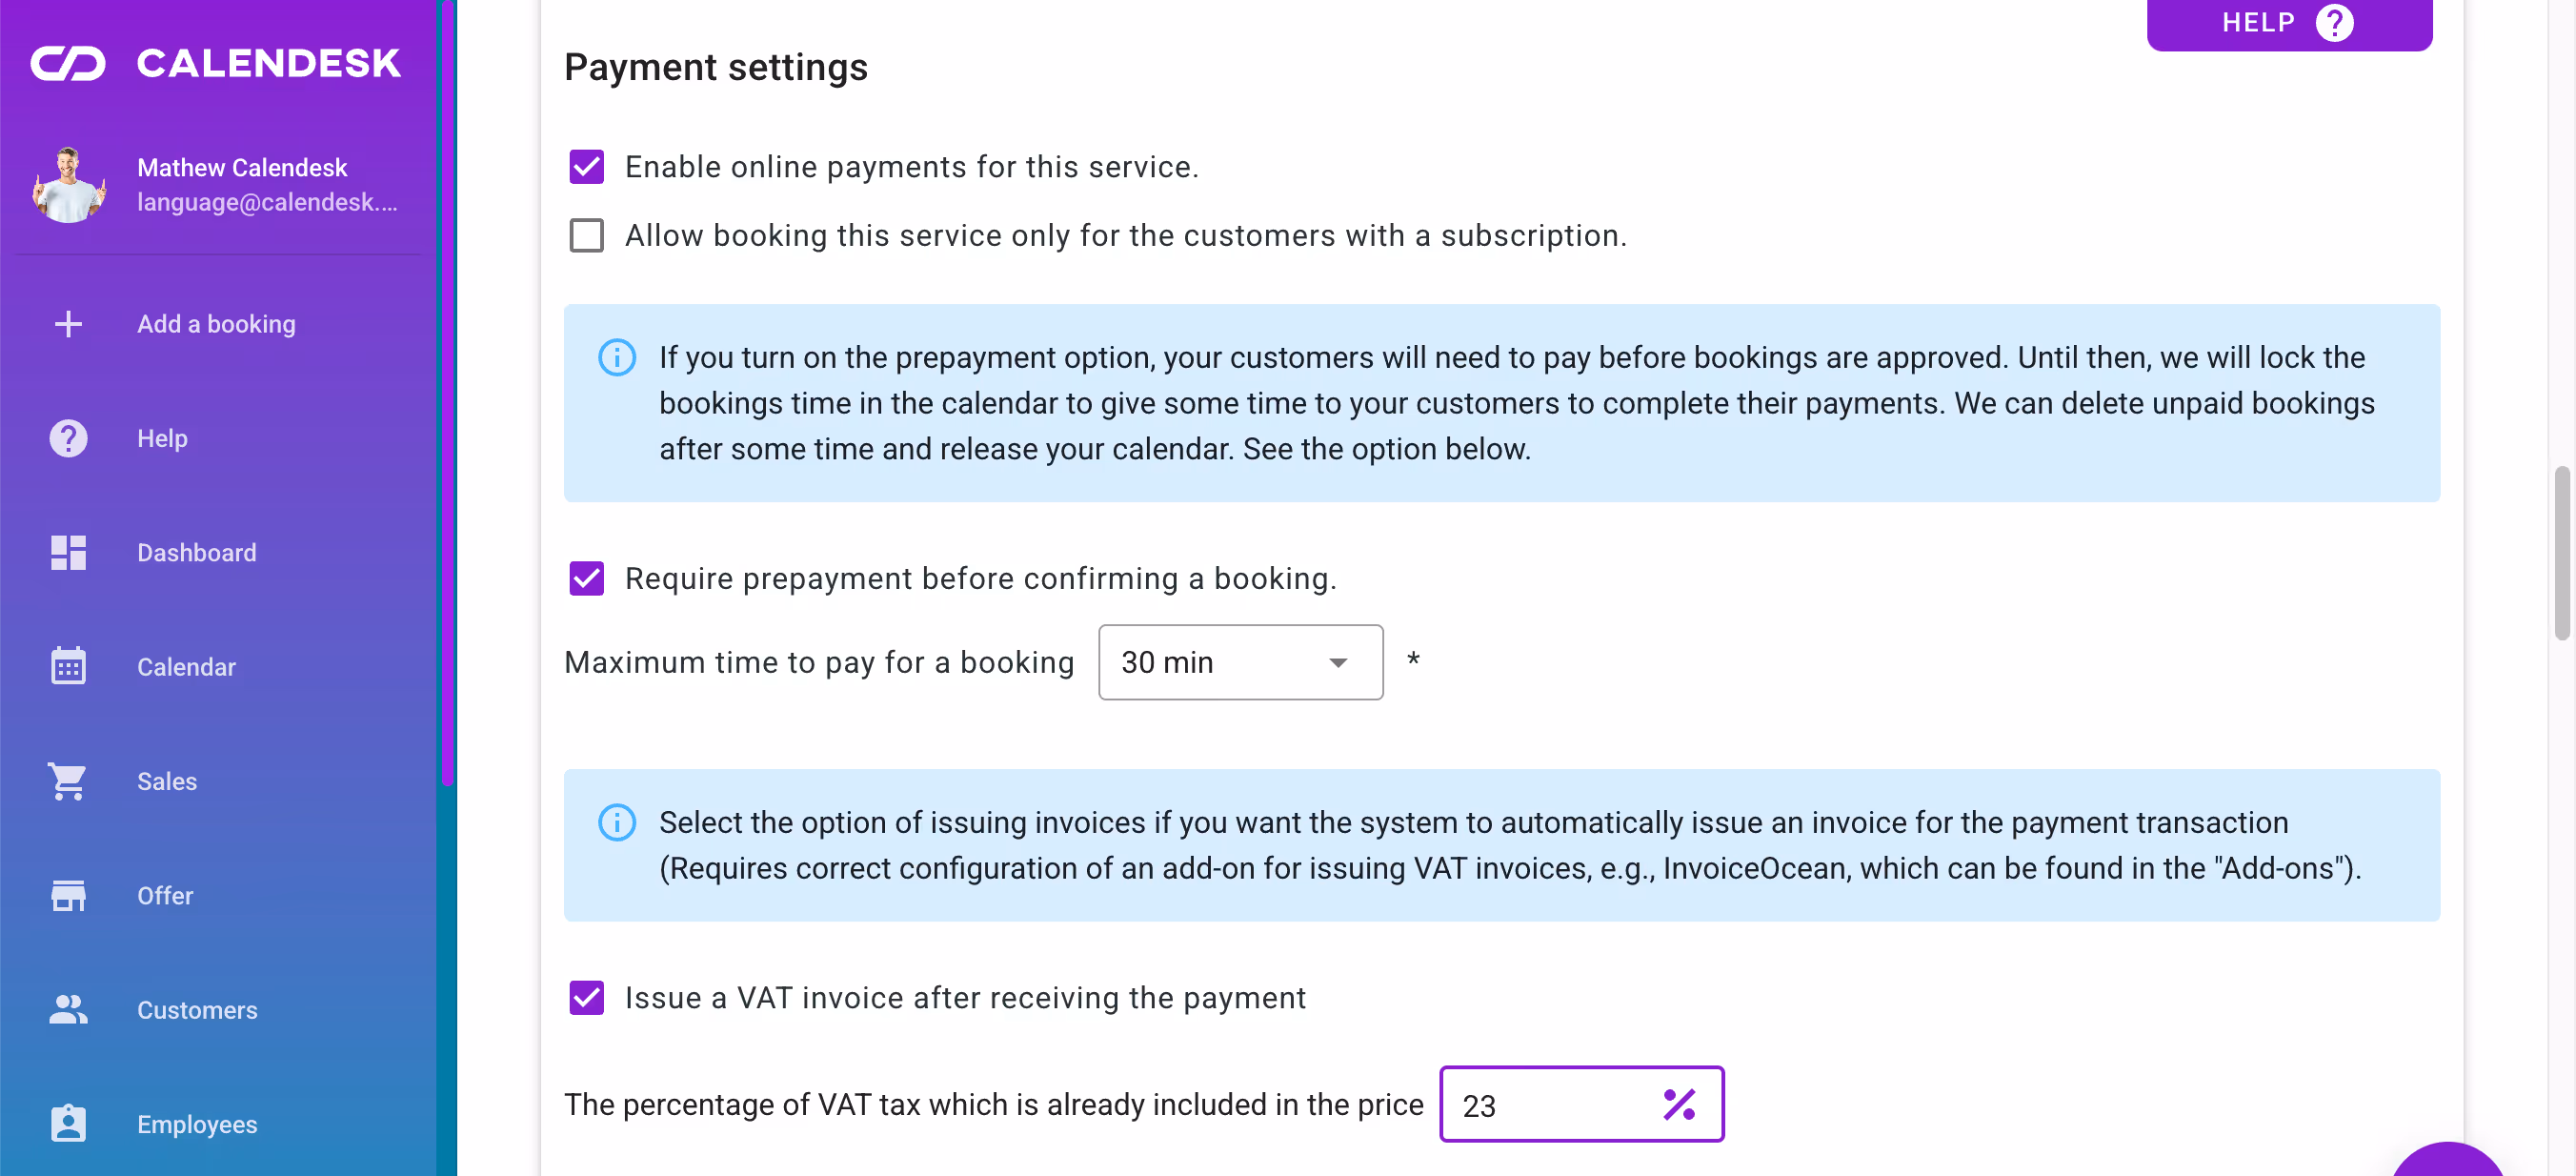
- Enabling payments for this service allows the customer to pay for the appointment immediately after booking, but it is not mandatory.
- The second option allows us to restrict payment for the service to customers who have an active subscription.
- The third checkbox determines the requirement for payment to be made within a selected time frame from the booking. If the booking is not paid for within the chosen time, it will be canceled, and the slot in the calendar will become available again.
- The last available option is the ability to issue an invoice after receiving the payment.
Next step is to specify where or through which communicator the appointment will take place. When adding a service, you will see a field labeled Location – here, you decide where the customer can redeem the service.
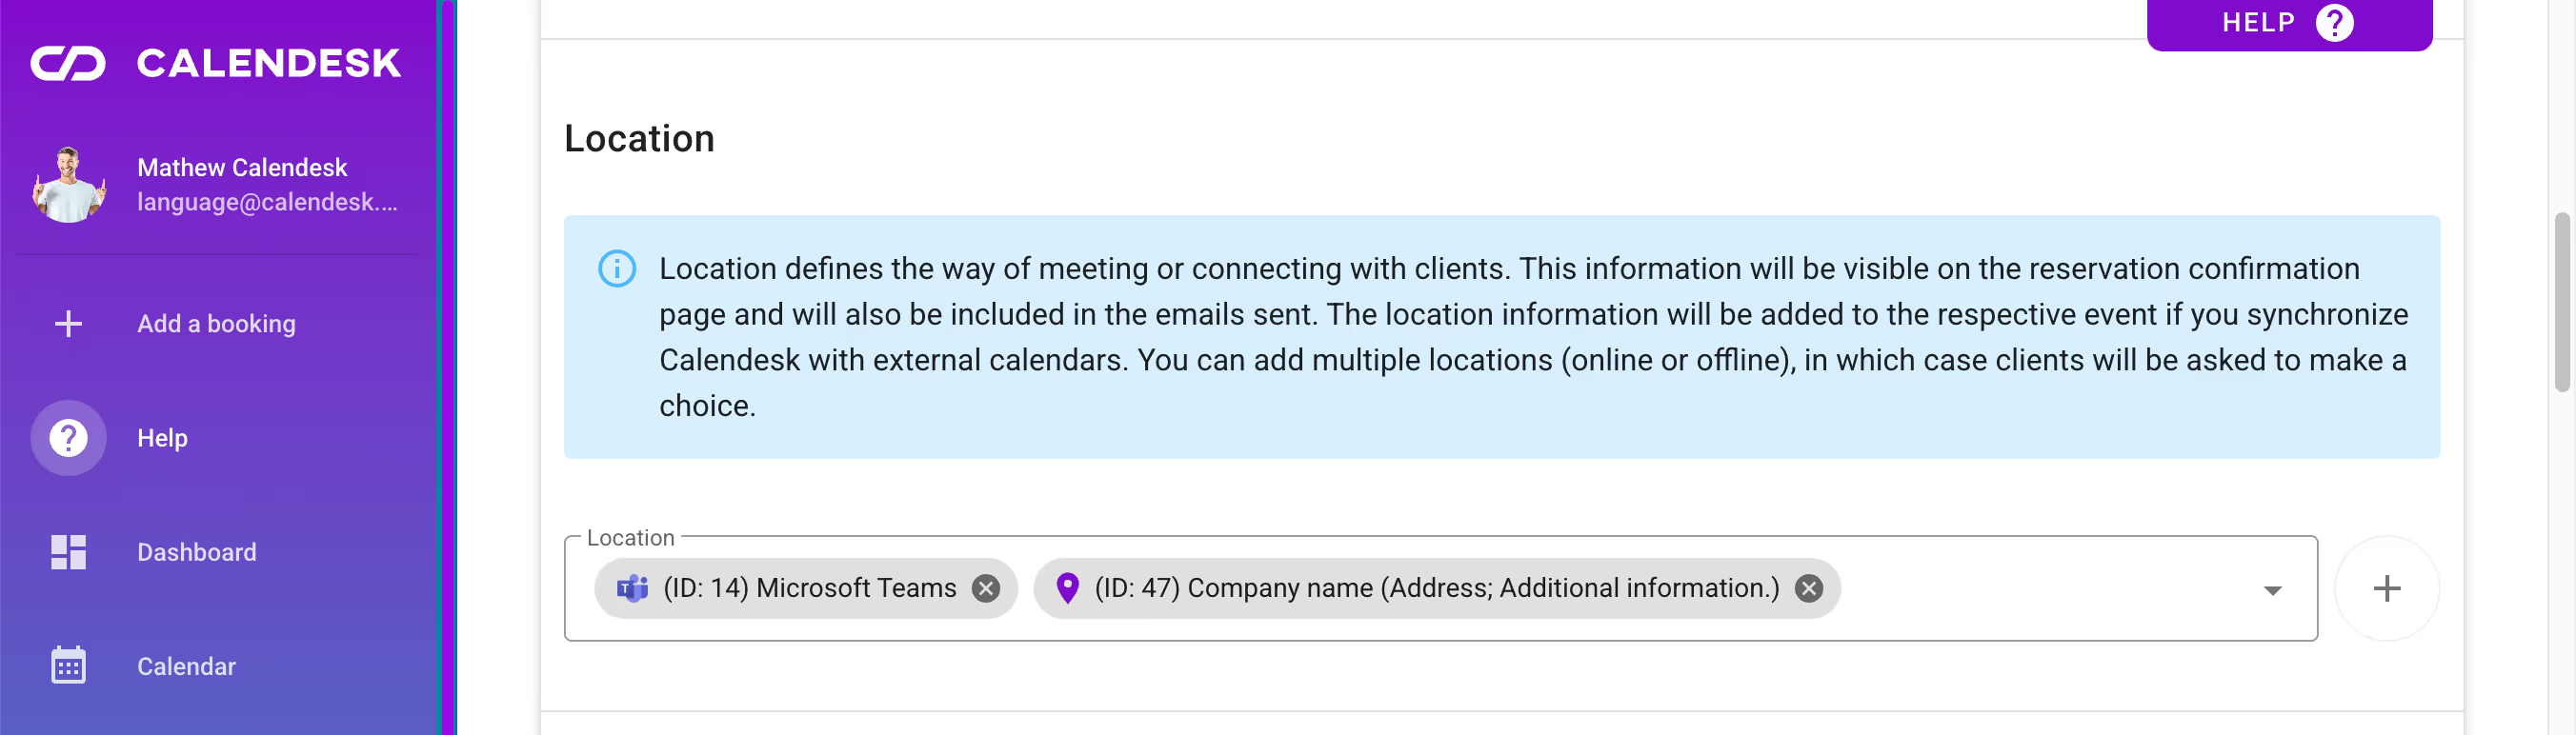
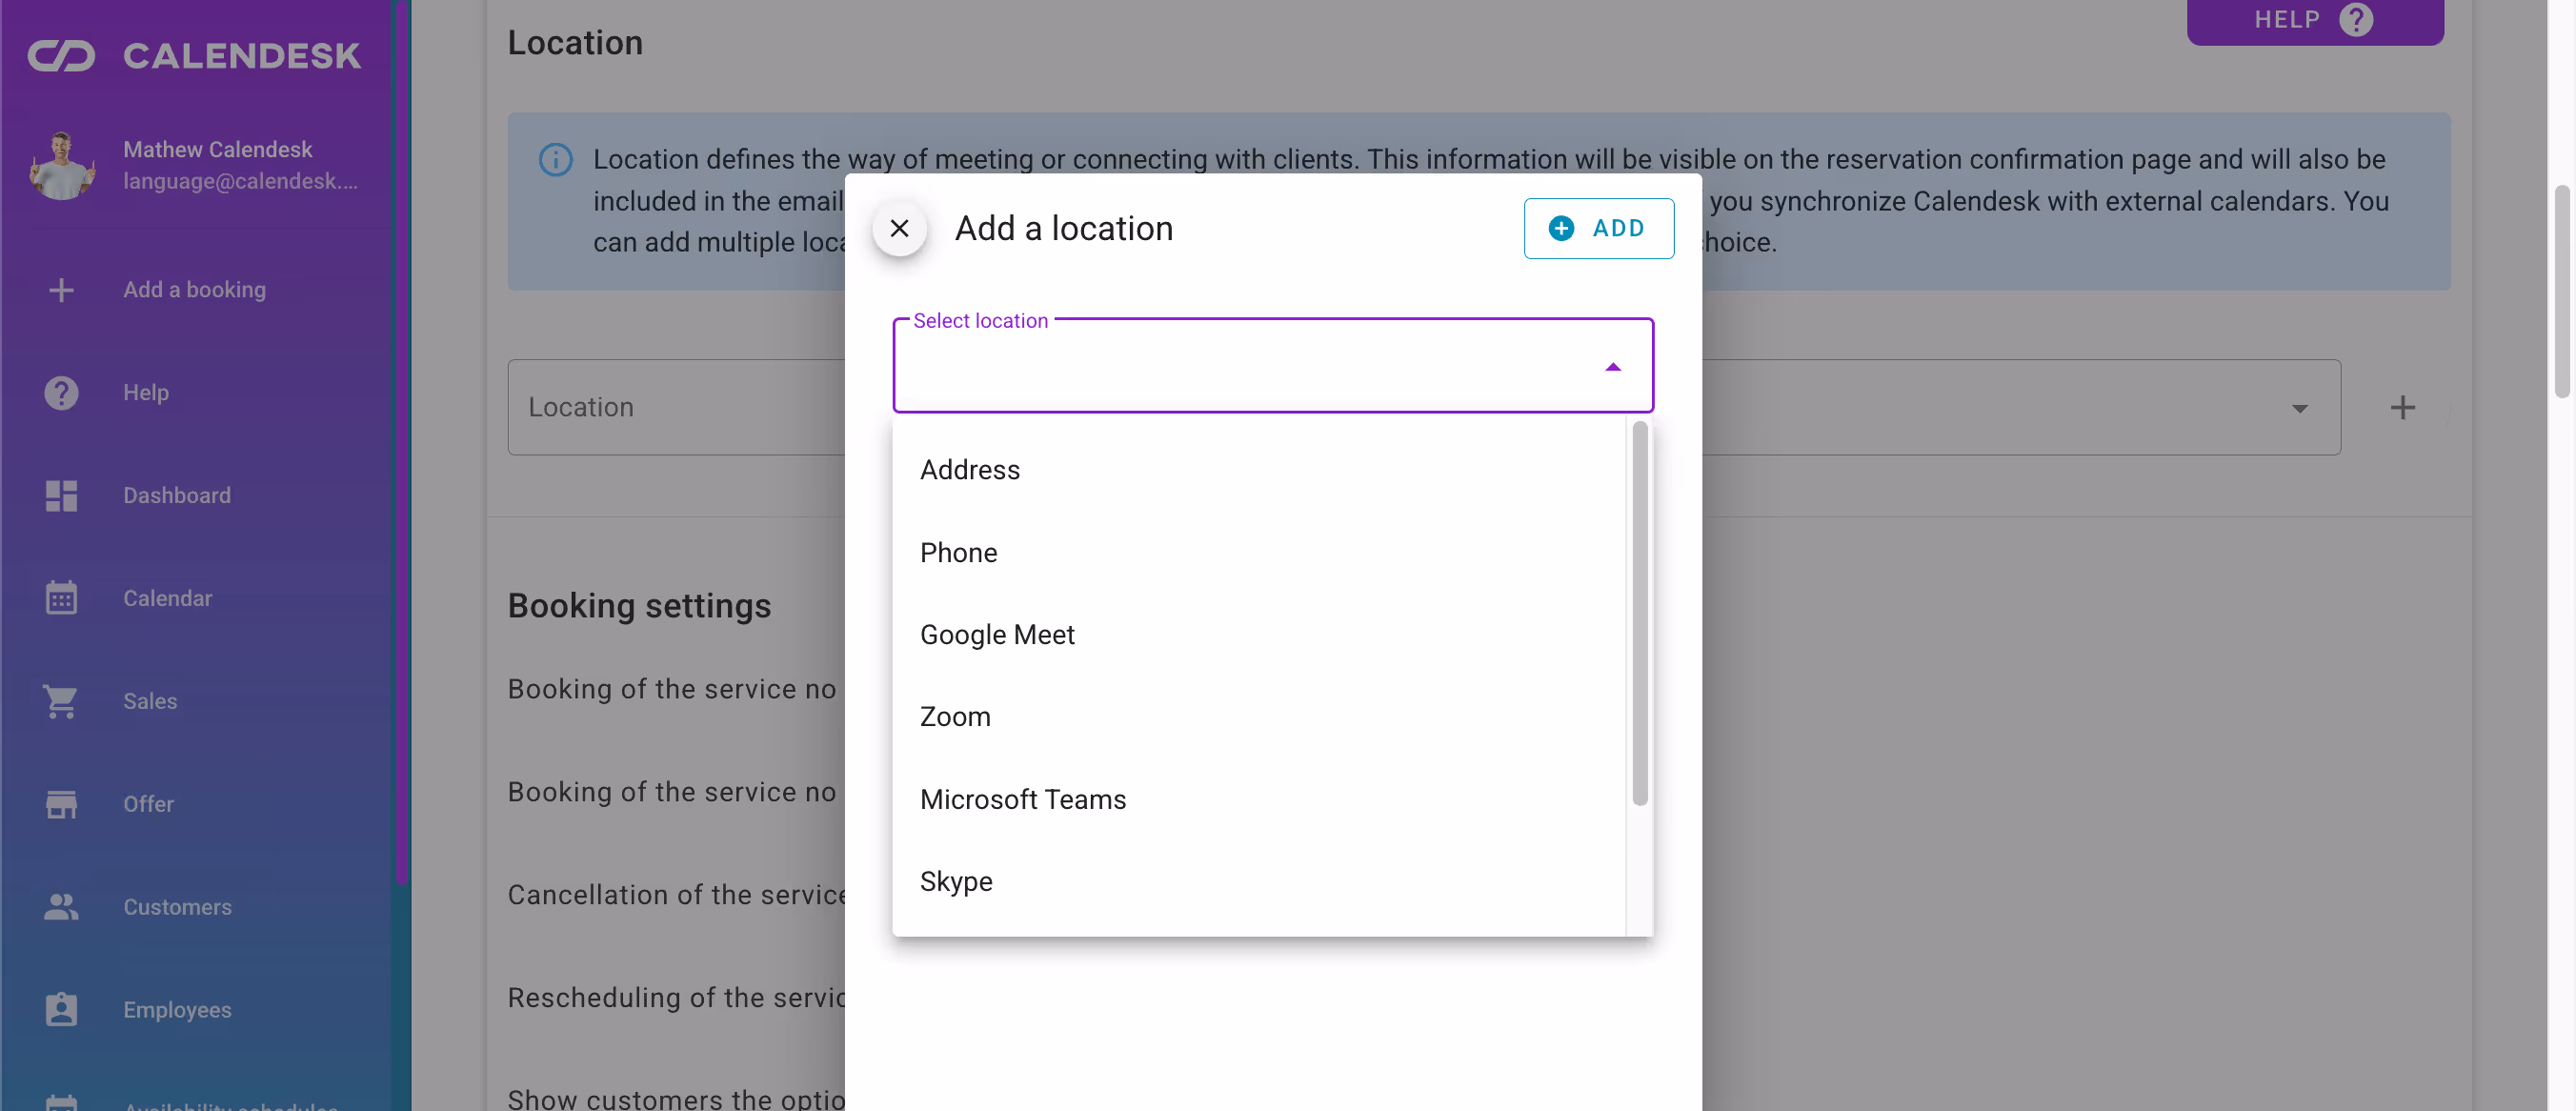
Our system allows you to set multiple locations at the same time from:
- the location specified by the entered address,
- a phone number (in the case of telephone consultations),
- a location, or rather a room, indicated via a link on Google Meet, Zoom, Teams, or Skype,
- a generated WhatsApp link; upon selection, the app will open with a text chat with an employee,
- another location, the details of which you can provide individually.
Another element you will read about in this article is the Resources section. Resources define the rooms or equipment needed to perform a service, such as a chair, a room, a massage table, etc. By assigning resources to a specific service, you eliminate the risk of booking conflicts when the necessary equipment is unavailable to serve a customer. You can read more about resources in the article What are labels, groups, and resources and how to manage them?.
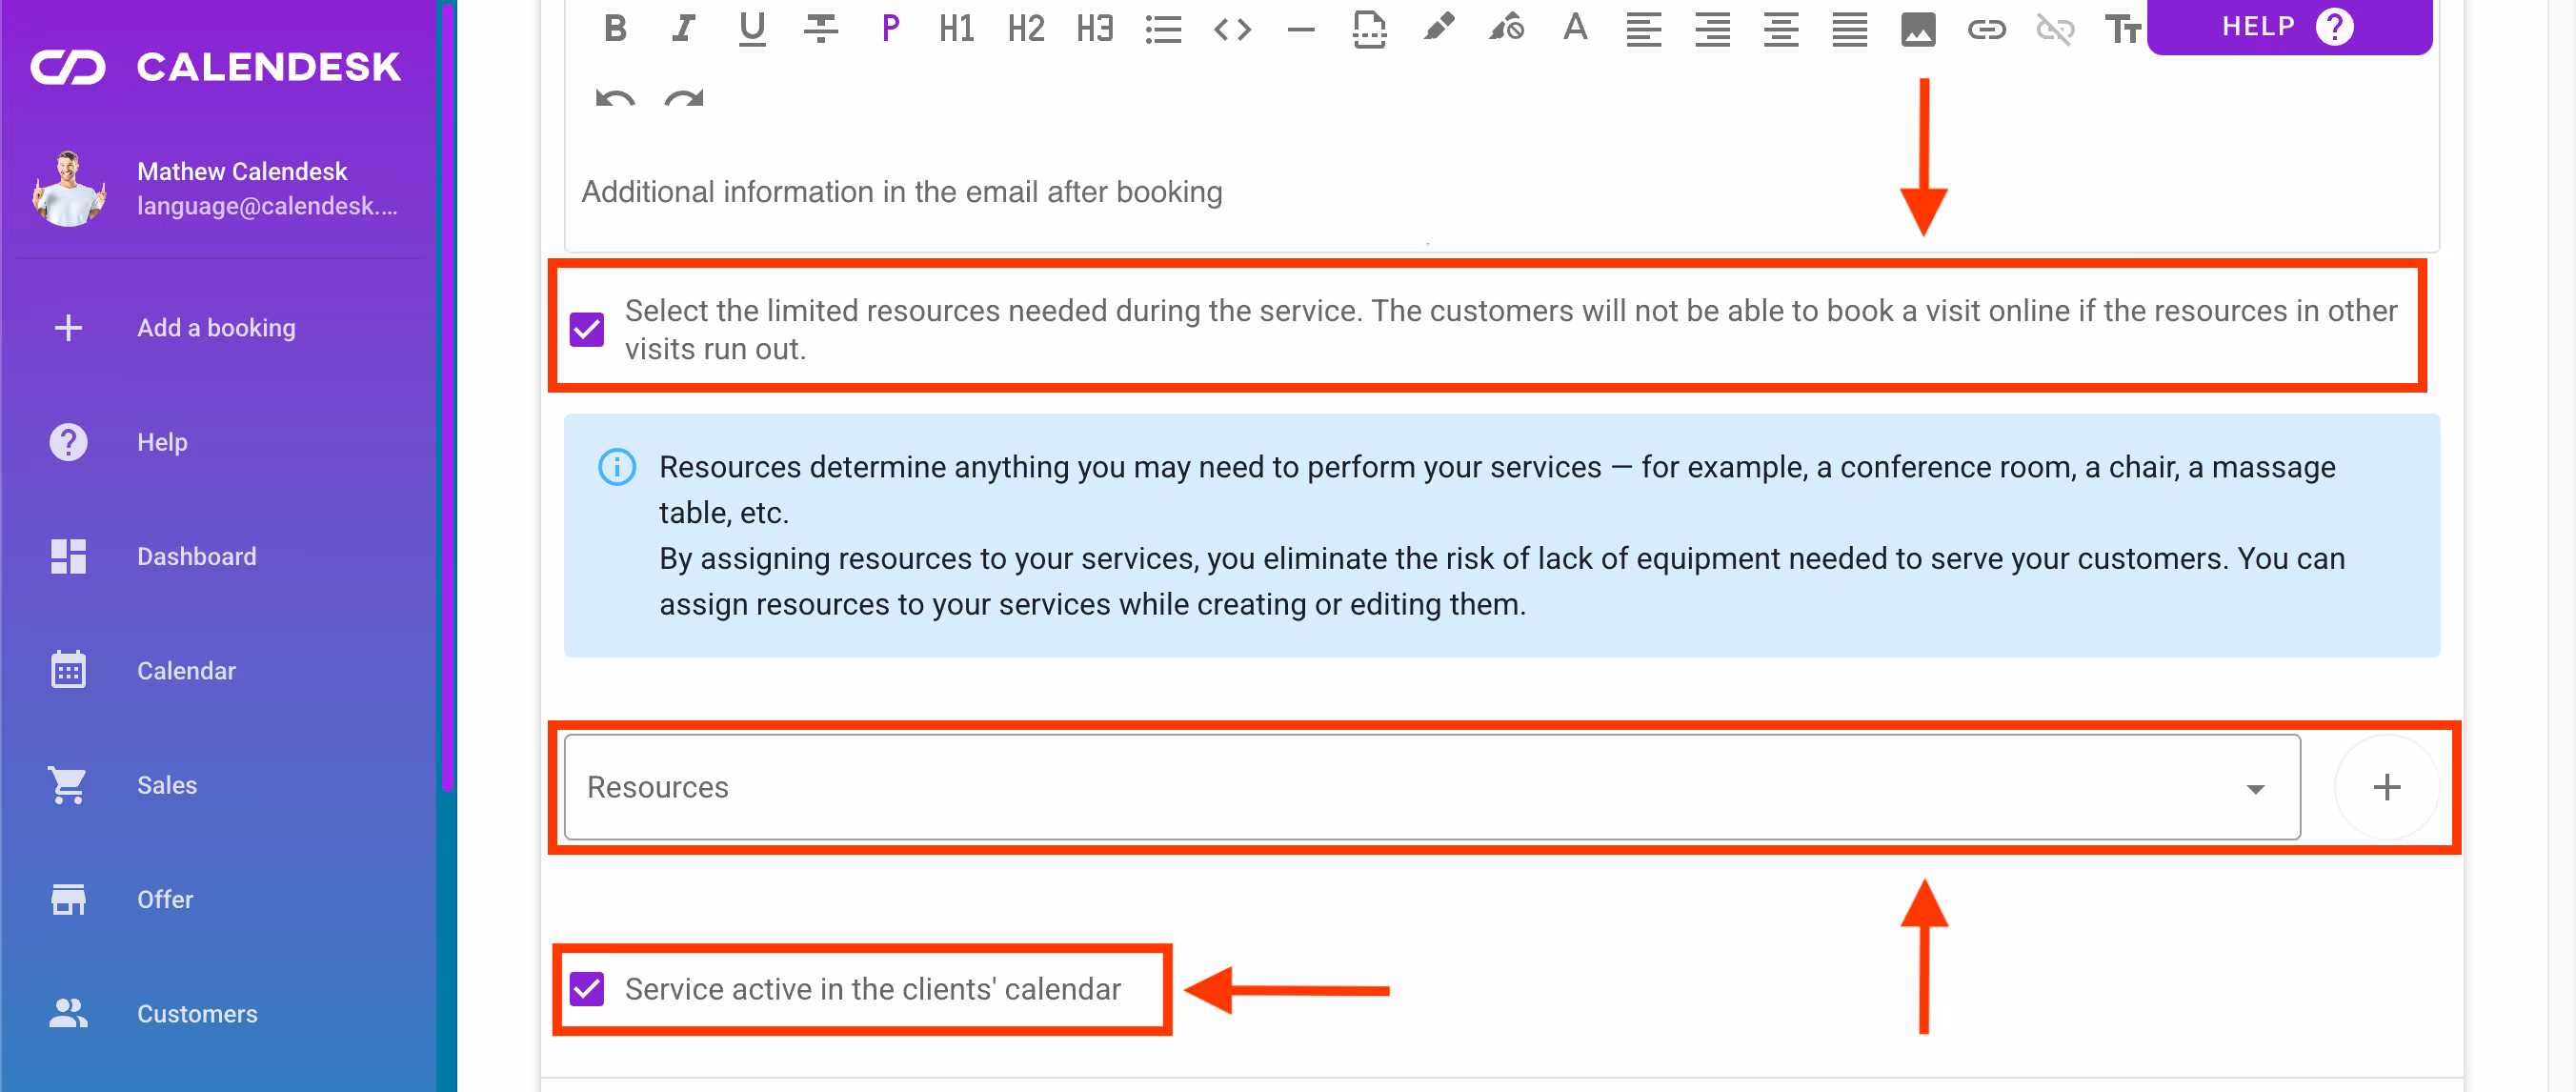
If your service has been configured, check the Service active in the clients' calendar box and confirm by clicking Save. The created service will then be visible in the client's calendar.