How to set your custom domain for your website?
Once your website is created and published, it is available under the Calendesk subdomain (calendesk.net). You can edit the subdomain and use it as long as you need. But if you prefer to have a custom domain, you can do it as well. Each website can have assigned a custom domain.
Notice, Calendesk doesn’t sell domains. Instead, you need to purchase a domain from some domain providers (for example GoDaddy) and delegate this domain to Calendesk.
To make the process of connecting your own domain easier, we will show you how to do it using an example domain purchased from GoDaddy. If you already have your own domain you can skip this part and go directly to the Domain configuration.
GoDaddy – An example domain provider, how to buy a domain?
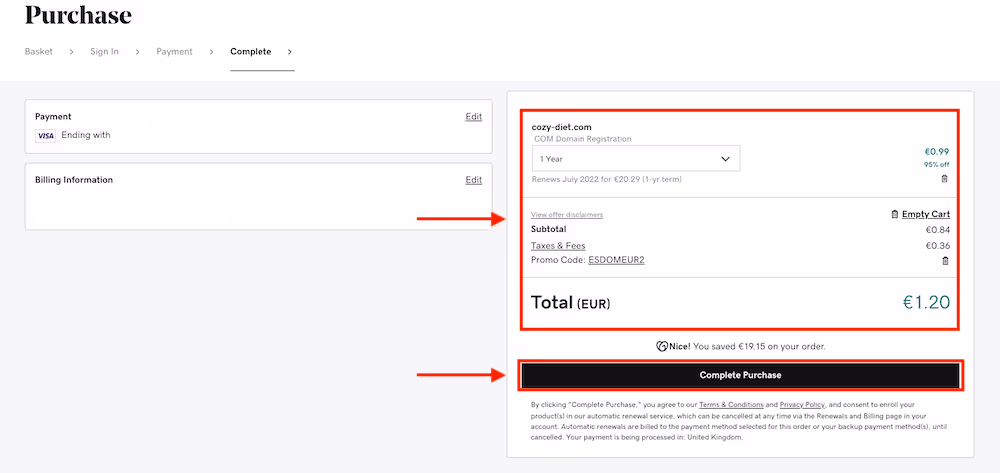
Domain purchase
It’s always a good idea to check for special offers with different domain providers. Sometimes you can find domains starting at €0.99 for the first year.
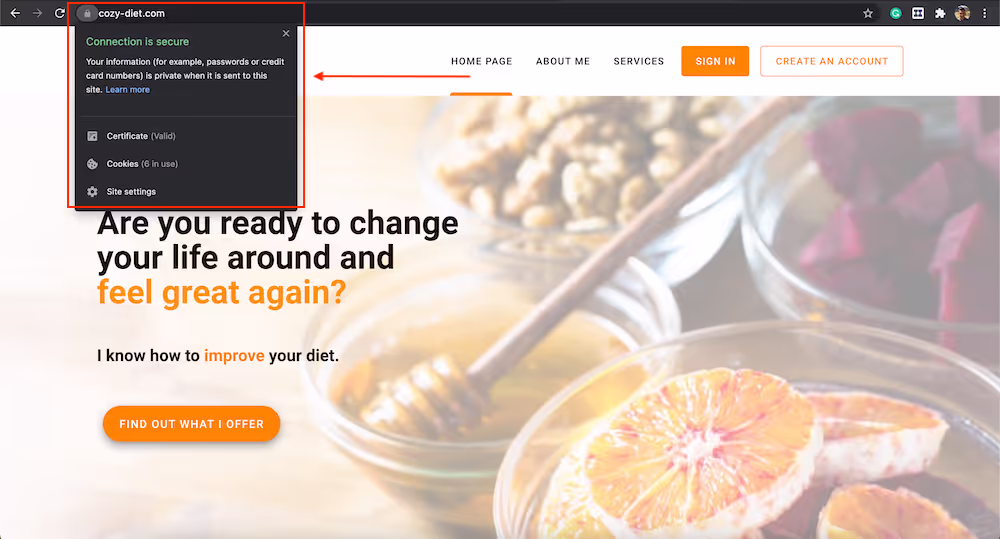
Please search for the name you would like to have and try to buy it. For example, we decided to buy “cozy-diet.com”.
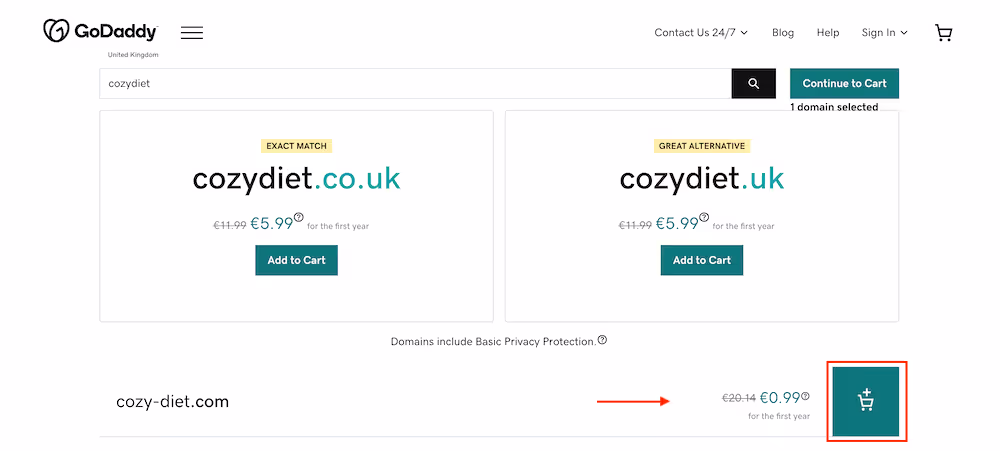
If you are not interested in other products, remove them from the cart. Notice, Calendesk will take care of your SSL certificate. You don’t need to buy it here.
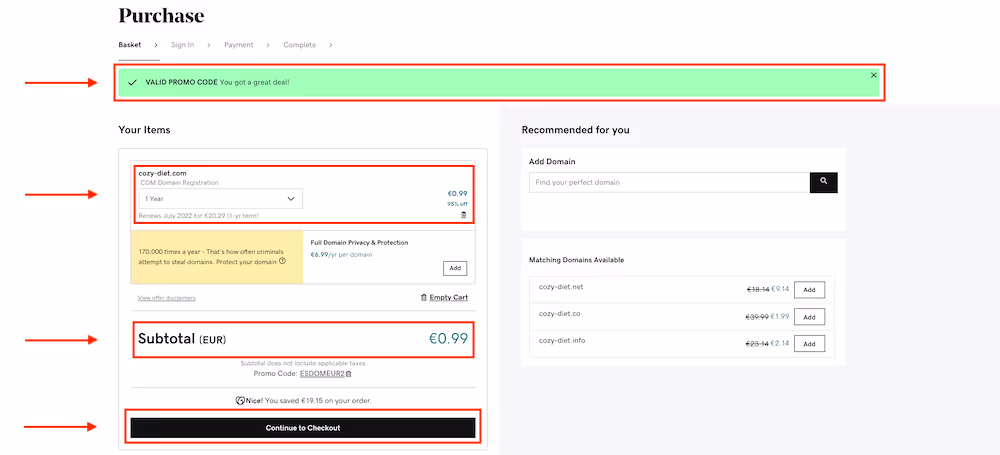
Please make sure that the only product in the cart is the domain you selected, and the order amount is equal to what you expect. After selecting the “Continue to Checkout” button, GoDaddy will ask you to create an account. On the last step, you will see the order summary. Sometimes new domains need to be activated by the provider. It is often necessary to wait a few hours for the domain provider to activate it after the purchase.
Domain configuration
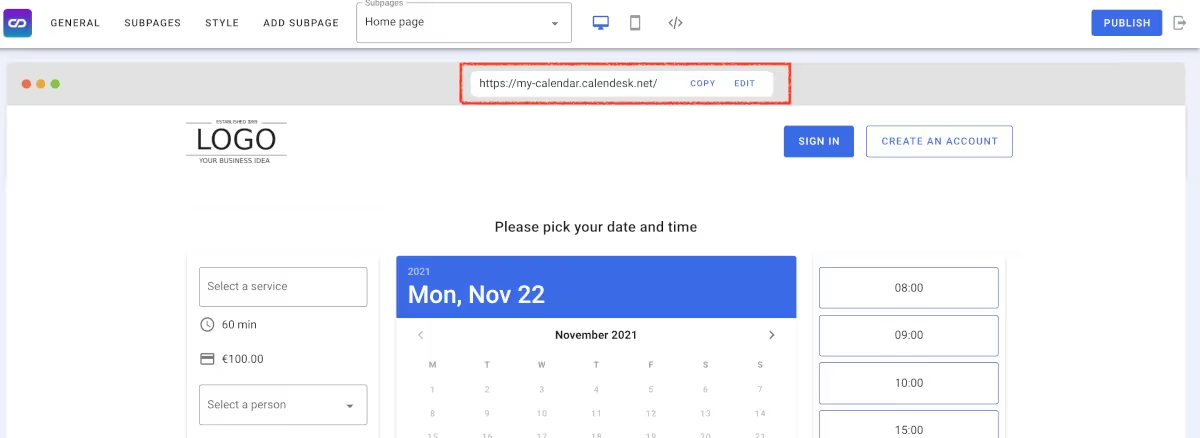
Go to the Calendesk website builder and click on the “Edit” button next to your subdomain.
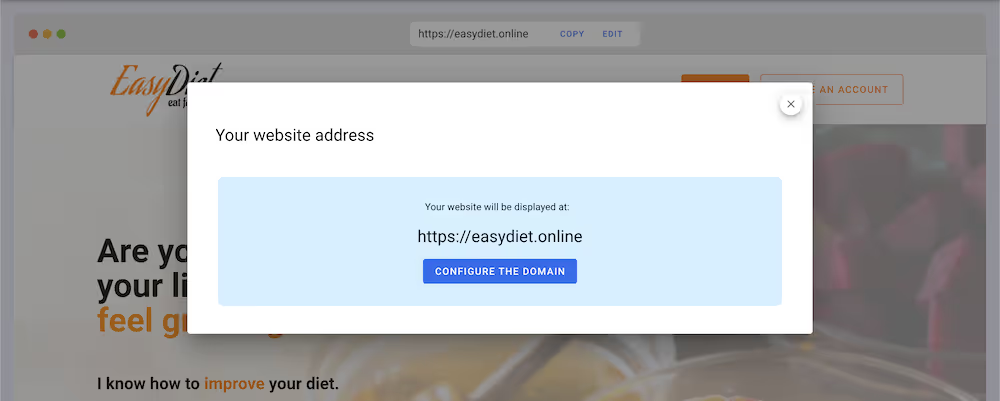
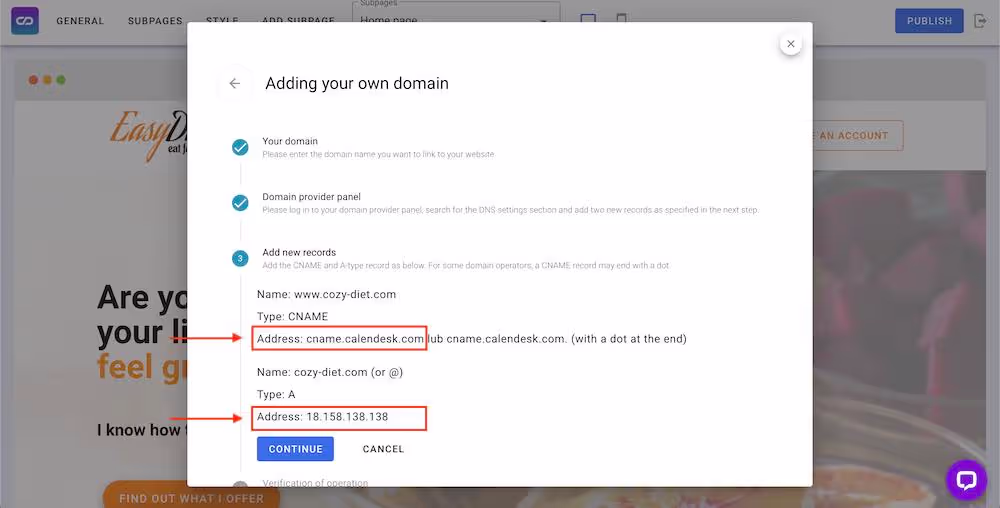
Next, click on the “Configure the domain” button and the “Add own domain” button. Then, follow the instructions from the screen.
Provide the name of the domain you want to connect to Calendesk.
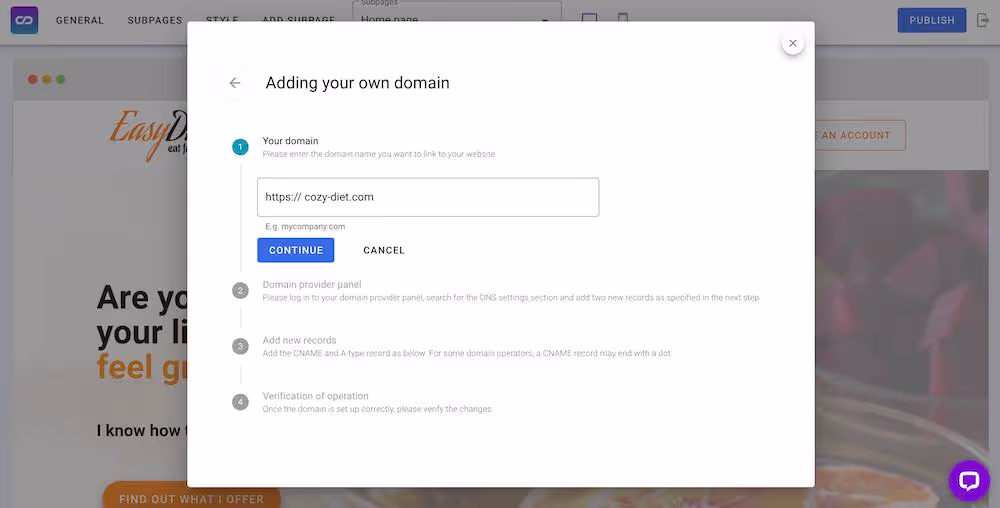
Follow the instructions from the process. In the third step, you will need to delegate your domain DNS to Calendesk servers. To do so, you need to go to the domain provider and change the domain’s DNS.
Here is an example where to find it in GoDaddy:
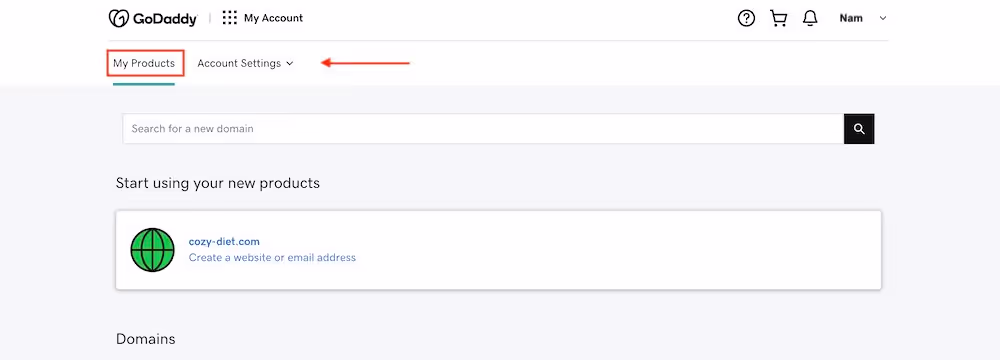
- Go to My products.
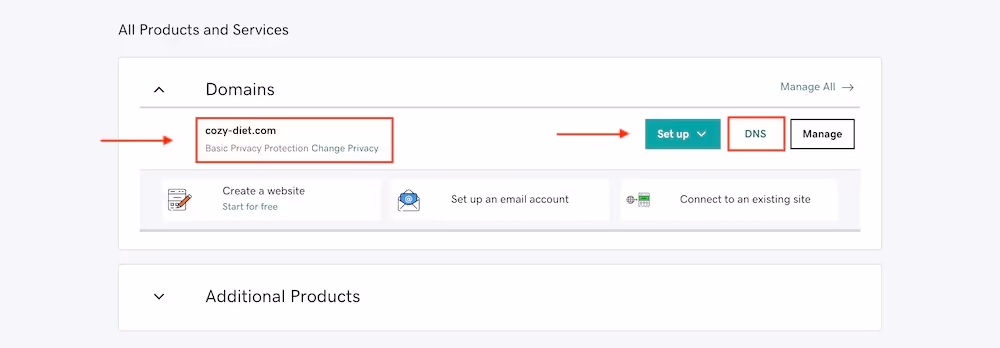
- Select the domain you want to edit. Next, you should see the DNS button, which will move you to the DNS configuration.
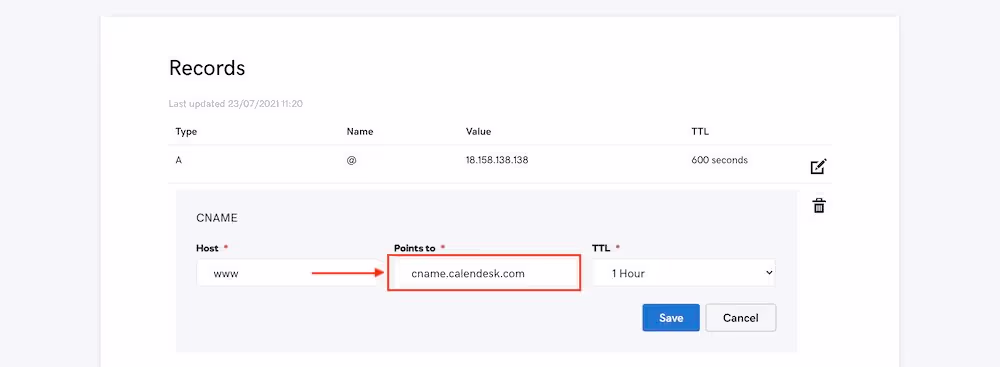
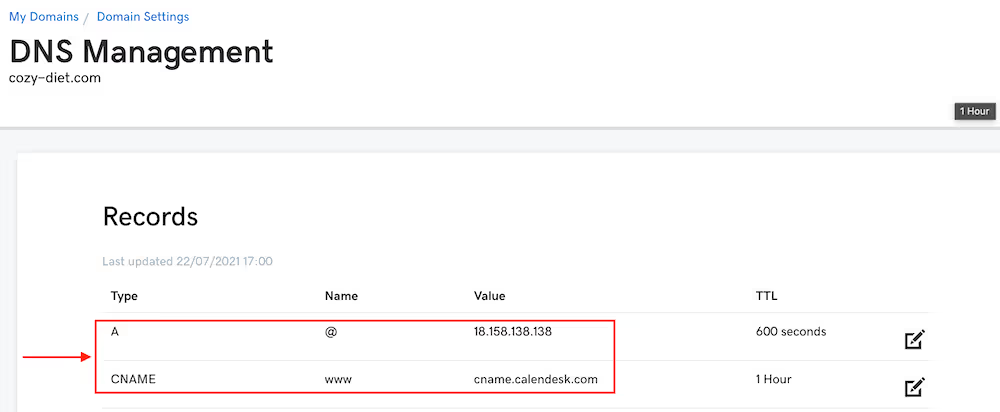
- In the DNS settings, you can replace or add the DNS records. You need to add two records (A and CNAME). Please notice, for subdomains, it’s only a CNAME record.
For subdomains and the www prefix, utilize a CNAME record, such as calendar.mydomain.com or www.mydomain.com, pointing to cname.calendesk.com.
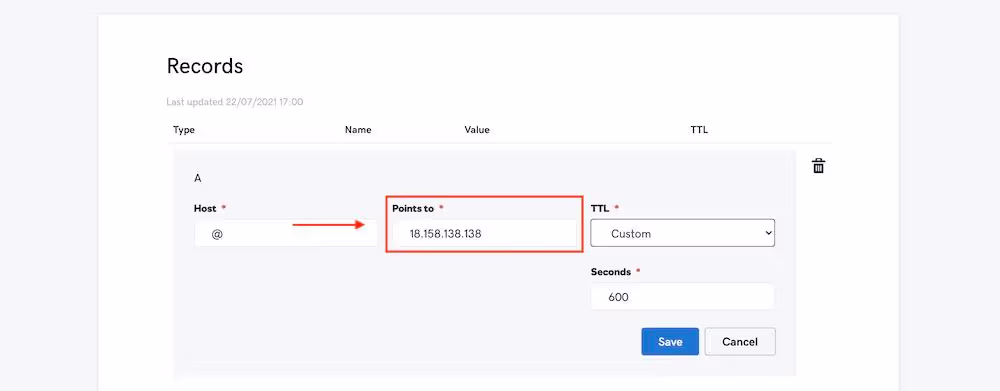
For the main/root domain, employ an A record, exclusively set to 18.158.138.138.
After adding/updating records, you will have to wait a while for your domain provider to accept the changes you have made. It can take up to 24 hours to update your DNS records.
Calendesk will verify your domain every 15 minutes. So you can update the records and save the settings in Calendesk. But, of course, you can always visit your URL address in the browser to check if it’s working.
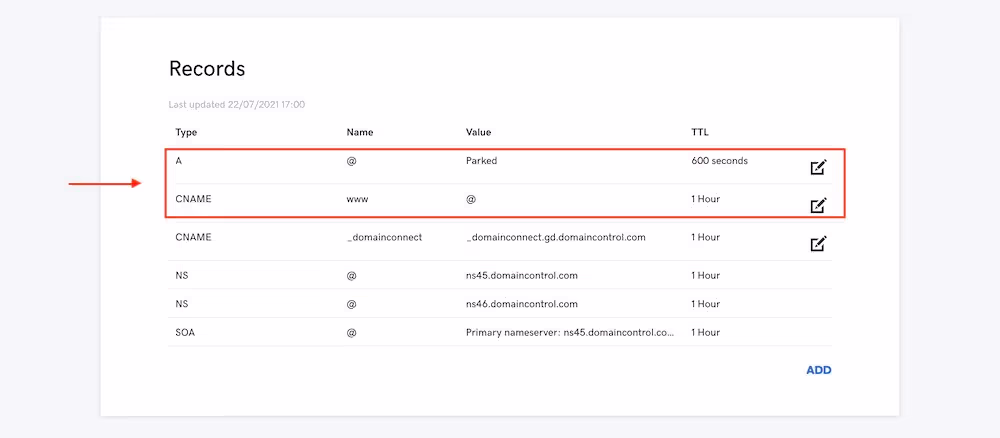
Record Type A
Record CNAME
Saving settings
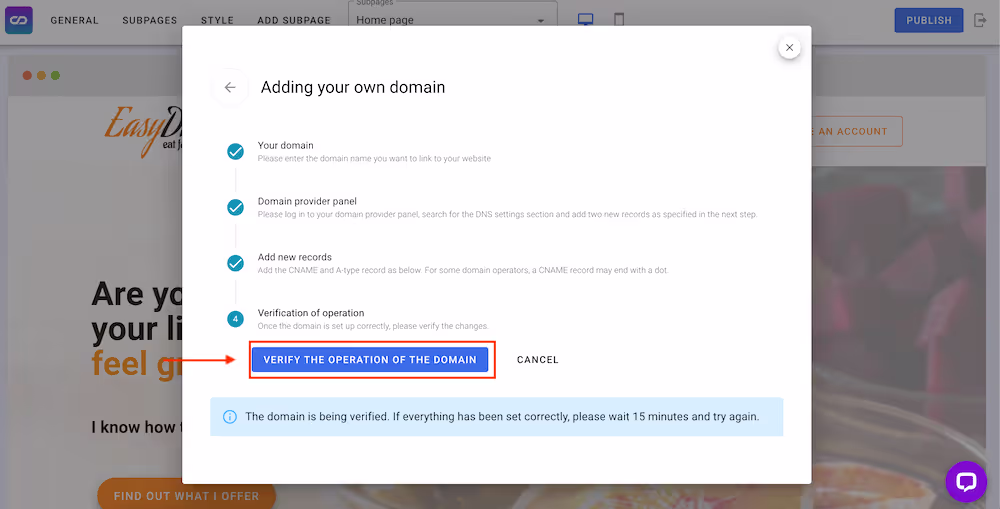
When you have added/updated all necessary records, go back to the Calendesk Website Builder and finish the configuration of the domain by clicking the “Verify the operation of the domain” button. Notice that the domain provider needs up to 24 hours to update your records. Calendesk will be checking your domain every 15 minutes.
SSL certificate
The good news! Calendesk takes care of all SSL certificates. You don’t need to buy it additionally. After connecting your domain to Calendesk we will create and maintain a certificate for you.