How can I edit email, SMS, and push notifications?
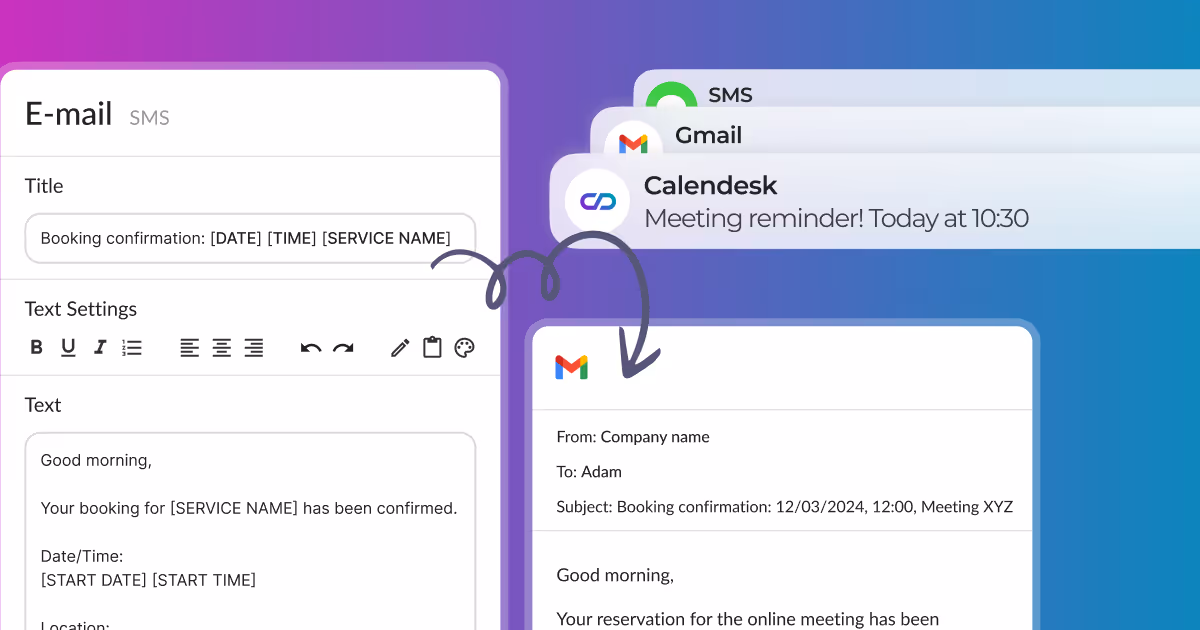
The Notification Editing section is where you can freely modify the content of notifications sent to your clients and employees from our appointment booking application, Calendesk. To access the notification editing section, go to the Notifications – Templates tab and then select the Edit email/SMS/push button, depending on the notification you wish to edit.
Notifications to the Customer and the Employee
Customer Notifications
Here, you can edit the notifications sent to your customers. To edit the content of a notification, select the Edit button as shown in the image below.
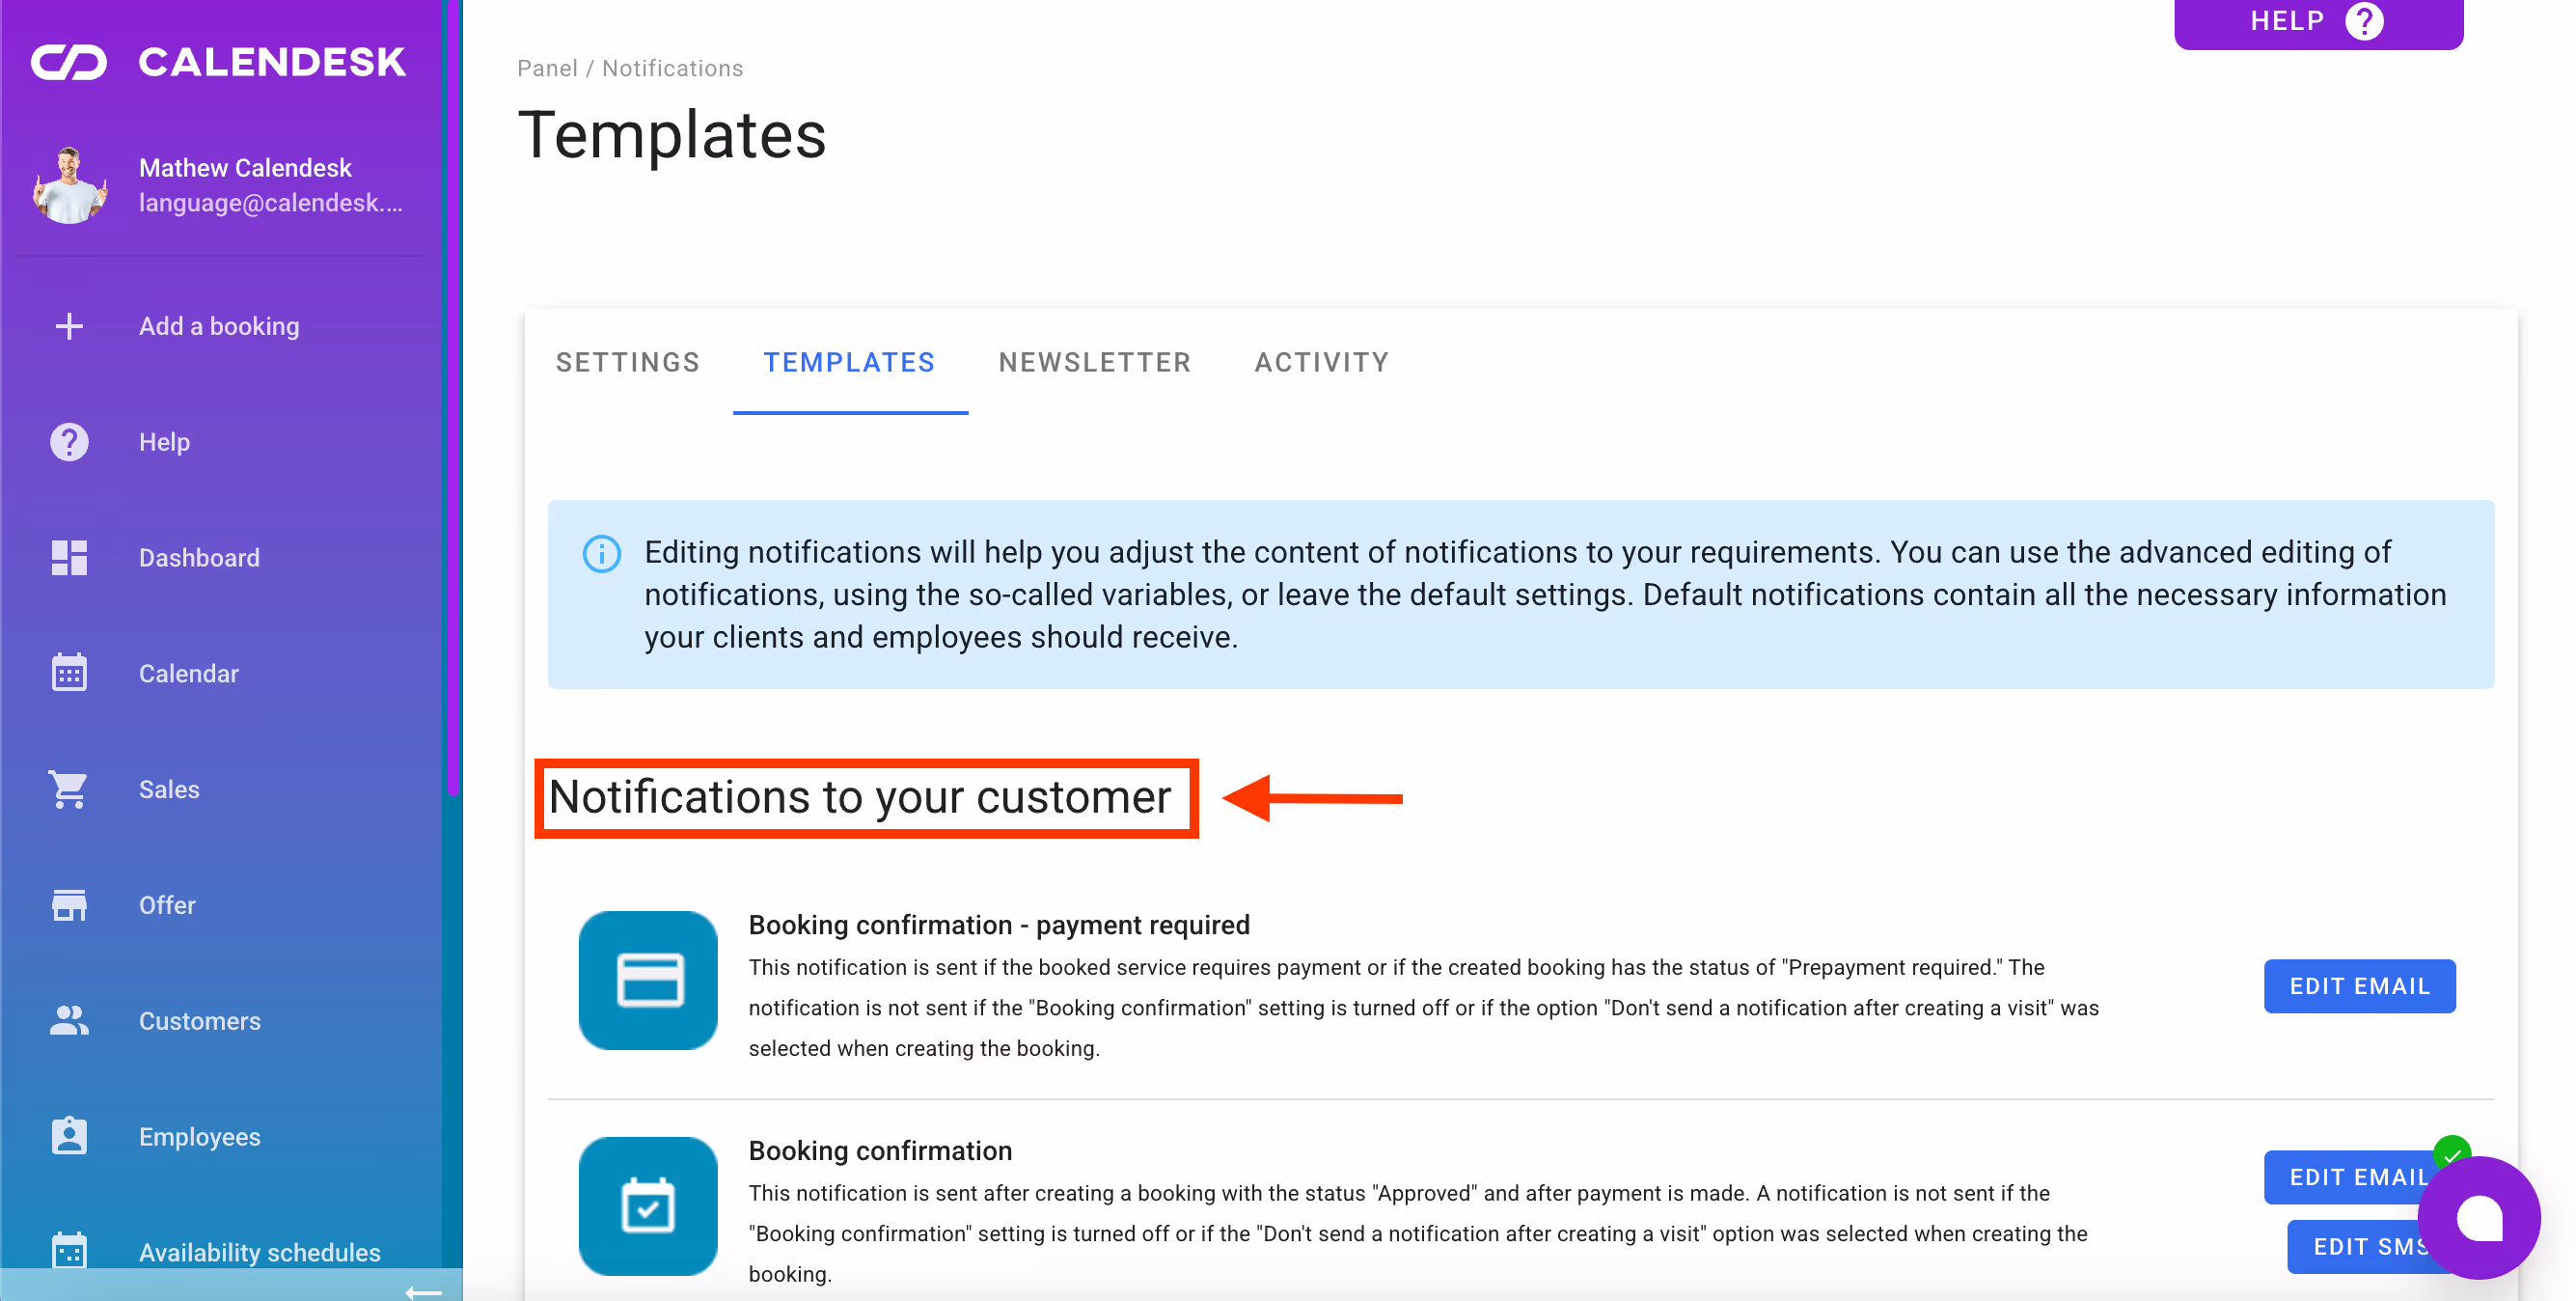
We distinguish several types of notifications for the customer:
Booking confirmation – payment required,
Booking confirmation,
Booking change,
Booking cancellation,
Booking reminder,
Account activation – welcome email,
Reset password,
Newsletter subscription,
Store - product purchase confirmation.
The Booking confirmation – payment required notification, as well as the last four types of notifications (Account activation, Reset password, Newsletter subscription, and Store – product purchase confirmation), can only be sent via email.
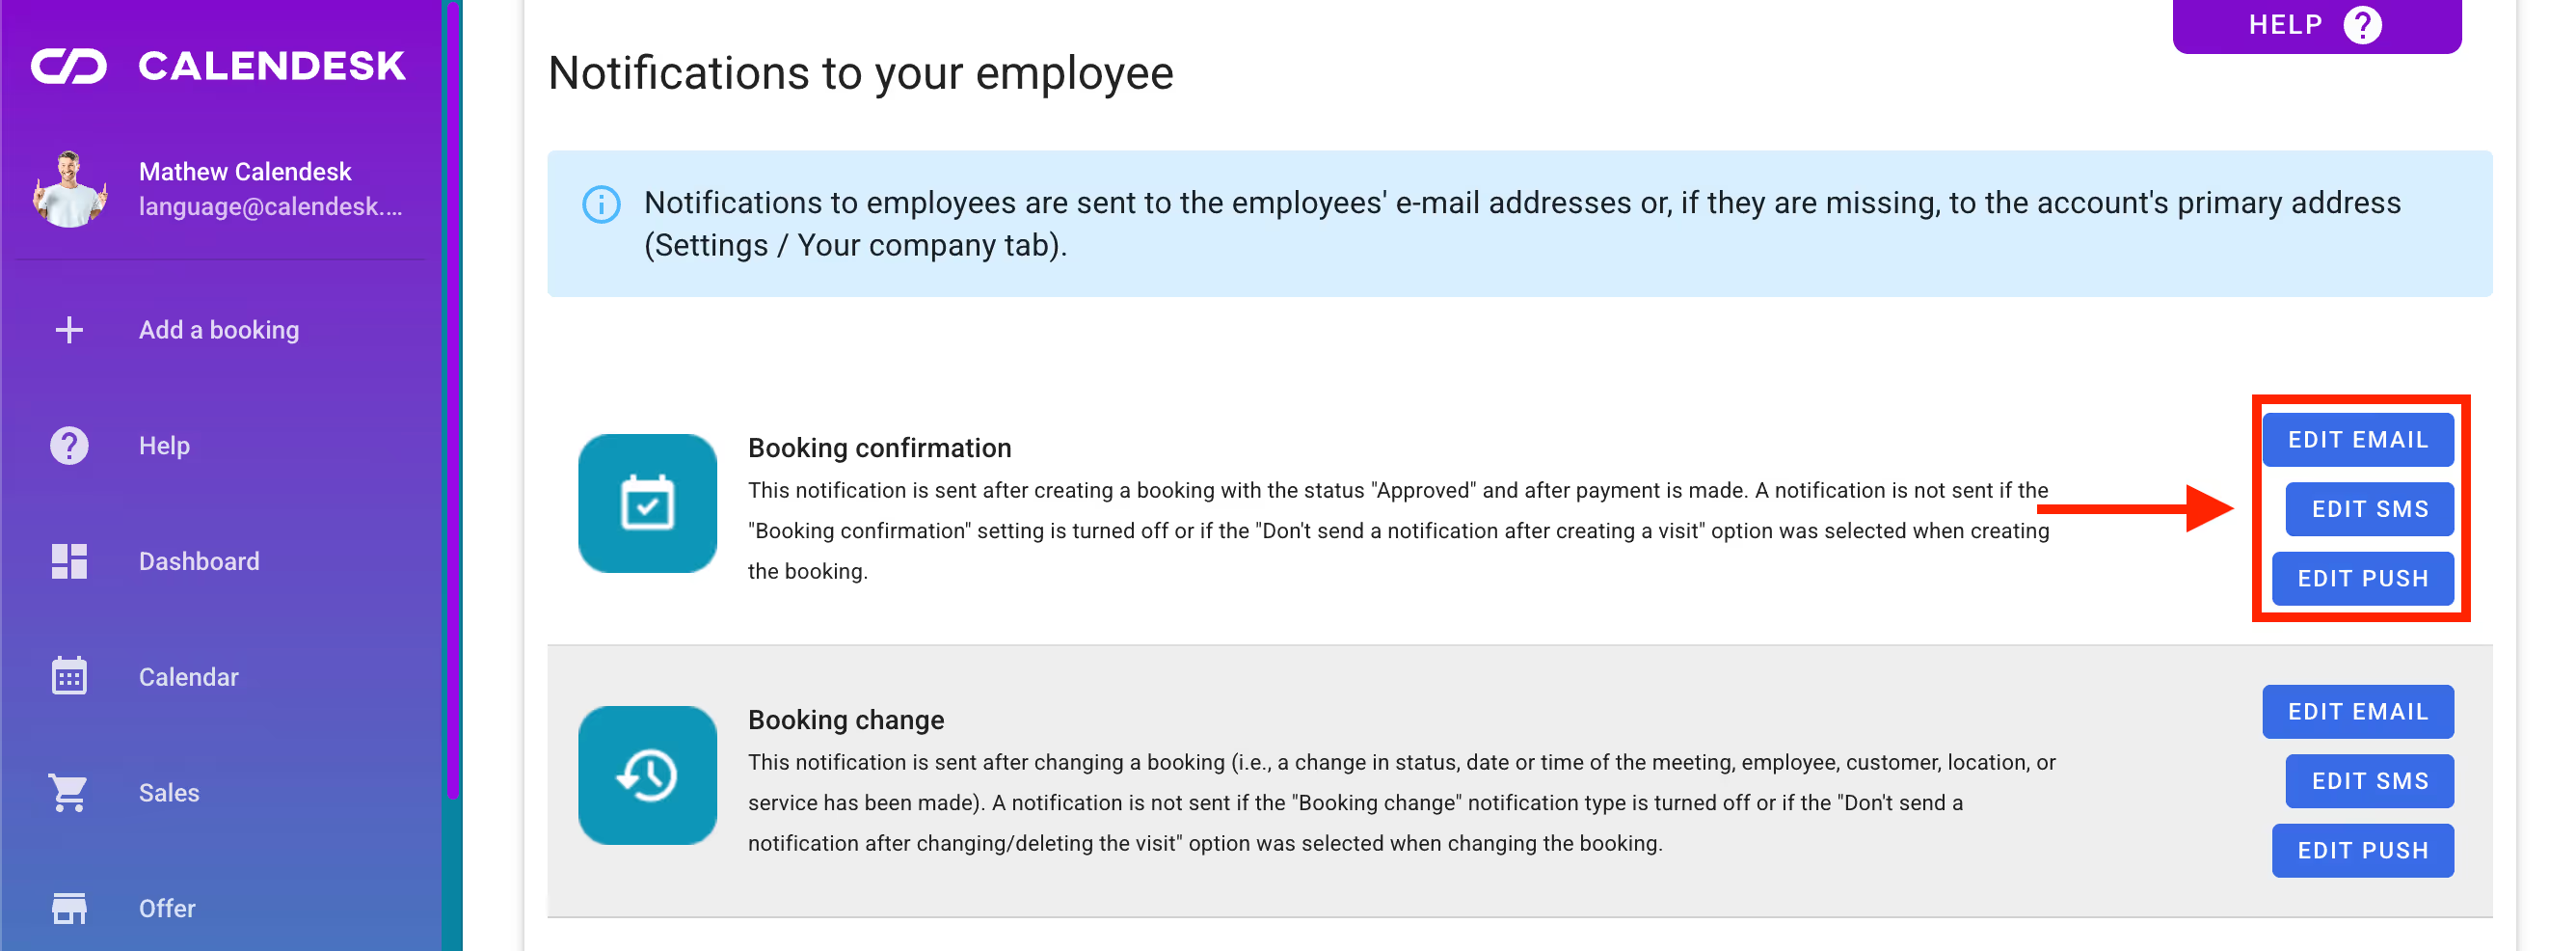
Employee Notifications
You can modify notifications to employees in exactly the same way as notifications to customers.
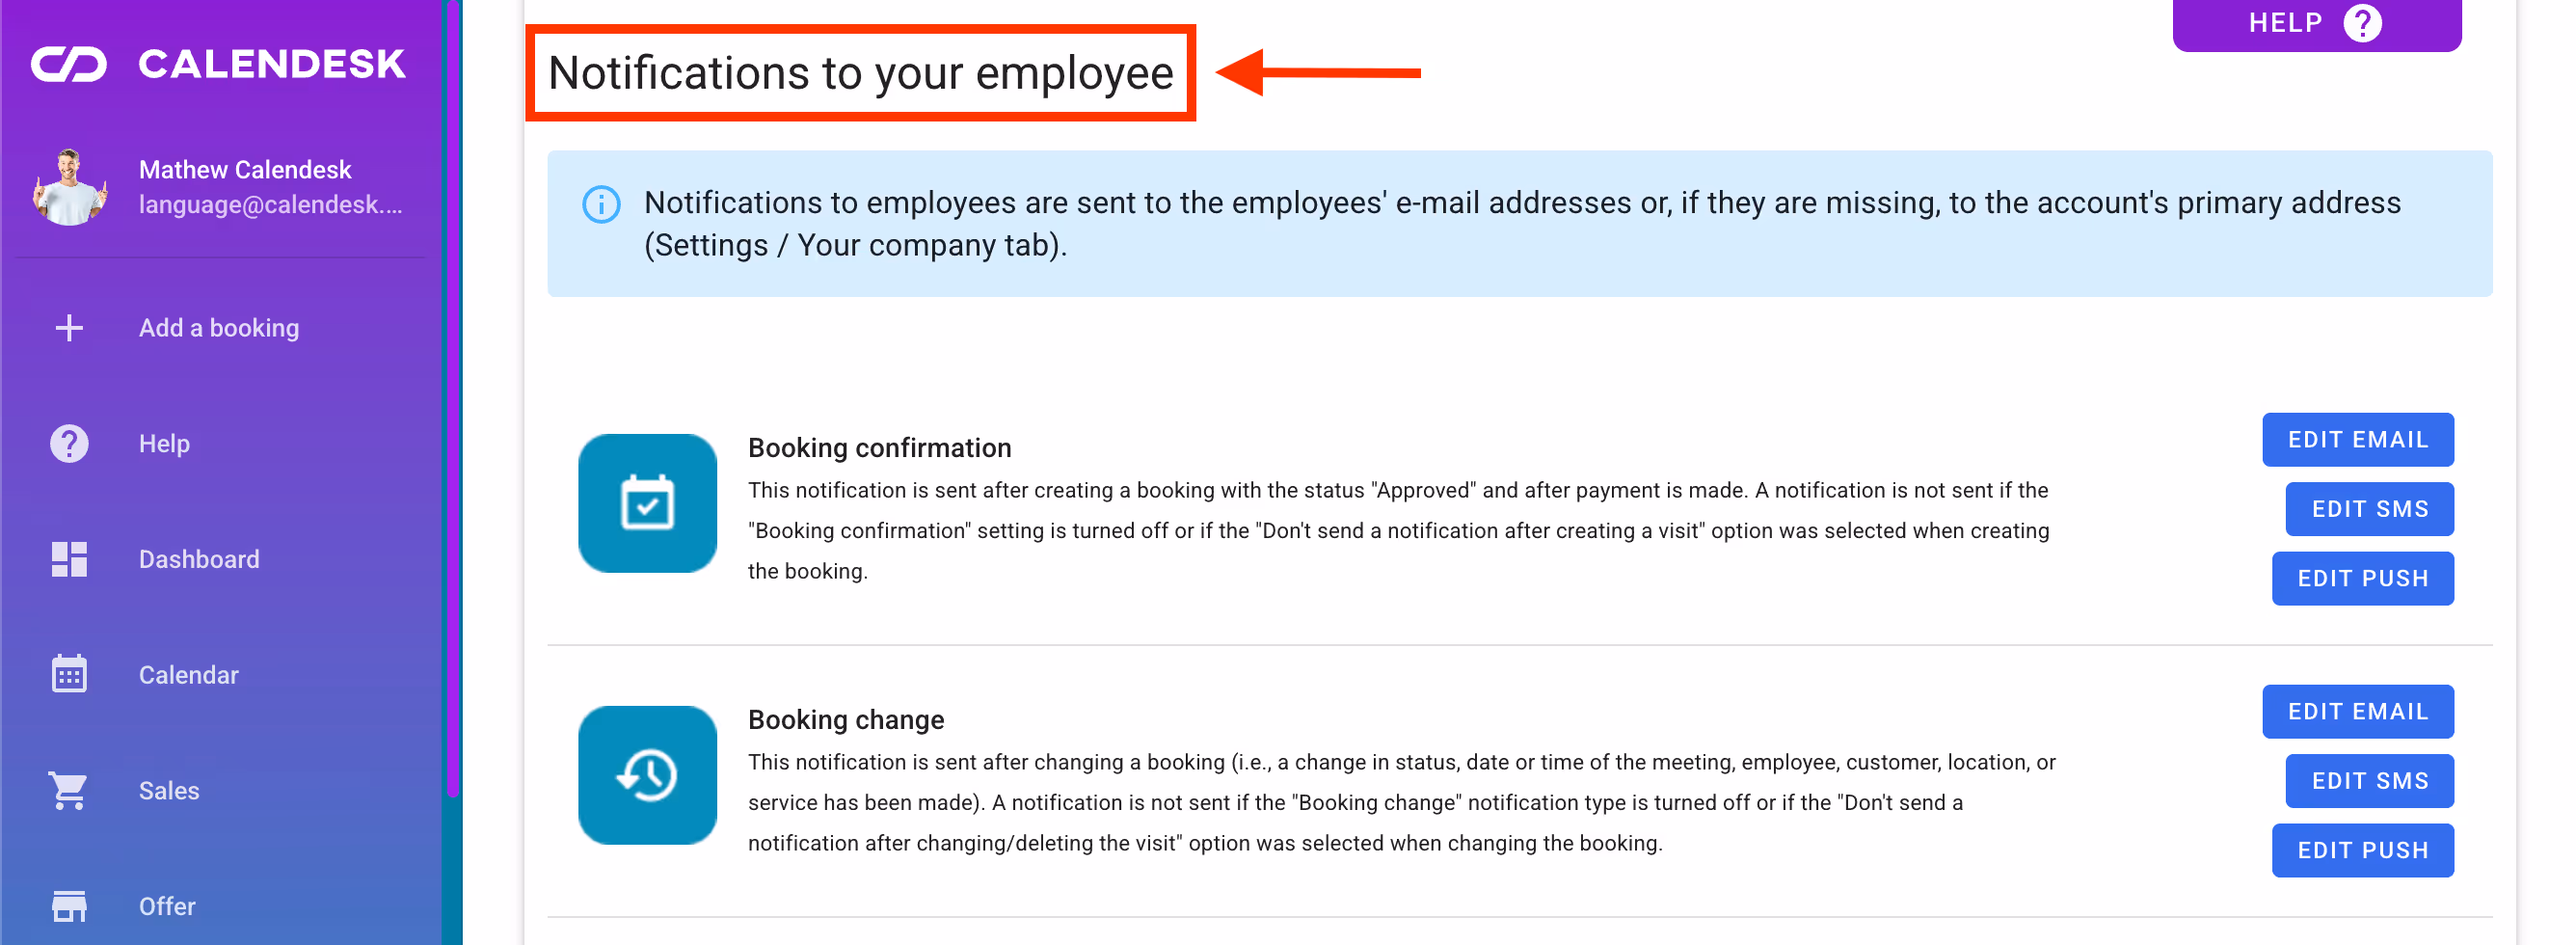
We distinguish the following notifications for employees:
Booking confirmation,
Booking change,
Booking cancellation,
Booking reminder,
Store - product purchase confirmation.
Editing Notification Content
Regardless of whether you are editing the content of an SMS, push, or email notification, you need to follow a series of steps to ensure the modification is successfully applied. The notification editing process is the same for both clients and employees.
The title size limits are indicated at the bottom right of the editing window. A helpful feature during the editing process is the character counter, which shows the estimated number of characters used in relation to the allowed limit. If you exceed the permitted number of characters, our application will not block you from adding more text. However, surpassing the recommended character limit may reduce the readability of your notification or increase the number of SMS messages used from your package.
Keep in mind that, due to factors beyond our control, excessively long SMS and push message content may be truncated when displayed on the recipient's device.
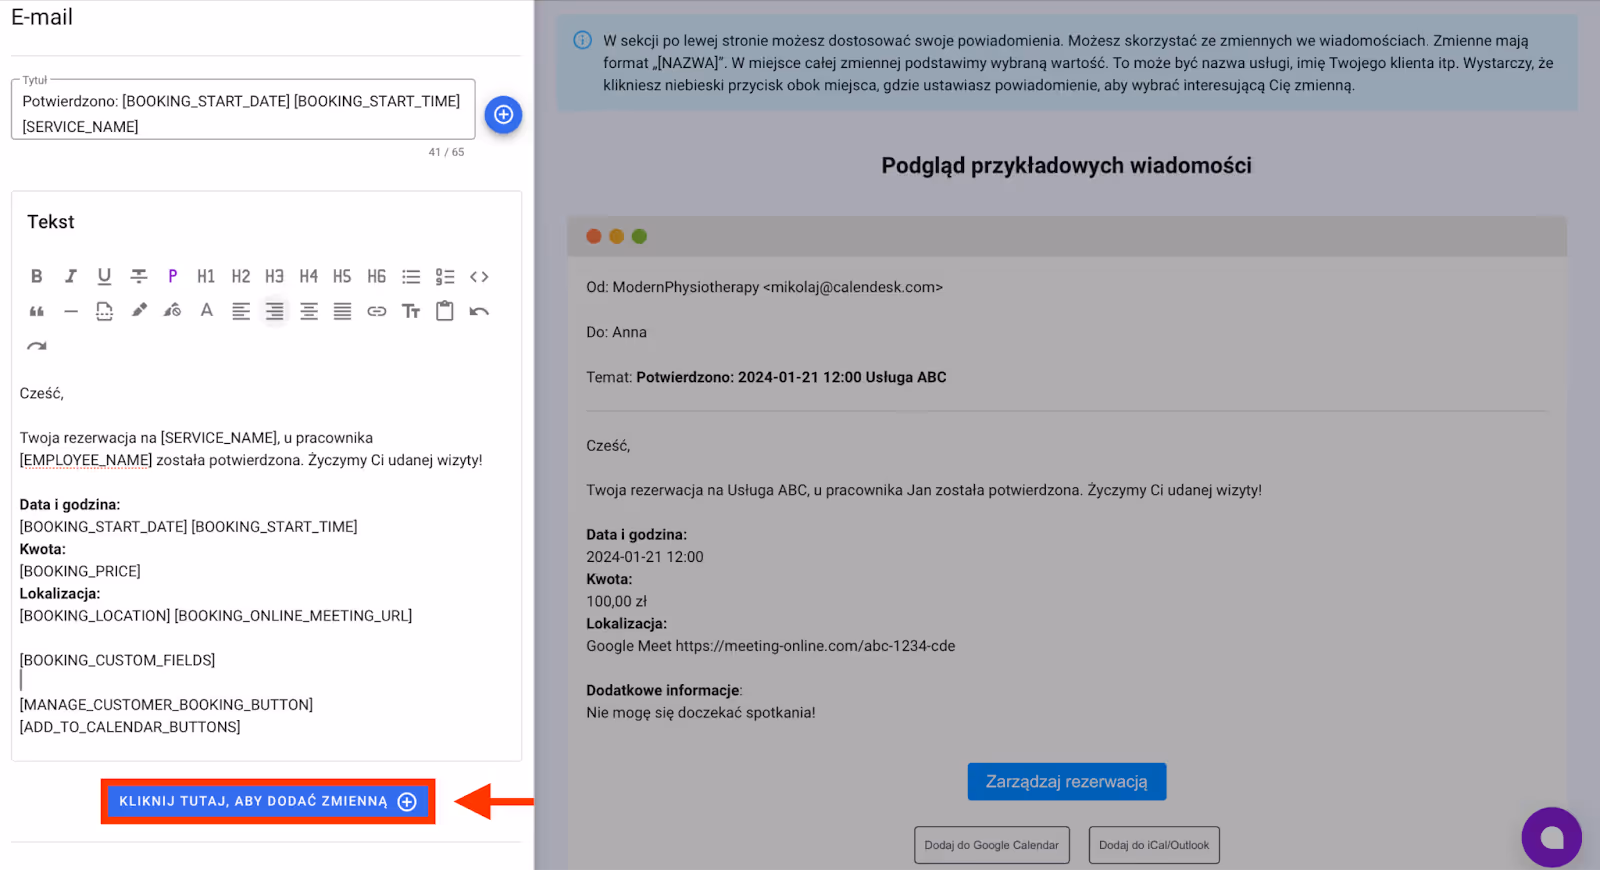
With the Click here to add a variable button, you can insert variables that make your message dynamically adapt to individual values. This means the notification will be personalized using the added variables, such as:
customer's ID,
customer's first and last name,
customer's email,
customer's phone number,
booking ID,
booking date,
booking time,
booking end date,
booking end time,
service name,
service price,
time zone,
time to complete payment,
online meeting links,
meeting location,
ID of the person creating the booking,
ID of the person modifying the booking,
booking form fields,
company name,
company phone number,
company address,
booking status,
employee’s first and last name.
and many more.
Individual Notification Section for Each Service
The default email notification content sent from the Calendesk system already includes the Additional information in the email after booking variable. This variable allows you to import extra text into the notification content from the service settings.
You can add additional service information by navigating to the Offer – Services tab and selecting the checkbox visible below.
and then entering an additional service description, which will be displayed in the content of the email notification.

Styling the General Notification Text
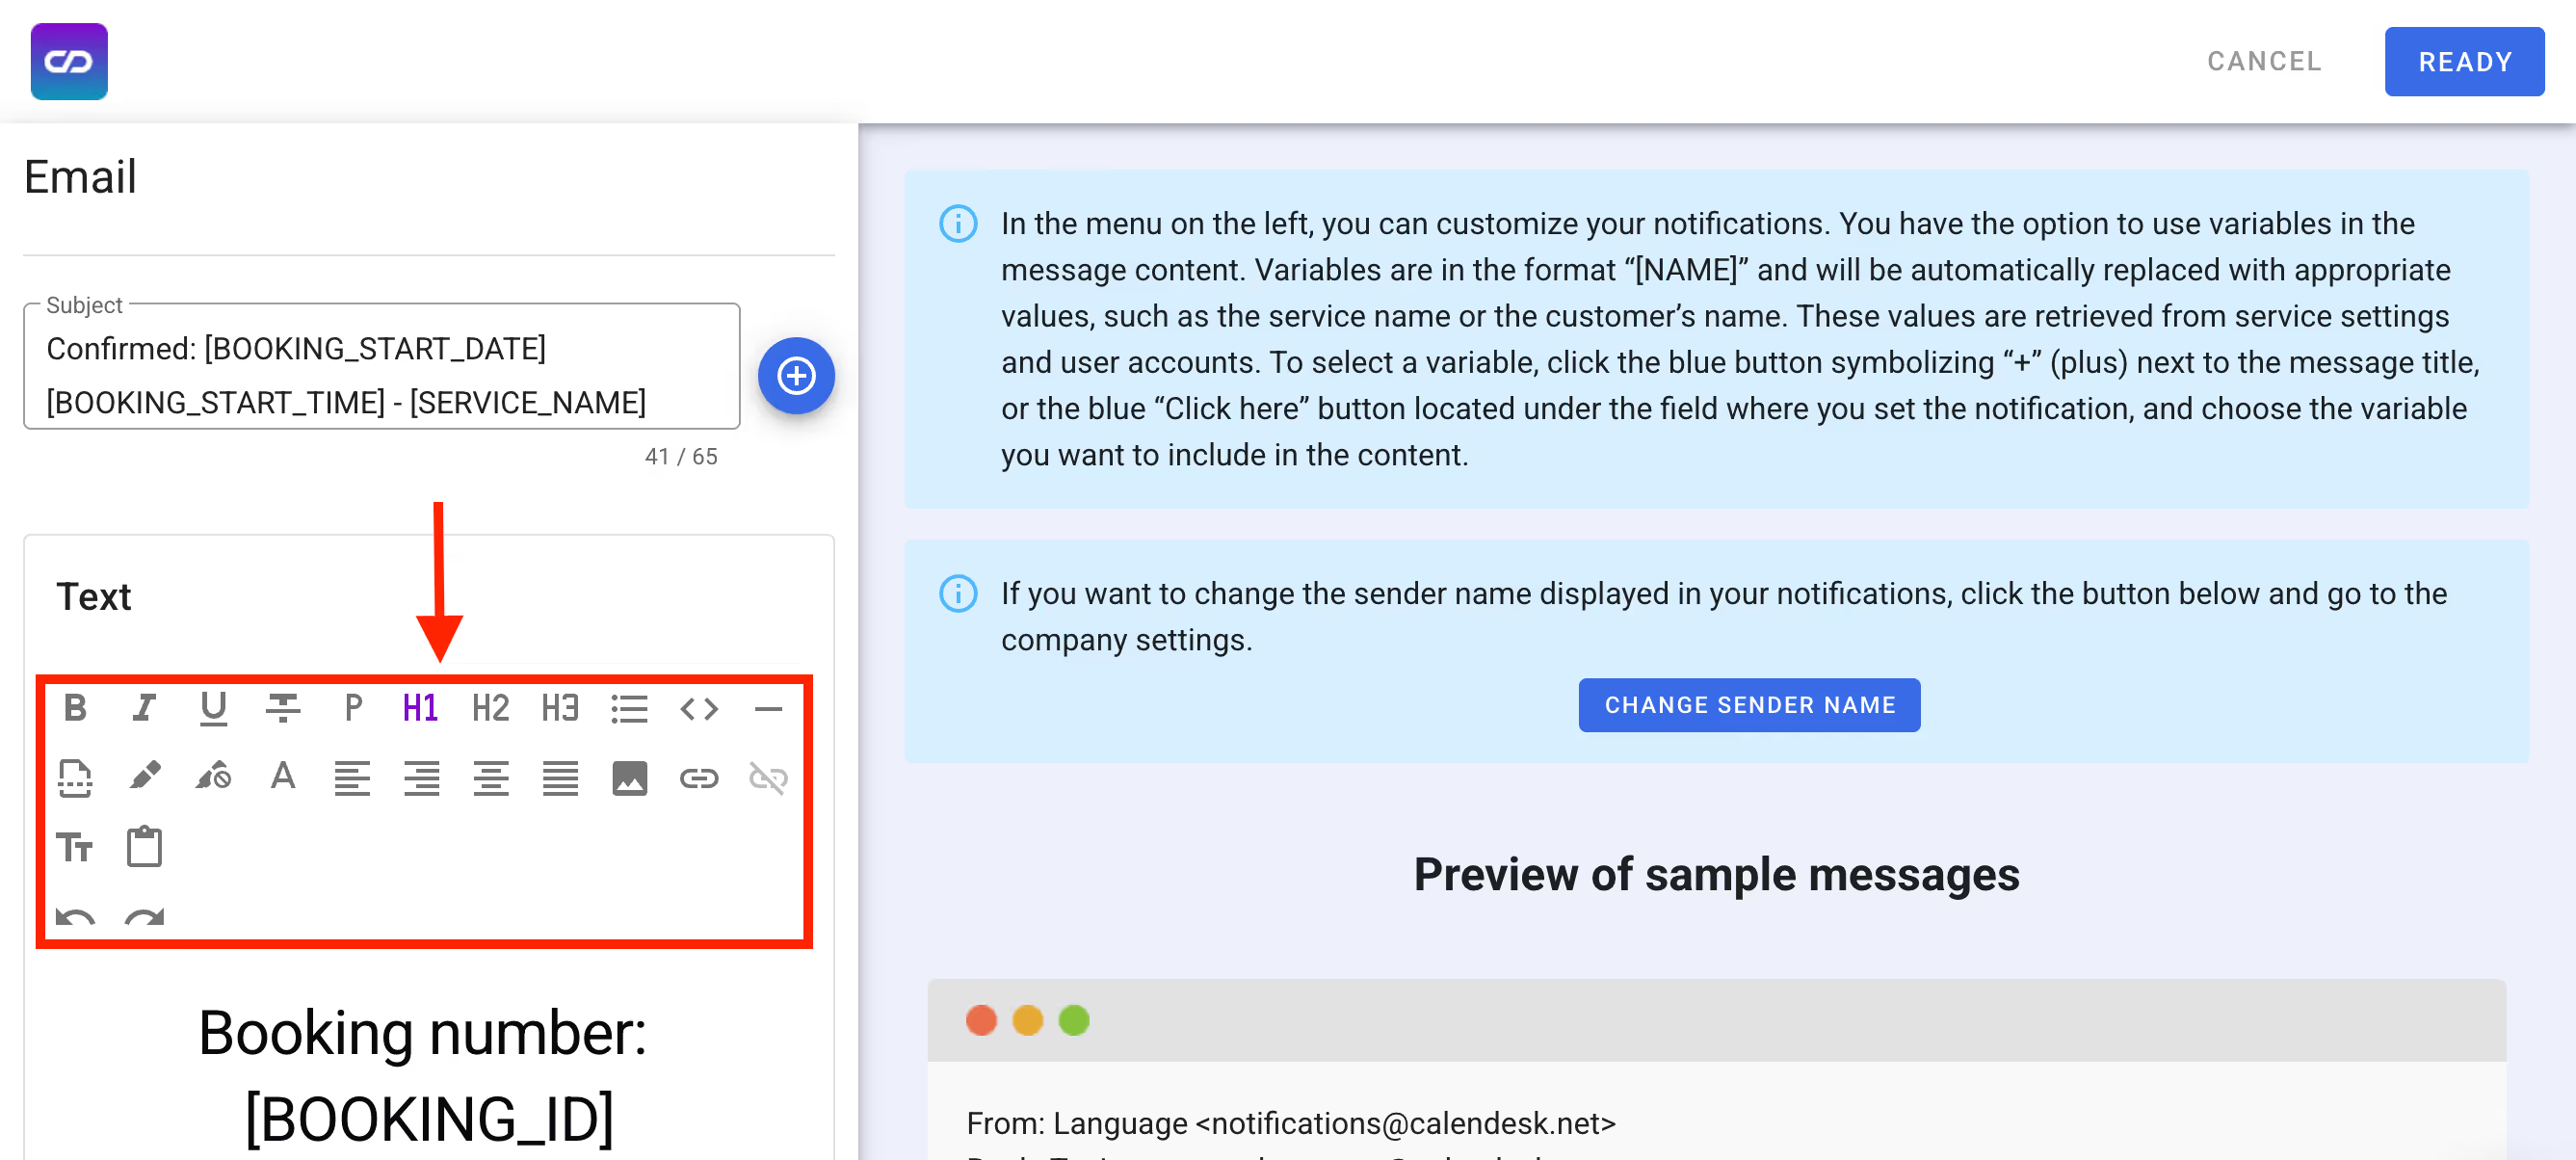
Of course, the number of variables is not limited, and you decide which ones appear in your notification. Additionally, we have introduced the option to edit the text style in email notifications. This means you can select a button from the list shown in the image below to give your text a distinctive style.
Preview of Notification Editing
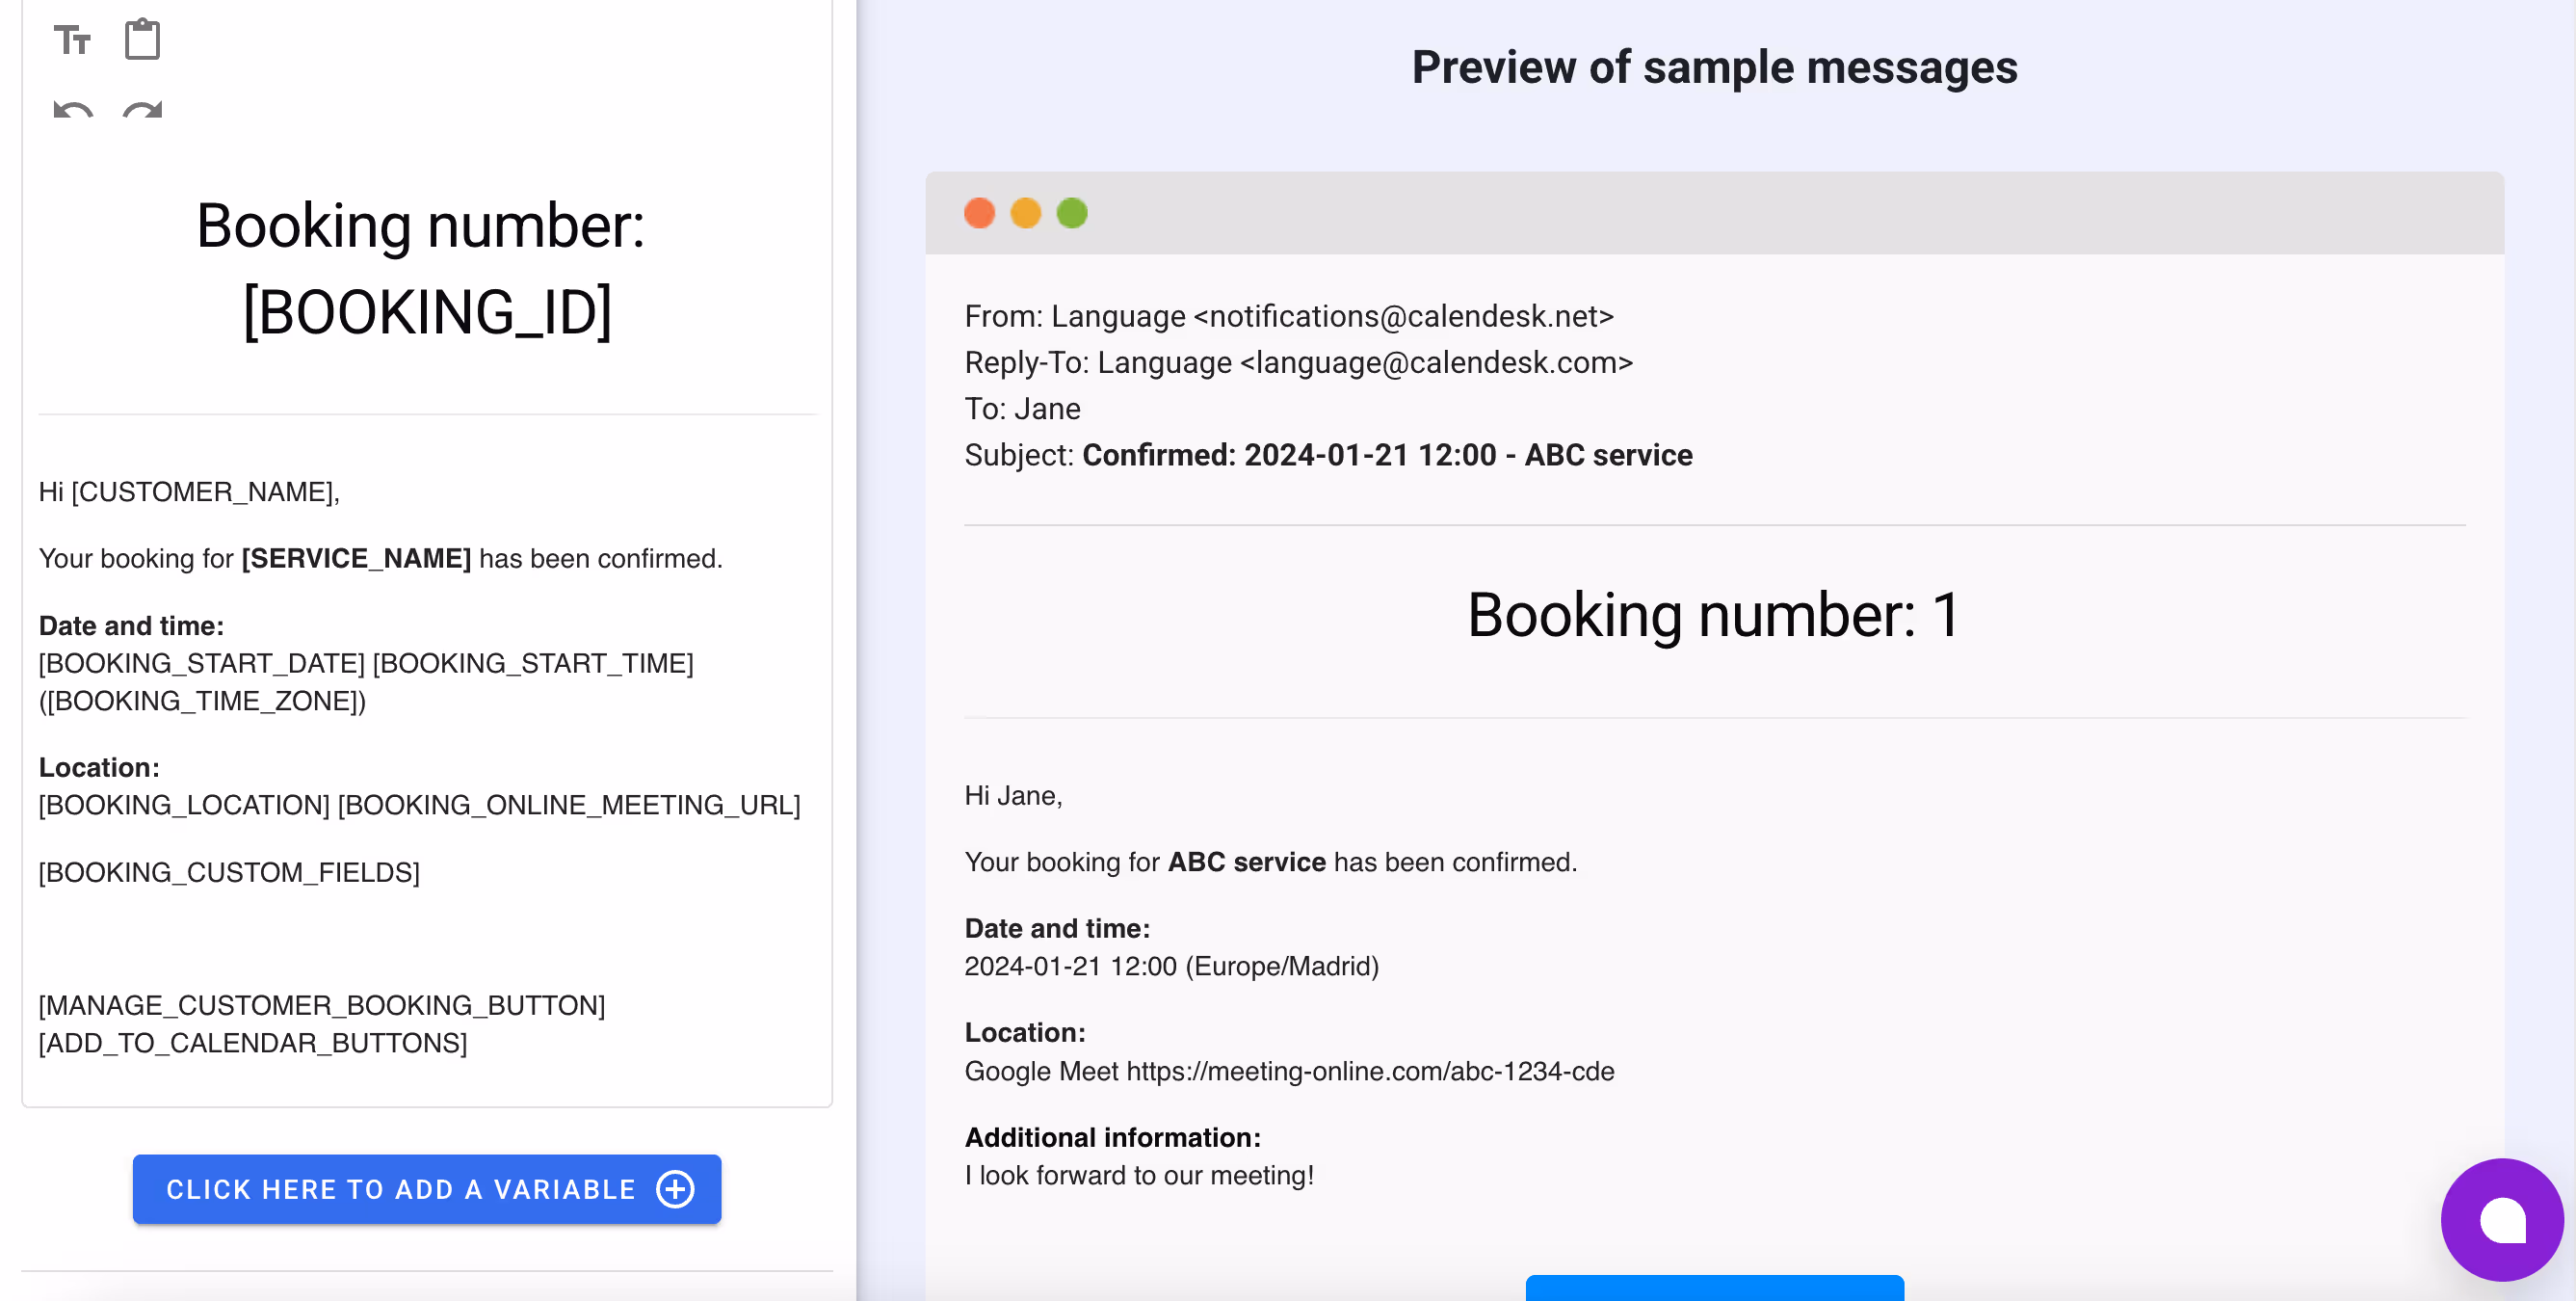
Thanks to the preview located on the right side of the content editor, you can quickly and easily see how your notification will look without needing to test it by sending trial notifications to your device—or worse, testing notifications on your customer! Here, you can view real-time changes to the style and content of your notification.
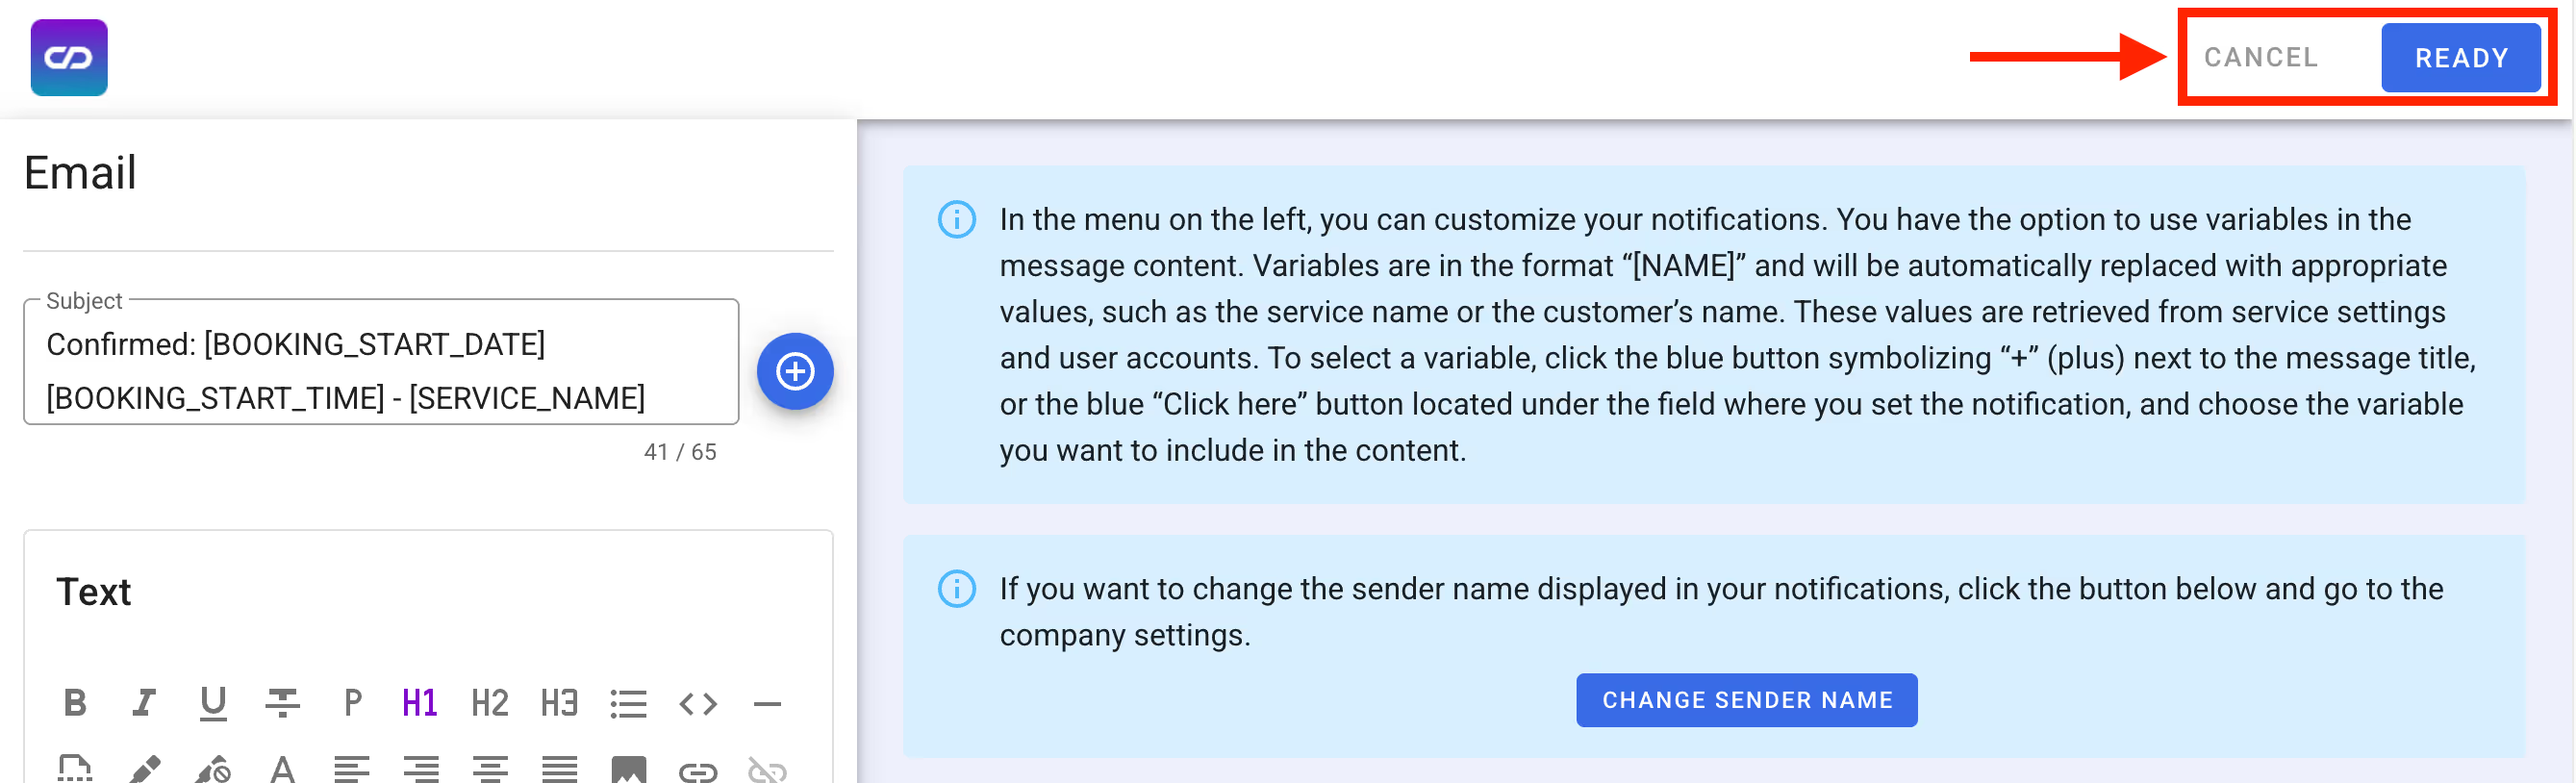
Confirming and Cancelling Edits
If you are ready to save all the changes made to your notifications, select the Ready button located at the top right of the editor window (see the image below).
If you do not want the changes to be saved, select the Cancel button at the top right of the editor window (see the image below).
Regardless of whether you choose Ready or Cancel, our application will ask you to confirm your decision before applying the selected action.
For more information about notifications, check out the article Advanced Notification Editing.
Here, you will find an attachment regarding the usage of available SMS notification balance when sending messages to international numbers.